How to Fix a Frozen Drop Feed Mechanism on Mid-Century Sewing Machines
Vintage sewing machines are known for their precision engineering, but decades of grime and dried oil can seize the moving parts. One common trouble spot is the drop feed mechanism, which lowers the feed dogs for free-motion quilting, embroidery, and darning.
This guide uses a Kenmore 148.15600 as its primary example. Similar drop feed mechanisms show up on a number of vintage machines, but the parts and adjustment steps vary by make and model. Check your own machine before you copy any step.
Depending on your machine, you will typically run into one of three symptoms:
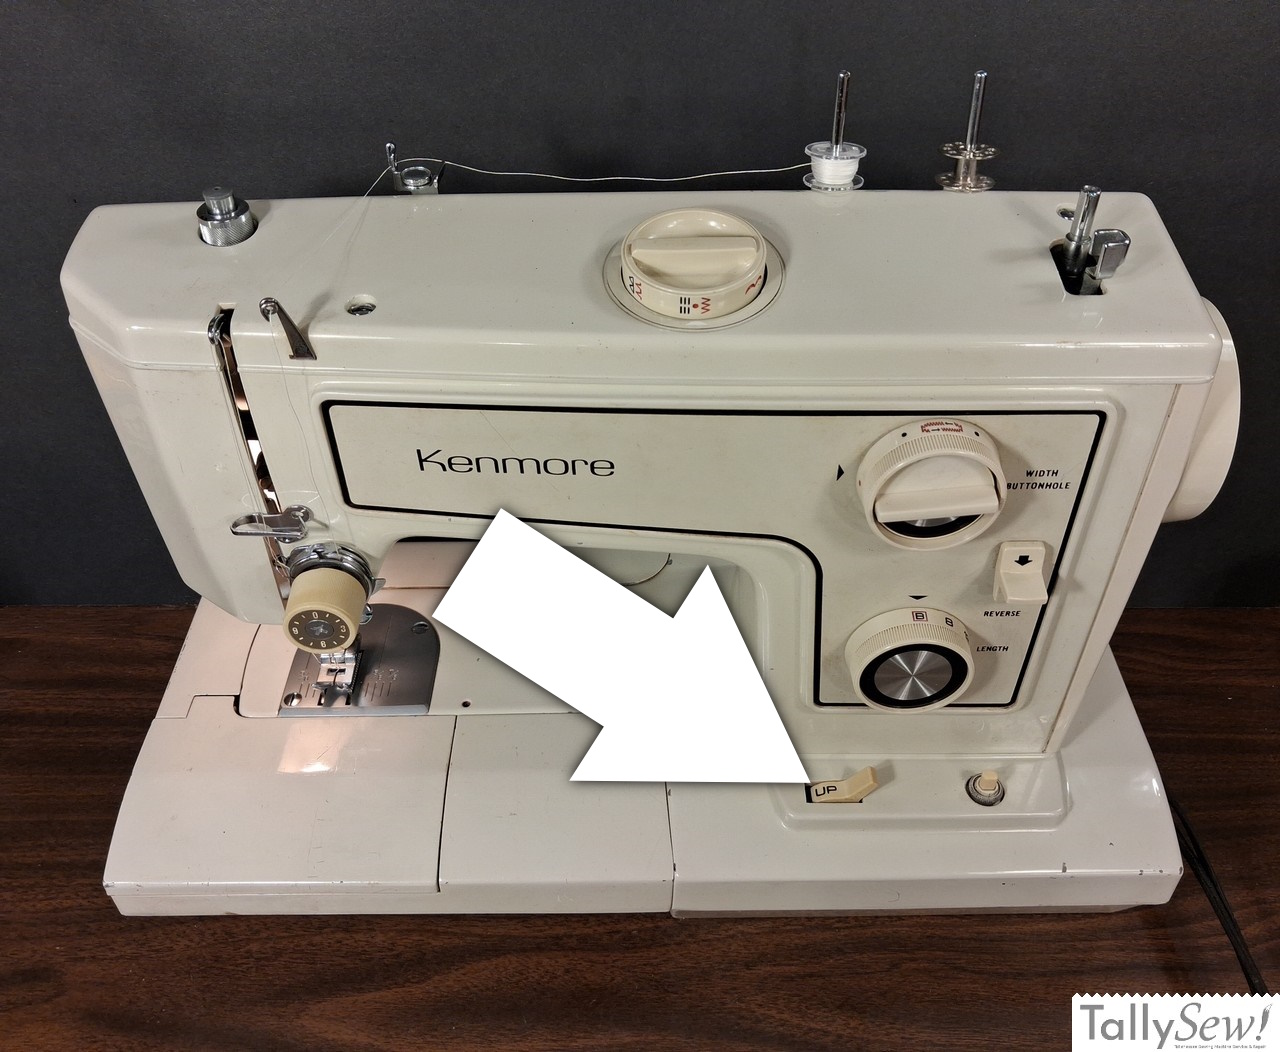
- The feed dog drop switch or knob is stuck in the “UP” position. Don’t make the mistake of forcing it.
- The switch or knob moves freely into the “DOWN” setting but the feed dogs stay raised.
- Alignment Slippage: If the connector tube or rock shaft fork clamping screws loosen, the rock shaft can slip, preventing the parts from moving in unison, or cause the feed dogs to sit too high or too low when in the standard “UP” position.
Side note: If you haven’t already, make sure to remove the needle plate and clean out any packed lint around the feed dogs first. If the feed dogs are clear of lint but the mechanism still won’t shift or move, the issue lies in the dried oil jamming the underside linkages.
Note on Root Causes: Symptoms 1 and 2 stem from dried oil jamming components in the same general area, while Symptom 3 is an alignment and adjustment issue. Keep in mind that rust or corrosion can cause similar symptoms, but the cleaners we are using in this article won’t free rusted components. Because addressing rust requires a more thorough teardown of this assembly, this guide will focus strictly on resolving hardened oil and varnish.
This guide covers how the mechanism works and the step-by-step process to restore full movement.
Major Parts of the Drop Feed Mechanism
These are the part names used in the rest of this article:
- Feed dog drop switch or knob: The control on the machine bed.
- Rock shaft: Receives its motion from the lift cam on the main hook shaft through the rock shaft fork.
- Rock shaft fork: Clamped to the rock shaft. It is not the same part as the feed dog lift fork.
- Drop feed connector tube: The main section of the assembly. It is clamped to the rock shaft.
- Drop feed connector ring: The short section next to the tube on the left side. The rock shaft runs through its base, but it is not clamped to the rock shaft and pivots freely on it.
- Locking pin: Sits inside the connector tube and couples the connector tube to the connector ring.
- Feed dog lift fork: Connects the ring to the feed dogs.
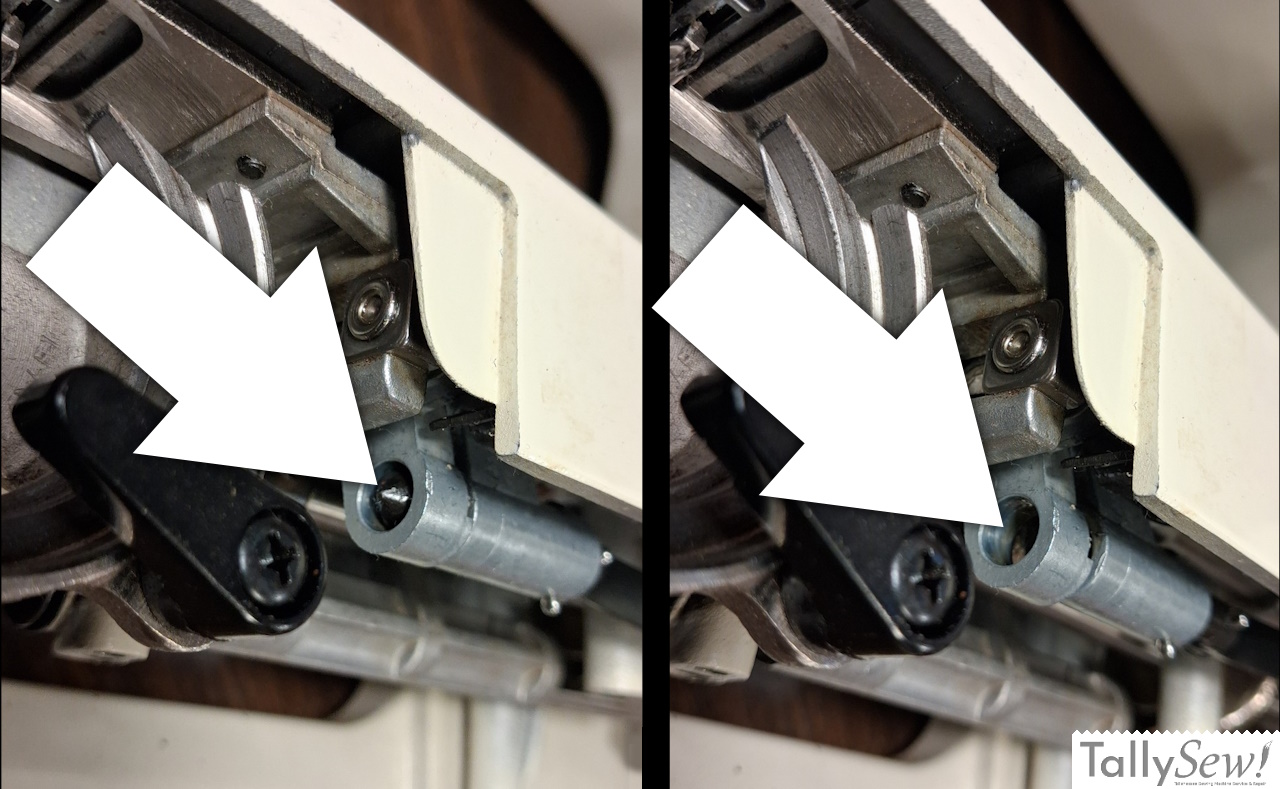
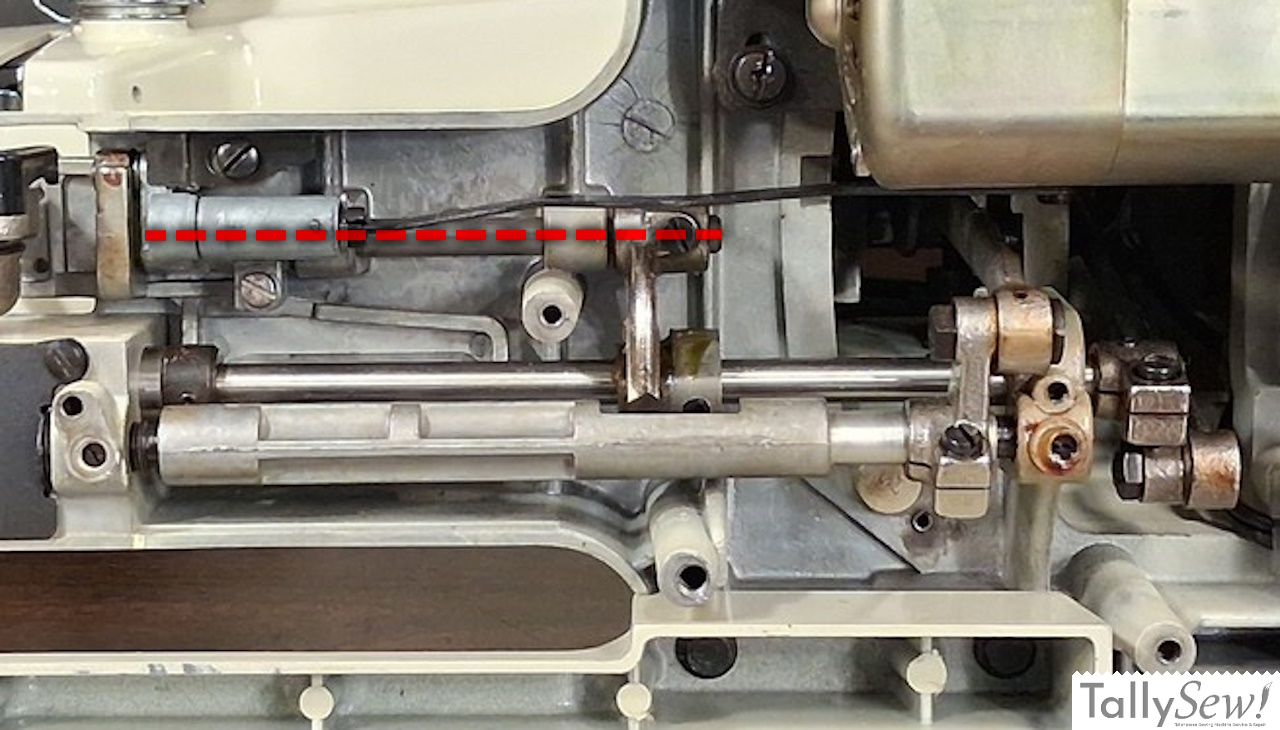
- On the left, the locking pin is engaged to keep the feed dogs in the standard sewing position. On the right, the pin is disengaged, which drops the feed dogs for free-motion quilting, embroidery, and darning.
- The red dotted line marks the path of the rock shaft. The rock shaft passes through both the connector tube clamp and the base of the connector ring.
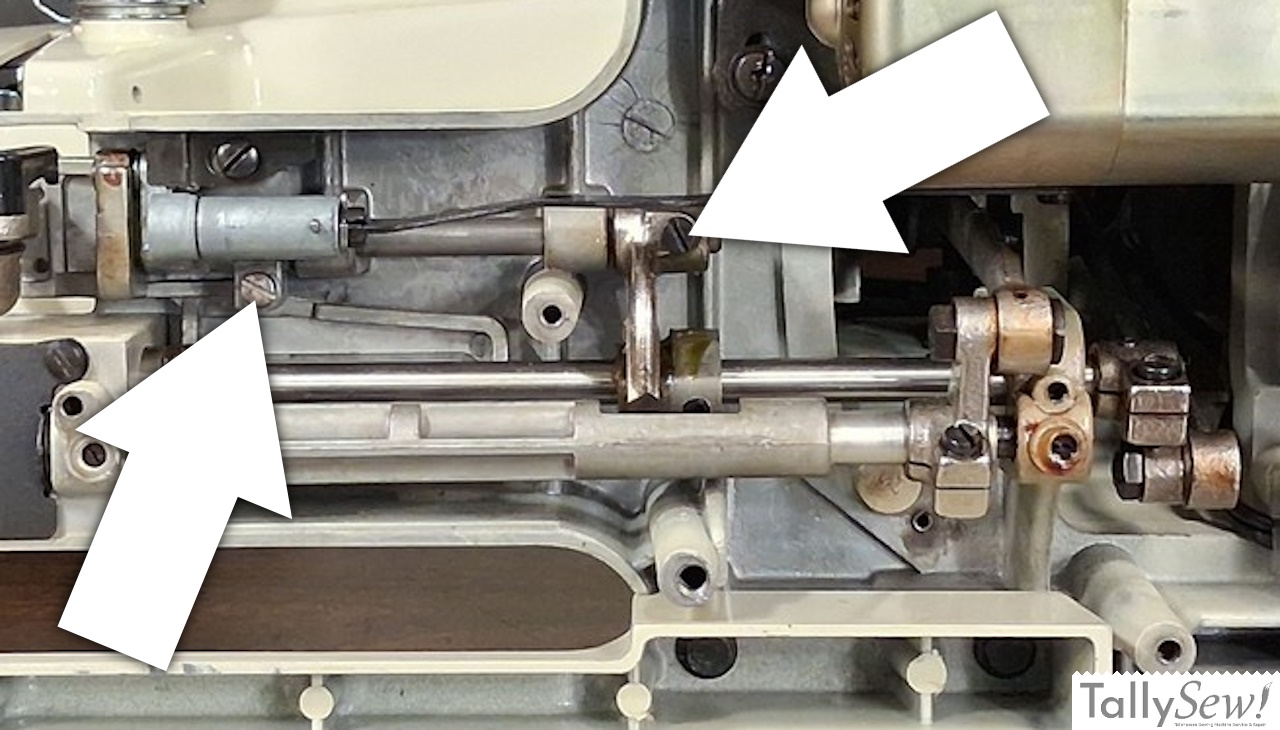
- The left arrow marks the connector tube clamping screw. The right arrow marks the rock shaft fork clamping screw. These screws lock the tube and the fork to the rock shaft so they move together.
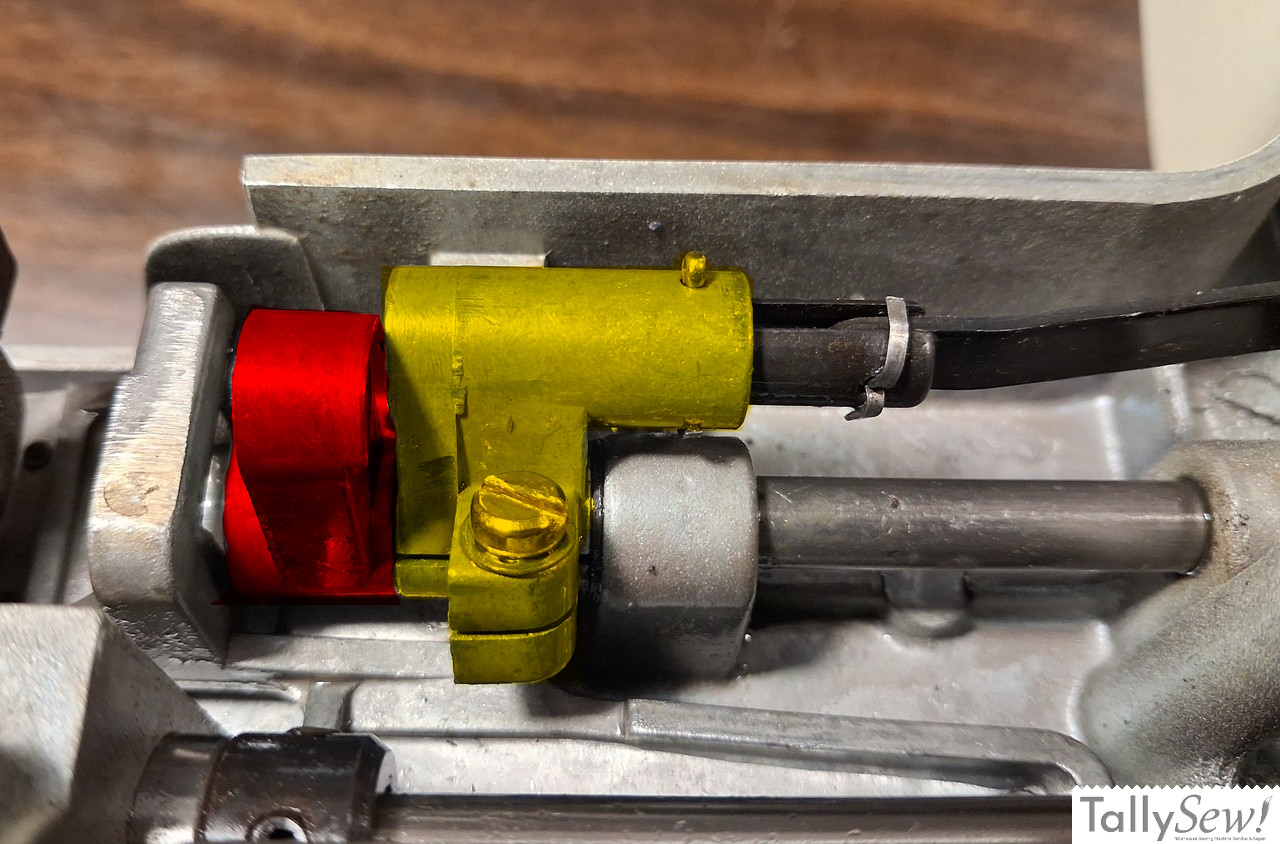
- The connector ring is marked in red and the main connector tube in yellow. The rock shaft runs through both parts, but it is clamped only to the tube. The ring is not clamped, so it can pivot freely on the shaft.
How the Drop Feed Mechanism Works
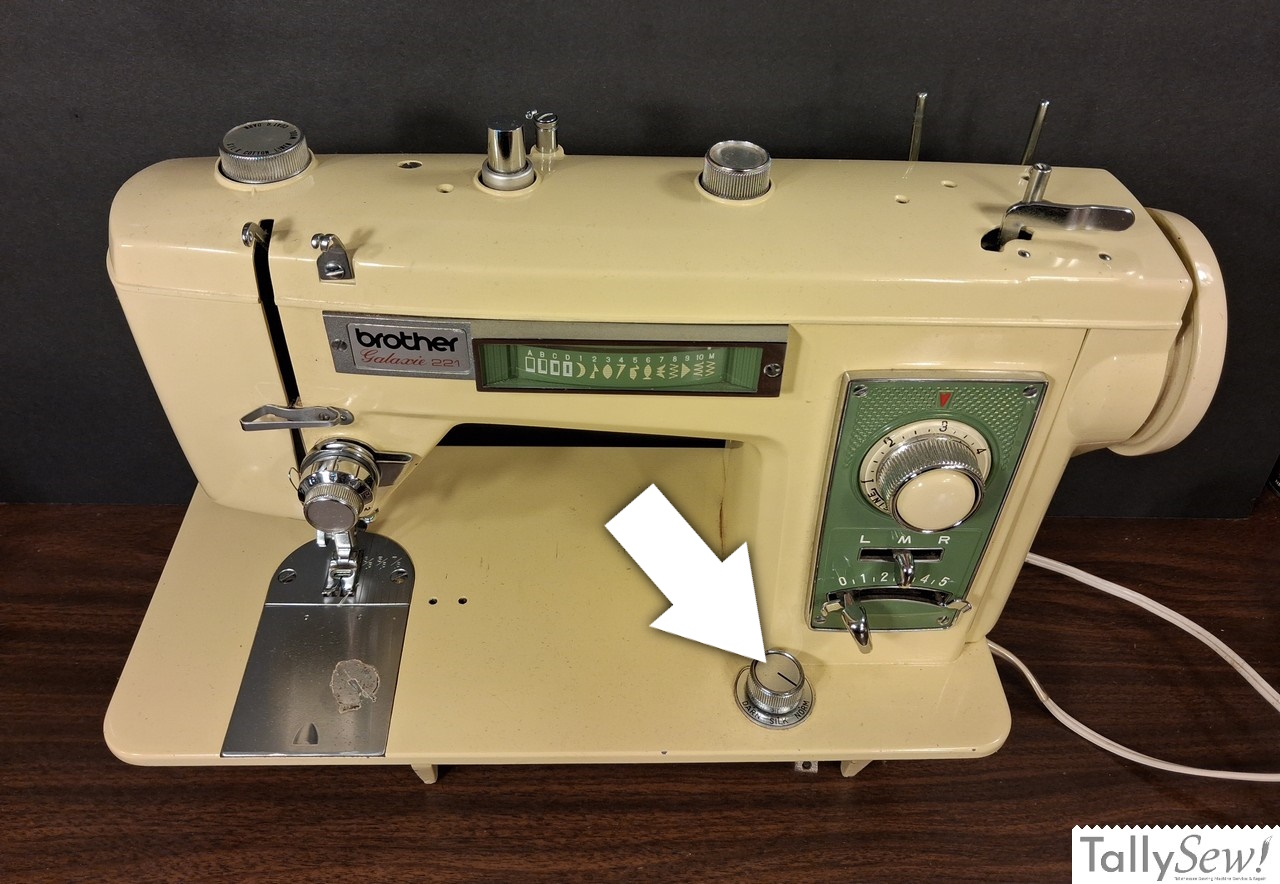
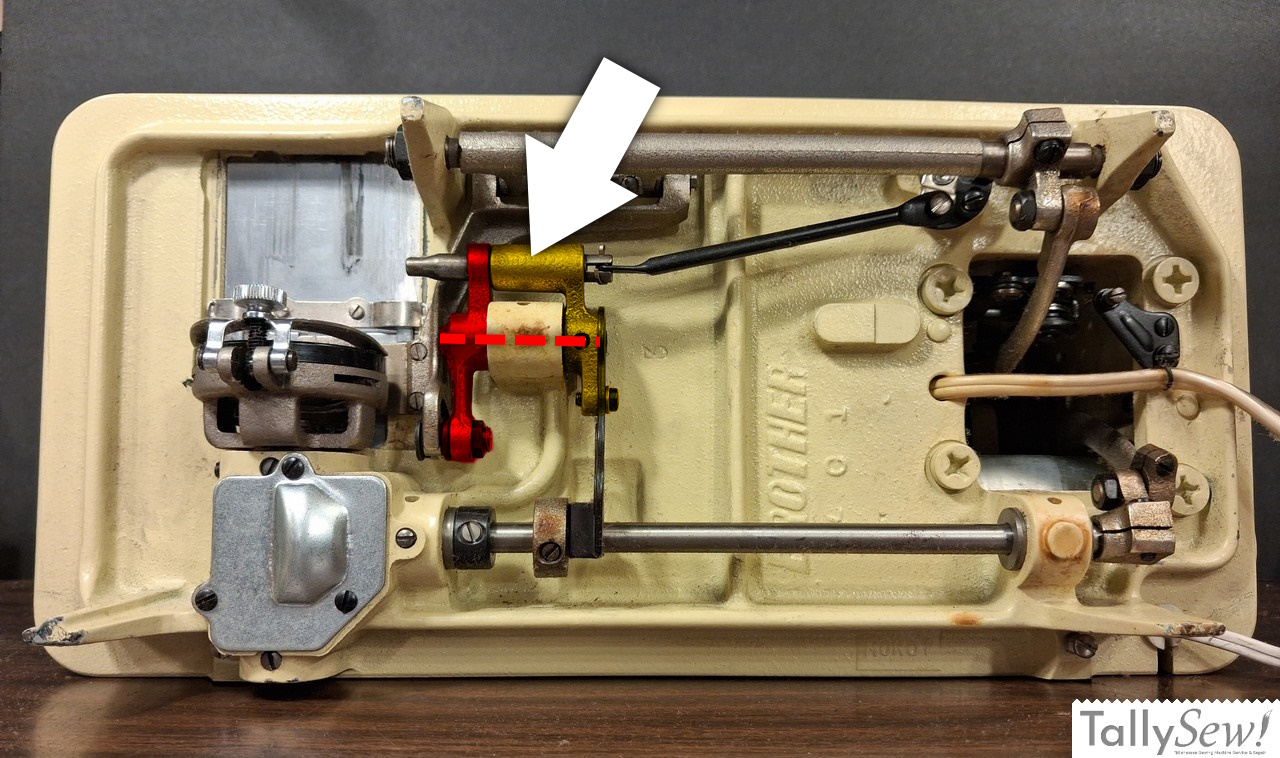
The Brother Galaxie 221 in these photos uses a knob instead of a switch and its mechanism is a less complicated design compared to the version found in the Kenmore.
Understanding what happens underneath the machine makes troubleshooting much easier:
- The setup: The rock shaft rocks back and forth, driven by the rock shaft fork riding the lift cam on the main hook shaft. The main connector tube is clamped directly to the rock shaft, causing it to swing in unison.
- “UP” setting: The locking pin engages and locks the tube and ring together. The shaft moves the ring, the ring moves the feed dog lift fork, and the feed dogs rise and fall as you sew.
- “DOWN” setting: The locking pin retracts. The ring is now uncoupled from the tube. It is still attached to the feed dogs through the lift fork, but it can swing on the shaft without being driven by it. The feed dogs stay below the needle plate.
When old oil turns to sticky varnish, it either locks the pin inside the tube and ring, or glues the connector ring base to the rock shaft so it cannot move on its own.
Tools and Supplies Needed
- Sewing machine oil: For flushing and lubricating after cleaning. Use a quality oil made for sewing machines.
- GOJO or GOOP non-pumice hand cleaner: The main cleaner for the pin and the ring. It is thick enough to stay where you brush it, and it turns liquid as it breaks down old oil or when it is warmed. Use the non-pumice kind only. It leaves an oily residue, which you flush out with sewing machine oil. It can damage shellac finishes and vintage decals, so keep it off them.
– Do not use the “Natural Orange” or any citrus version of GOJO or GOOP - Kerosene (optional): For heavy varnish that the hand cleaner will not cut. Use it sparingly and follow the safety warnings.
- Hair dryer: Gentle heat softens hardened oil and thins the cleaner. Use it only as described in the safety warnings.
- Screw Drivers: 1/4 inch slotted driver and Phillips “P2” driver.
- Small lint brush: For removing loosened residue and lint.
- Small paint brush, 1/4 inch: Puts the cleaner where you want it without getting it everywhere.
- Small dish: Holds a little cleaner or kerosene so you can dip your brush without contaminating the container.
- Cotton swabs or an old toothbrush: For cleaning residue out of the joints.
- Clean rags or paper towels: For wiping off dirty cleaner, excess oil, and kerosene.
- Paint marker or nail polish: For marking clamp positions before you loosen anything.
- Metric ruler: For checking feed dog height in Step 5.
- Cellphone camera: Take lots of photos as you go so you know the original positions. It is cheap insurance.
- Patience: Lots of patience.
Safety Warnings
- Unplug the machine and remove the needle before you start work underneath. Keep it unplugged until Step 4.
- GOJO or GOOP can damage shellac finishes and vintage decals. Apply it with a brush in small amounts, and keep it off the finish, decals, plastic parts, wiring, and belts.
- Kerosene, if you use it, gives off flammable vapor. Its flash point is about 100°F or higher depending on the grade. A hair dryer can ignite solvent vapor. Never use the hair dryer while the joint is wet with kerosene or if you can smell the kerosene. Wipe the excess off and let it dry first.
- GOJO and GOOP have a much higher flash point, but both still contain petroleum distillates. Use heat in short passes on the metal parts, keep the dryer on a low or medium setting a few inches away, and keep it moving. Warm is enough. If you cannot comfortably rest a finger on the part for a few seconds, it is too hot.
- If the machine has plastic gears or linkages near the drop feed assembly, aim the heat only at the metal joints and shafts so the plastic does not warp.
- Work in a well ventilated area, keep solvents away from sparks and open flame, and do not leave used rags in a pile. Spread them out to dry outdoors or put them in a metal container with a lid.
- If you tip the machine back, support it fully. Do not rely on the cabinet hinge or lift mechanism alone.
Step-by-Step Restoration Guide
Step 1: Prep, Expose the Underside, and Inspect the Clamp Screws
- Unplug the machine and remove the needle and presser foot.
- Remove the bottom cover plate, or tip the machine back out of its cabinet to expose the underside.
- Clean out loose lint around the linkages.
- Look at the connector tube clamping screw and the rock shaft fork clamping screw. Photograph them, and mark the position of each clamp on the rock shaft with a paint marker.
- Check for slippage. Try to twist the tube and the fork by hand. If either one turns on the shaft, a screw has loosened and the part may have moved. If the Rock shaft fork is loose, go ahead and tighten it down, if the tube is loose you can leave it and we will adjust it in section 5.
- If nothing moves and the marks line up, make sure both screws are snug. Recheck them as you go, since they can loosen when the parts heat up.
Step 2: Unfreeze the Locking Pin
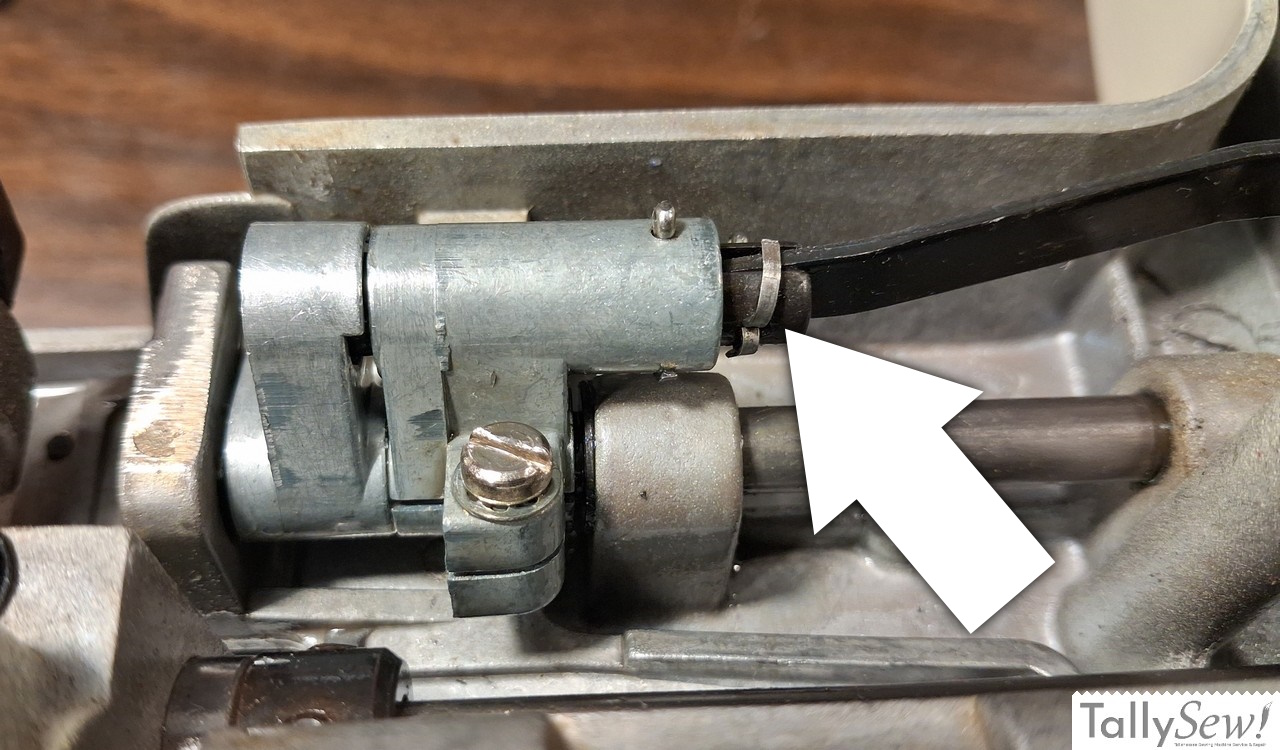
If the drop switch is completely stuck or the pin will not withdraw, start here.
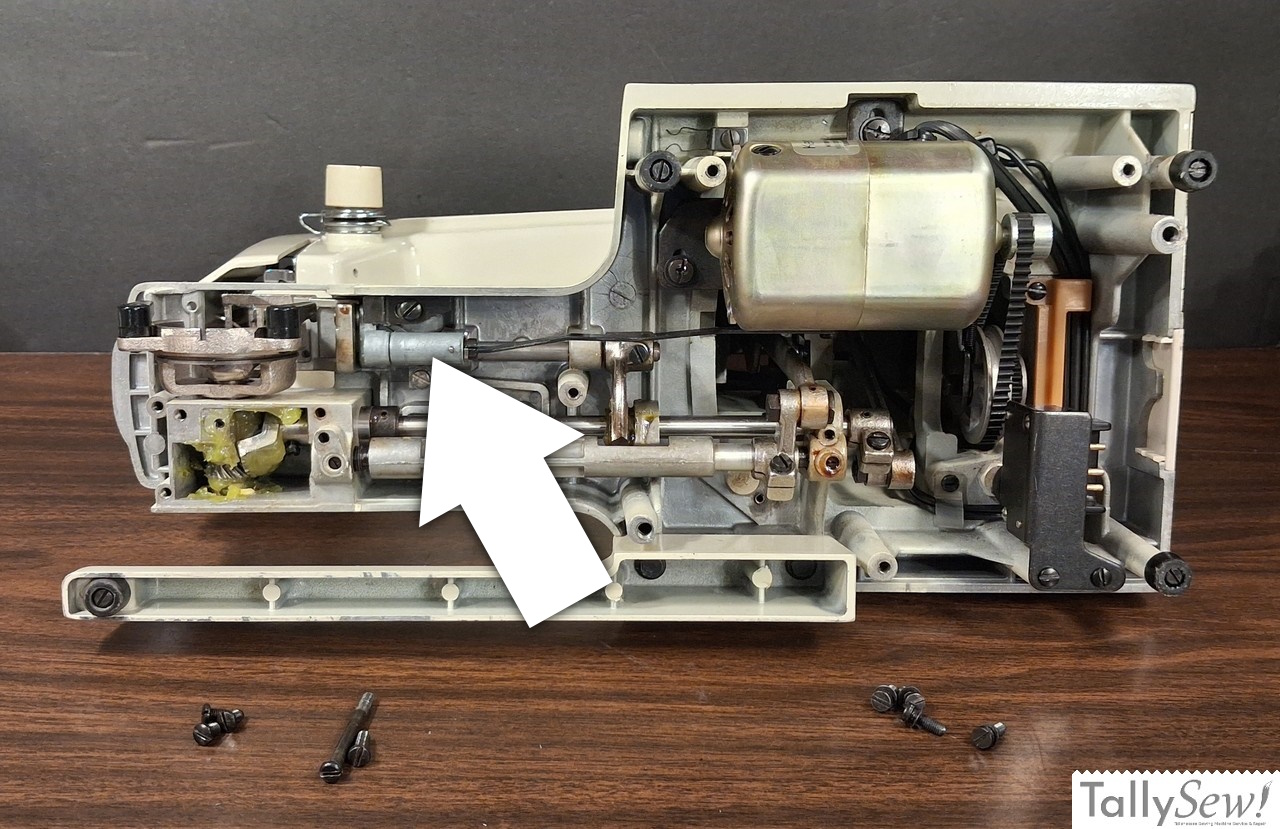
- Find the connector tube and ring assembly underneath the machine. The tube is hollow and holds the locking pin. See the photo above and at the top of the article.
- With a small paint brush, work a little GOJO or GOOP non-pumice cleaner into each end of the tube and into the joint where the tube and ring meet. A small amount is enough. The cleaner is thick, so it stays where you put it.
- Give it time to work. As it breaks down the old oil, the cleaner turns liquid and moves further into the joint. Gentle heat from the hair dryer speeds this up.
- Try the drop switch gently. Do not force it.
- If it does not budge, repeat the process: more cleaner, more gentle heat, then another gentle try. Keep going until the pin retracts and moves smoothly between UP and DOWN.
- Once it moves freely, cycle the switch several times to work the cleaner through the joint. Wipe away the dirty cleaner that works out.
- Add a few drops of sewing machine oil, cycle the switch, and wipe off the oil that runs out. Repeat two or three times to flush out the cleaning solution.
- If the pin will not move after several rounds, the varnish may be too heavy for the hand cleaner. Switch to kerosene. Apply a few drops to each end of the assembly and to the joint where the sections meet, let it soak, then wipe off the excess and let it dry. Only then use the hair dryer on the dry metal. Flush with sewing machine oil when the pin moves.
Step 3: Unfreeze the Drop Feed Connector Ring
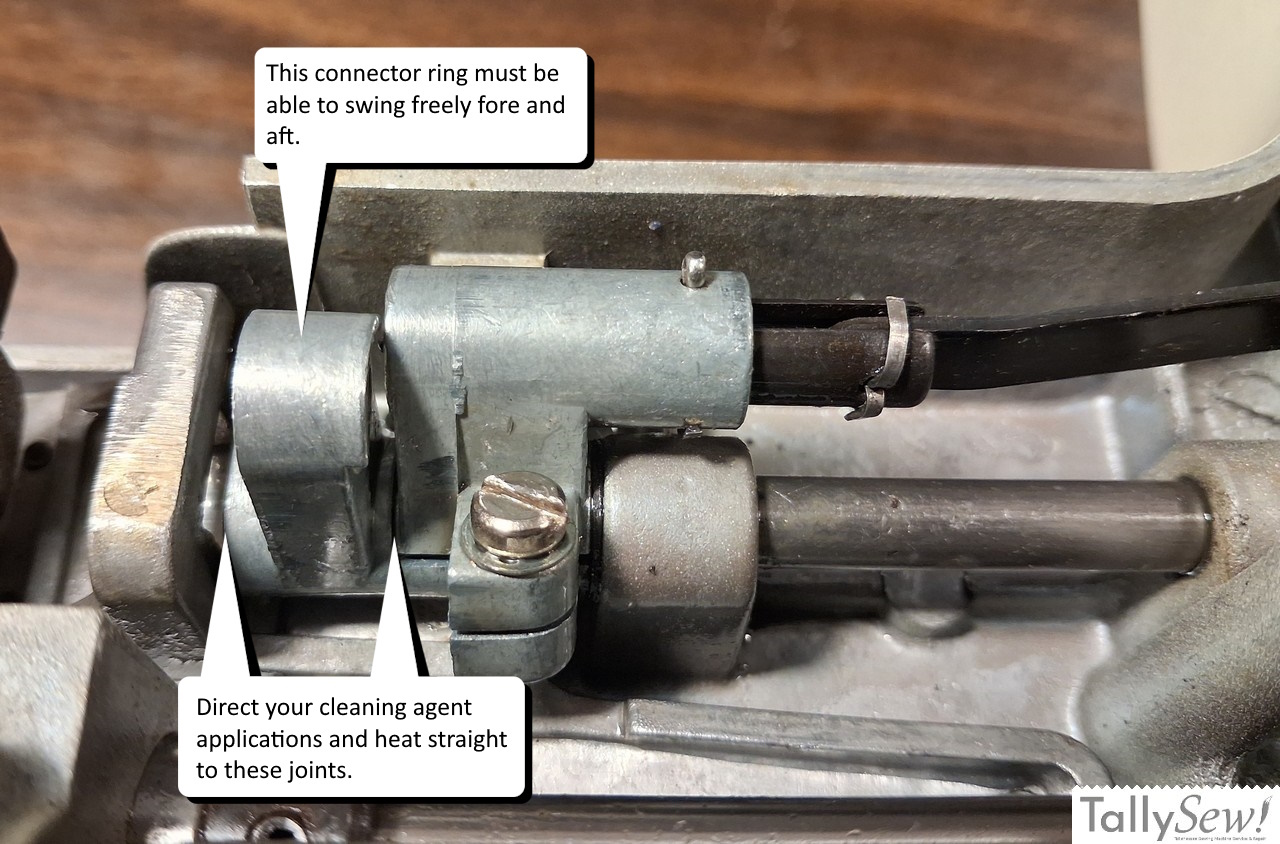
Once the pin moves properly, turn to the connector ring to make sure the feed dogs actually drop.
- Find the connector ring, the short section that connects to the feed dog lift fork. With the pin retracted, it must swing easily on its own, separate from the rest of the tube.
- With a small paint brush, work GOJO or GOOP non-pumice cleaner into the joint where the ring meets the tube, and into the base of the ring where the rock shaft passes through it.
- Let it work, apply gentle heat with the hair dryer, and wiggle the ring by hand until it moves freely. This really may take a lot of work, so be patient.
- Flush the joint and the pivot points with sewing machine oil, working it in by hand. Wipe off the oil that runs out and repeat a couple of times.
- After the machine cools, check the ring again. If it has stuck to the rock shaft again, you have not removed all of the varnish from that bearing surface. Repeat the cleaning. For stubborn varnish, use the kerosene method from Step 2.
Step 4: Testing the Mechanism
- Make sure the machine is dry and has no solvent smell.
- Stand the machine upright, or reinstall it in its cabinet. Do not plug it in yet.
- Set the drop switch to DOWN and turn the handwheel by hand through several full rotations. Watch the feed dogs through the needle plate opening. They should stay below the plate.
- Set the switch to UP and turn the handwheel by hand. After you move the switch from DOWN to UP, you may need to turn the handwheel one full turn before the pin lines up and the feed dogs start moving. The feed dogs should rise through the plate and drop below it with each turn.
- If anything binds or catches, stop and go back to the cleaning steps.
- If it all moves freely by hand, plug the machine in, lift the presser foot, and run it briefly at low speed in both positions.
- Place piece of fabric under the presser foot, and then lower the presser foot.
- In DOWN, the feed dogs should stay below the plate and not move fabric. In UP, they should feed normally.
If the feed dogs still rise or move fabric in DOWN, unplug the machine, lay it back down, and repeat the cleaning, heating, and oiling on the connector assembly until it disengages completely.
If the feed dogs stay below the plate in DOWN and feed normally in UP, the repair is complete.
Alignment and height check: The connector tube clamping screw or the rock shaft fork clamping screw may have been loose before or during your repair. If so, the feed dogs may move properly but sit at the wrong height. If that is what you see, continue to Step 5.
Step 5: Adjusting Feed Dog Height
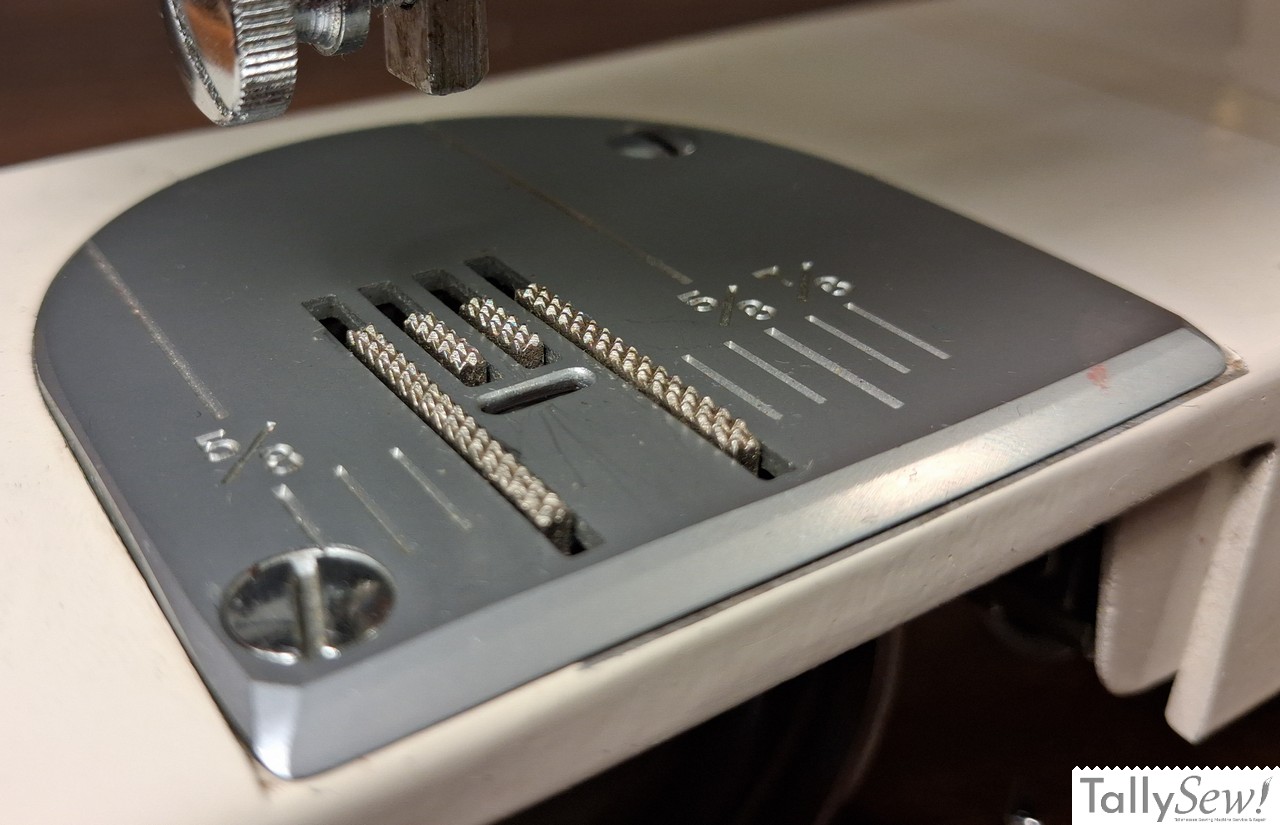
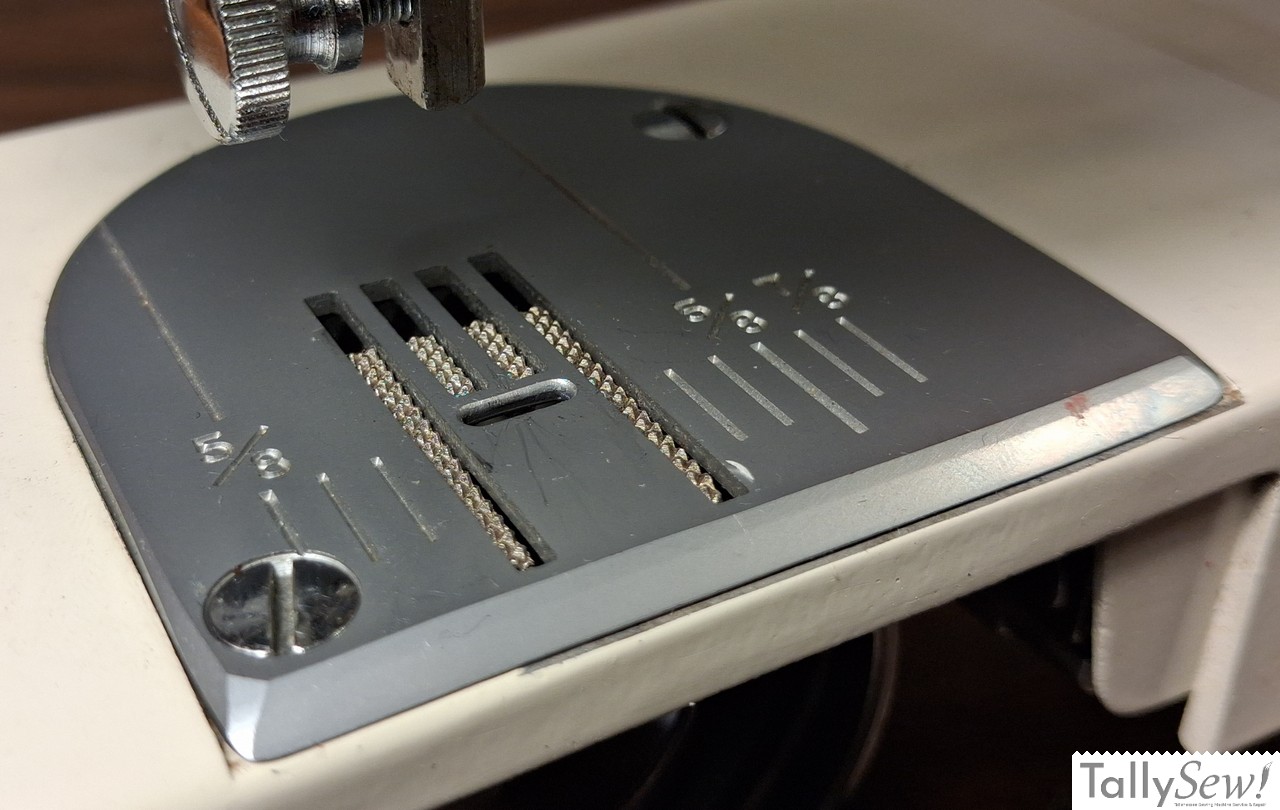
Use this step if the feed dogs move freely but sit too high or too low when engaged.
- Unplug the machine and lay it back down to reach the underside linkages.
- Set the drop switch to DOWN. Try to move the connector tube fore and aft on the rock shaft. If it moves, the tube clamping screw or the rock shaft fork clamping screw is loose.
- Make sure the rock shaft fork clamping screw is tight. You should not need to adjust it. You will make your adjustment at the connector tube clamping screw.
- Mark the current position of the tube on the rock shaft.
- Set the drop switch to UP so the pin is engaged.
- Slightly loosen the connector tube clamping screw so you can shift the assembly by hand.
- Turn the handwheel toward you until the feed dogs reach their highest point. The lift cam on the main hook shaft will be at its highest point too.
- Position the feed dogs at the correct height by rotating the connector tube fore or aft. A service manual for a different model Kenmore machine suggests 0.9 to 1.1 mm of tooth height above the needle plate at the highest point. I can’t find a service manual for the 148.15600, so consider this a ballpark measurement and your mileage may vary. Hold the parts in that position and fully tighten the connector tube clamping screw.
Also see the two photos below about the feed dog drop limiter* that is specific to the Kenmore 148.15600 - Turn the handwheel by hand through several rotations in both switch positions. In DOWN, the feed dogs should stay below the plate. In UP, they should rise to the correct height.
- Plug the machine in and run it briefly to confirm it feeds normally.
- You may need to try this a few times to get it right.
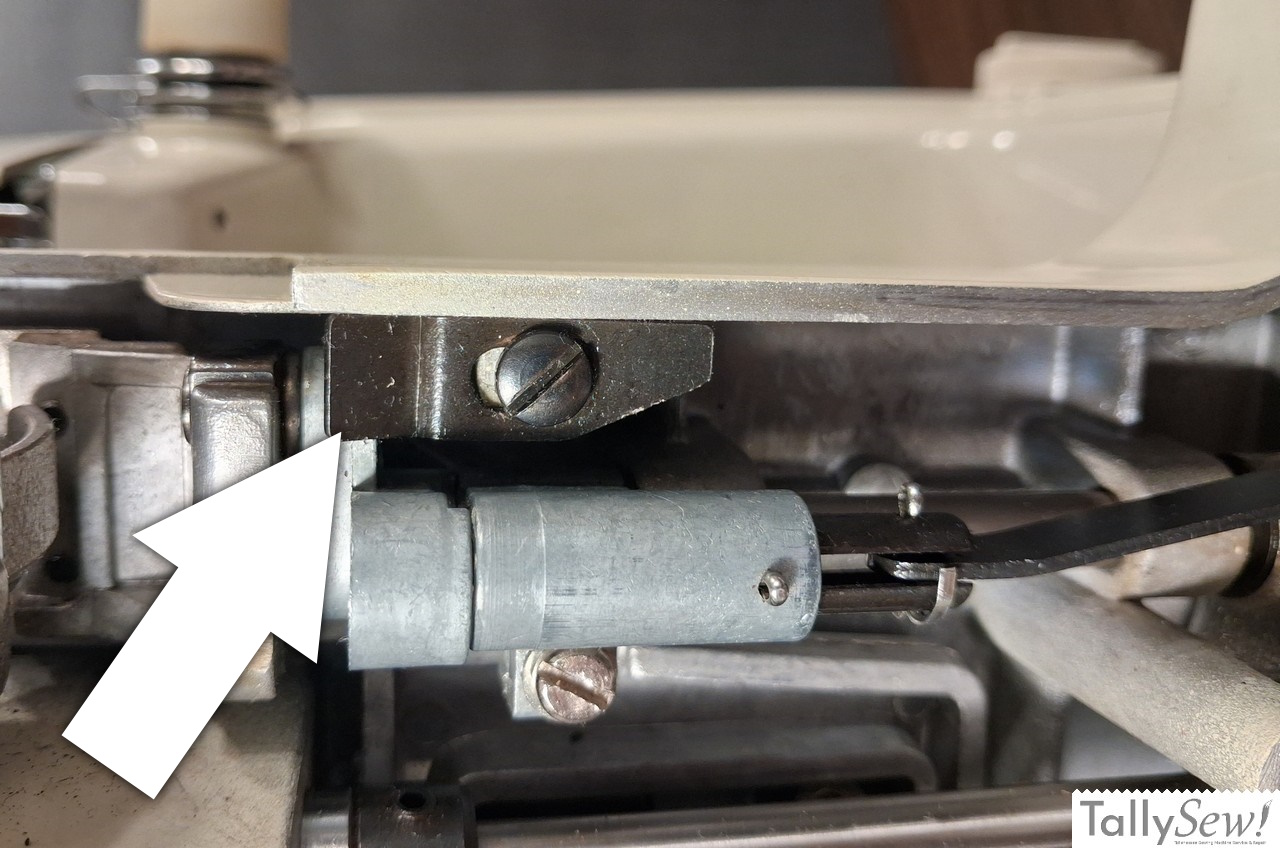
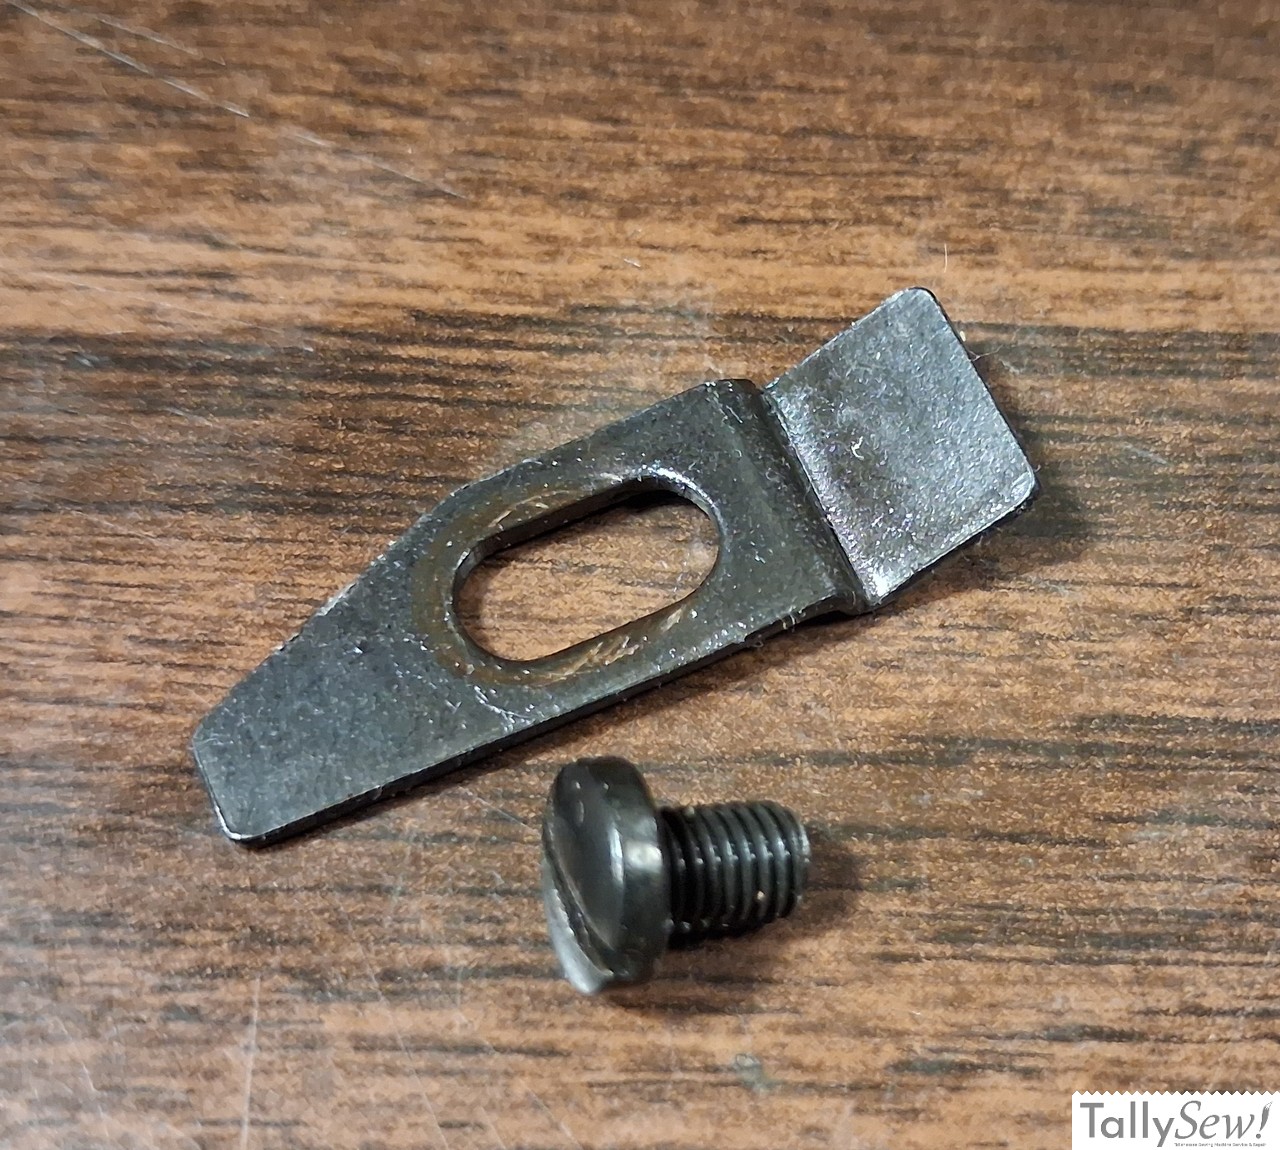
* Feed dog drop limiter: There’s probably no need to remove or adjust this, but if you did move it for some reason, this is used to limit how far the feed dogs drop below the needle plate at their lowest point, or when the feed dog drop adjuster is set to DOWN. Just adjust it so that the feed dogs are just below the needle plate.
When to Stop
Stop if the pin will not move after several rounds of cleaning, or if you find a bent, cracked, or badly worn part. More force will not fix it. At that point the next step is partial disassembly, which is beyond this guide. If you are not comfortable doing that, take the machine to a repair shop like Tally Sew LLC.
Keeping It From Freezing Again
The mechanism freezes when it sits in one position for years. Once it’s working, cycle the drop switch between UP and DOWN every few months, and always before a project that needs it. Put a single drop of sewing machine oil on the pin and the ring pivots now and then. Do not flood the assembly. Extra oil collects lint and turns to varnish again.
Historical Background
Drop feed is older than the 1940s. A 1928 British patent (GB298049, Johann Debertin) already covered disengaging the feed dog drive on household machines. US Patent US2440031A, filed in 1945 and granted in 1948 to George R. Wainwright, is an early patent for a different way of doing it, a latch-and-lever style. A lever arm rides freely on the rock shaft, and a latch pivoted on the shaft couples the two.
The layout differs from our Kenmore and Brother machines. In Wainwright’s design, the free-riding lever arm is driven by the machine, and the rock shaft carries the motion to the feed dog. On the Kenmore it works the other way around. The tube clamped to the rock shaft is driven, and the free-pivoting ring connects to the feed dogs. The principle is the same, because each design couples and uncouples a free part from a driven part to turn feeding on and off.
Wainwright’s patent describes one specific mechanism:
- A latch pivoted on the rock shaft that engages a notch in the lever arm.
- An external handle marked IN and OUT, so you don’t have to tilt the head or reach underneath.
- A spring that rocks the shaft against a stop pin when the latch releases, holding the feed dog below the throat plate.