Brother VX-1100


A no-frills straight stitch and zig zag sewing machine with adjustments for stitch width, length, and a Left, Middle, and Right needle positions. This machine’s simplicity plays in it’s favor though. It’s designed for light duty sewing, and as long as it’s used as intended, and serviced like any other domestic machine it shouldn’t have any problems working for decades.
This is a nice, full size, but still portable machine. It isn’t going to draw a crowd like a pristine Singer Featherweight, but if it gets stolen from your camper while on holiday, it isn’t going to cost a half grand to replace. …And that’s what this machine is good for, it’s a dependable tool that you can use without worry, and sometimes that’s literally the best tool to have available.
This would also be a great first machine for anyone wanting to learn to sew. You’ll probably grow out of it, but you’ll probably also keep it as a handy backup for years to come.
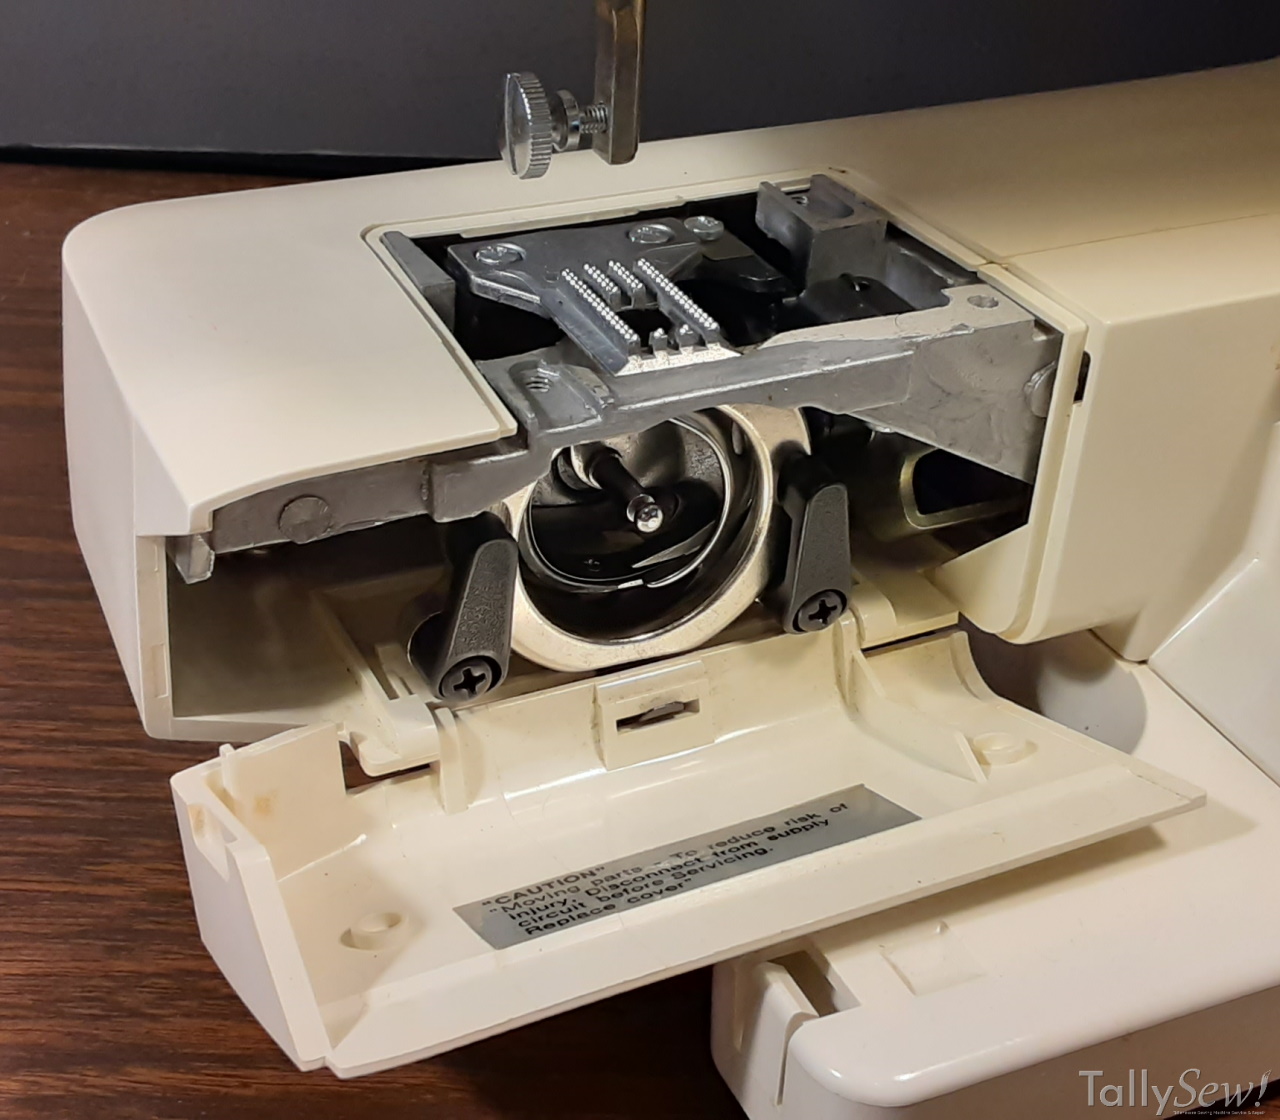
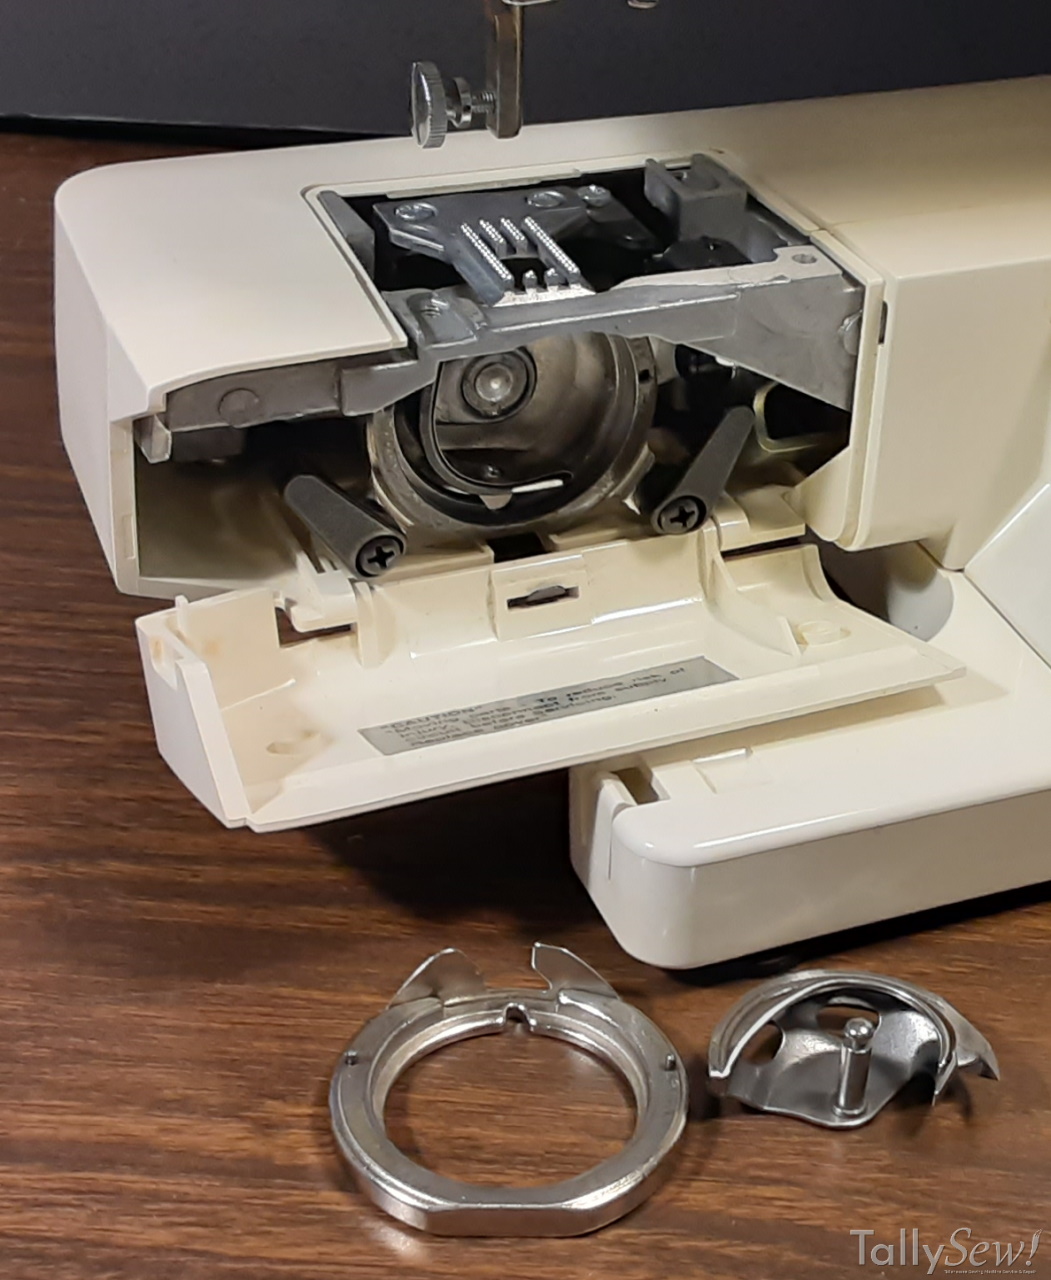
This is a traditional Class 15 oscillating hook sewing machine.
Since it’s a simple zig zag machine it’s easy to use and more forgiving than many machines that I’ve used. Obviously it’s still a sewing machine and can’t fix human failings, so it will still happily turn your bobbin area into a bird’s nest if you don’t use reasonable care.

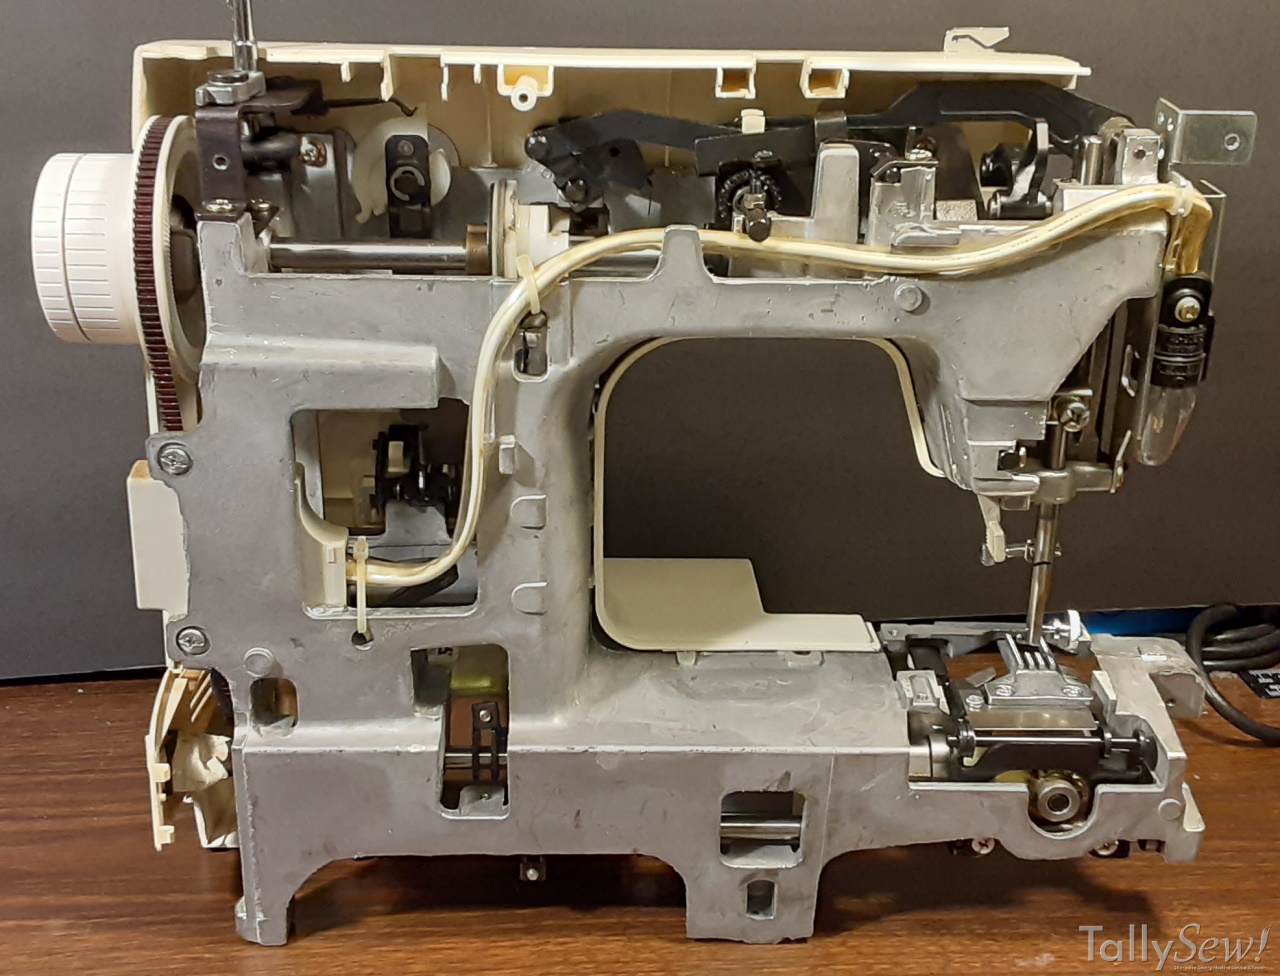
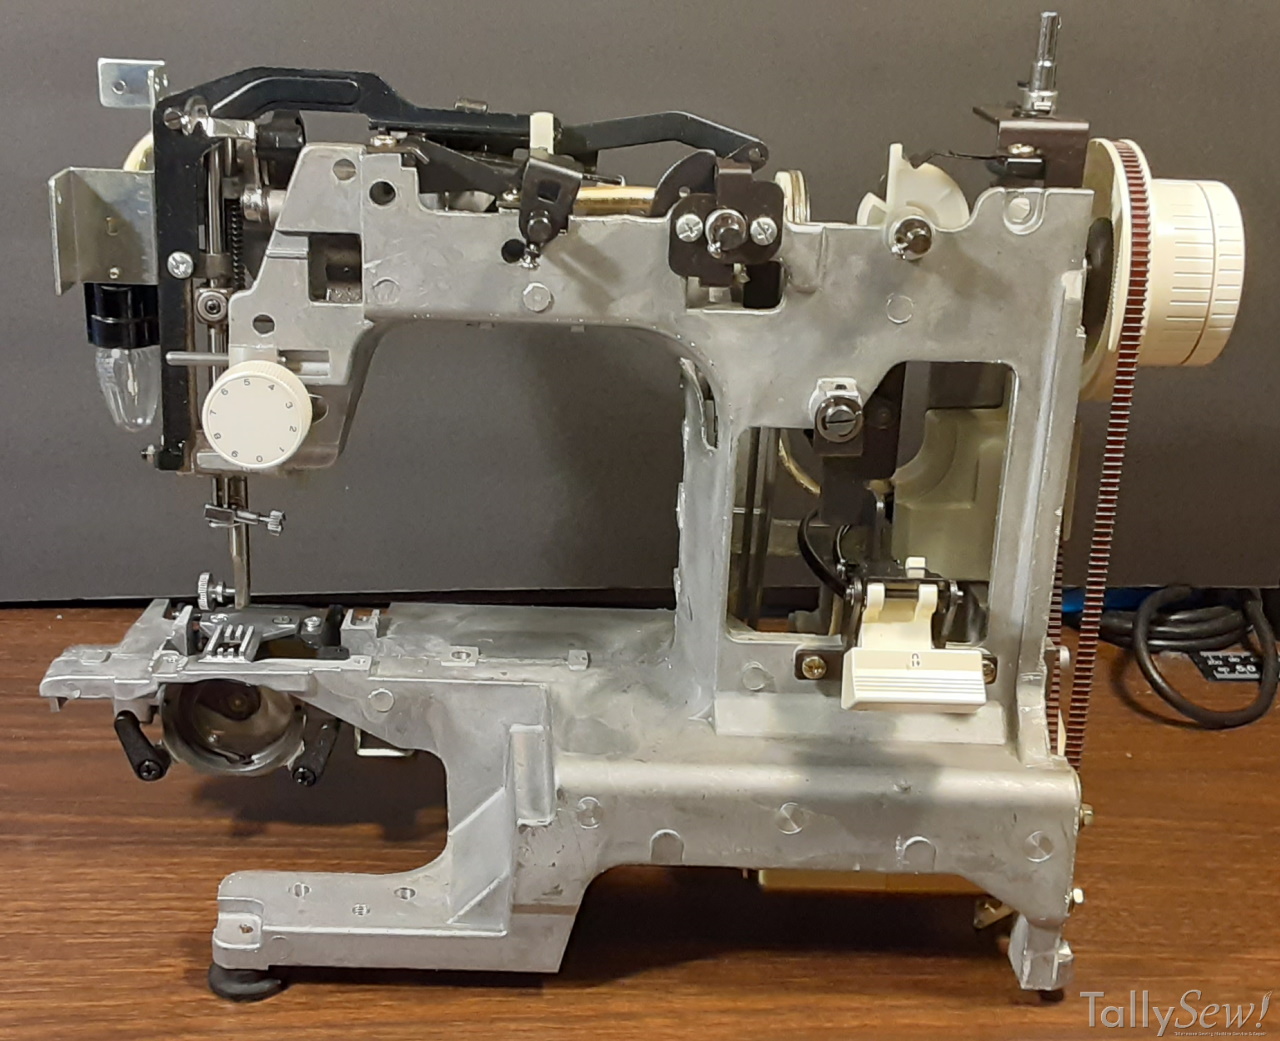
The inner frame of the Brother VX-1100 is a cast metal, and provides reasonable stiffness to the machine. The drivetrain does include some plastic components, but they’re well designed and made of modern plastics, so they’re unlikely to disintegrate under normal use. With modern plastic gears the issue tends to be flex, allowing jumped teeth and the machine’s timing to be thrown off. The plastic gears in this machine are designed and assembled so that flex isn’t likely unless someone asks more of the machine than was intended.
Removing the outer plastic shell
Start by unplugging the machine.
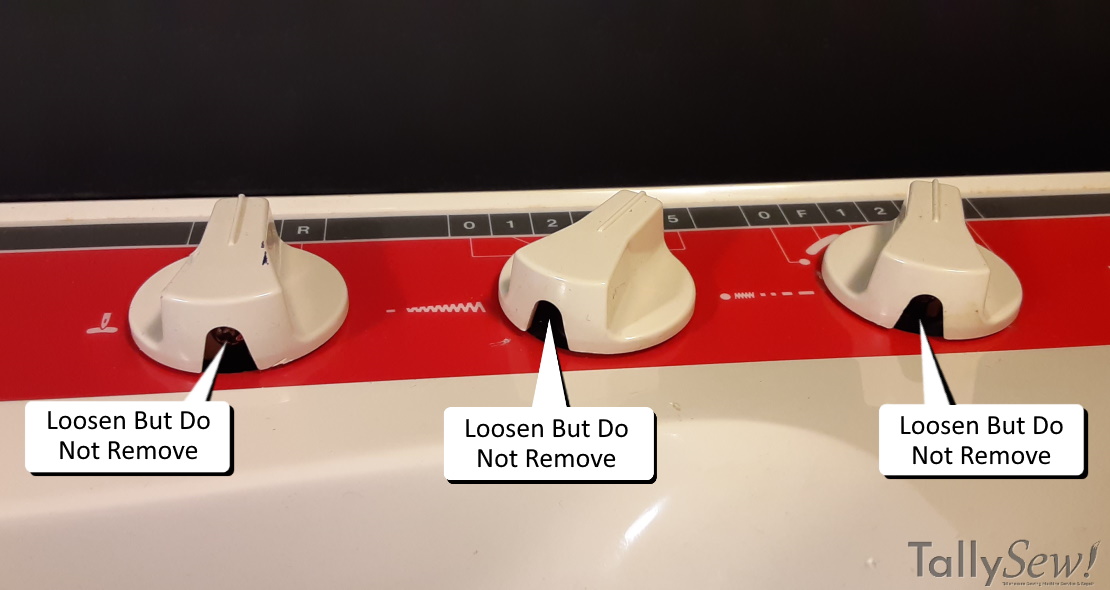
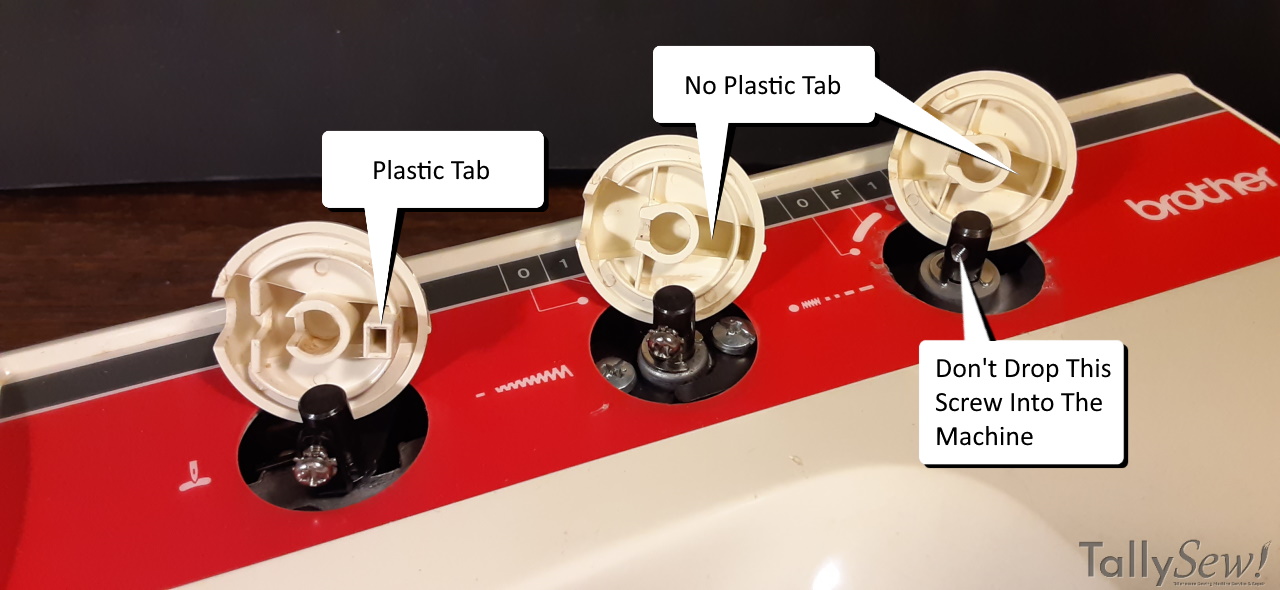
Tilt the machine onto it’s back and use a Phillip’s screwdriver to loosen, but not remove the screws that hold the front knobs in place. Once the screws are loosened the knobs can be pulled off of their posts. Note that the needle position knob is different than it’s two siblings.

While the machine is still on it’s back, remove the rubber feet. When removing the rubber feet be careful not to lose the Crush Proof Spacer that keeps the screw from collapsing the rubber foot. The feet aren’t complicated, but there are more parts to each one than you might expect.
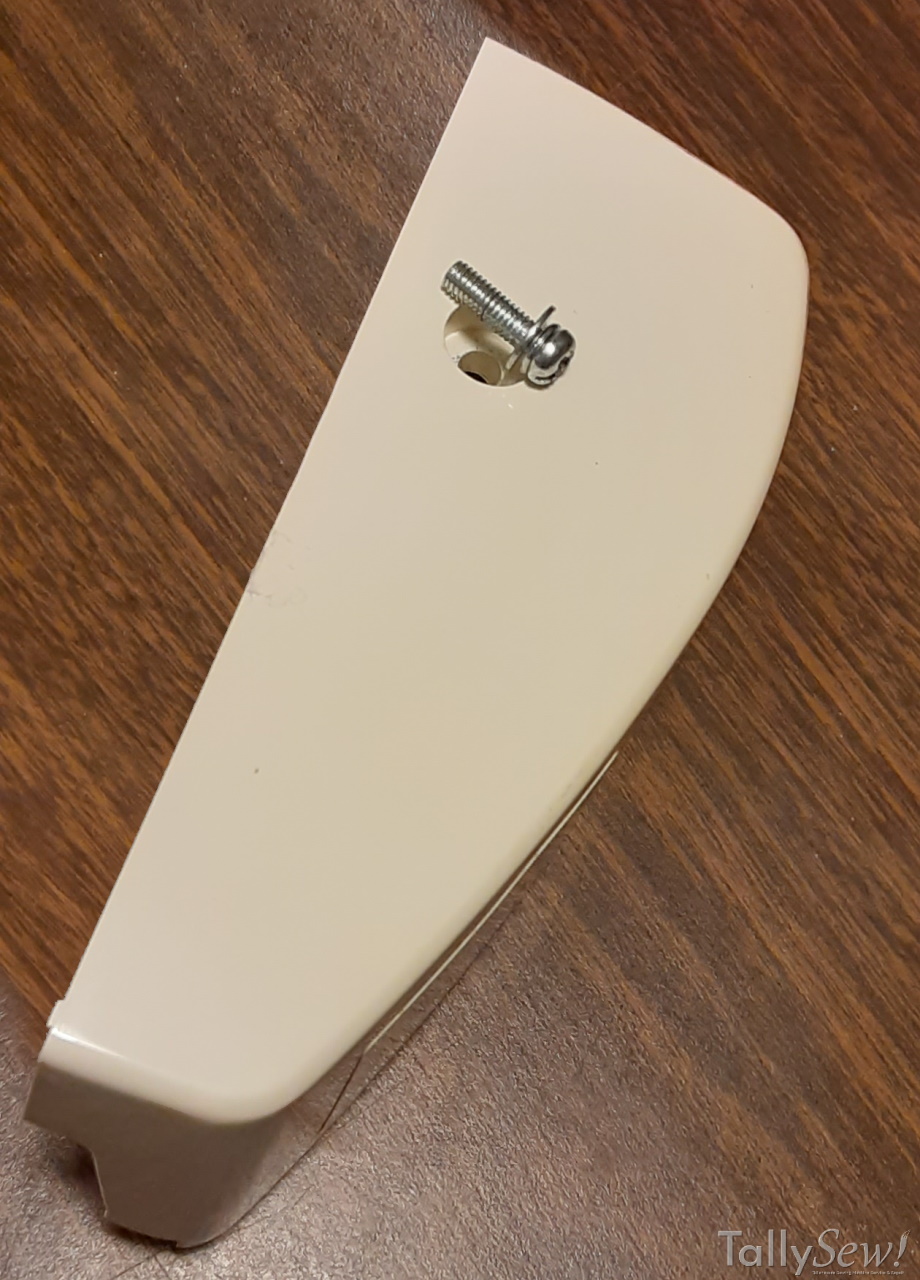

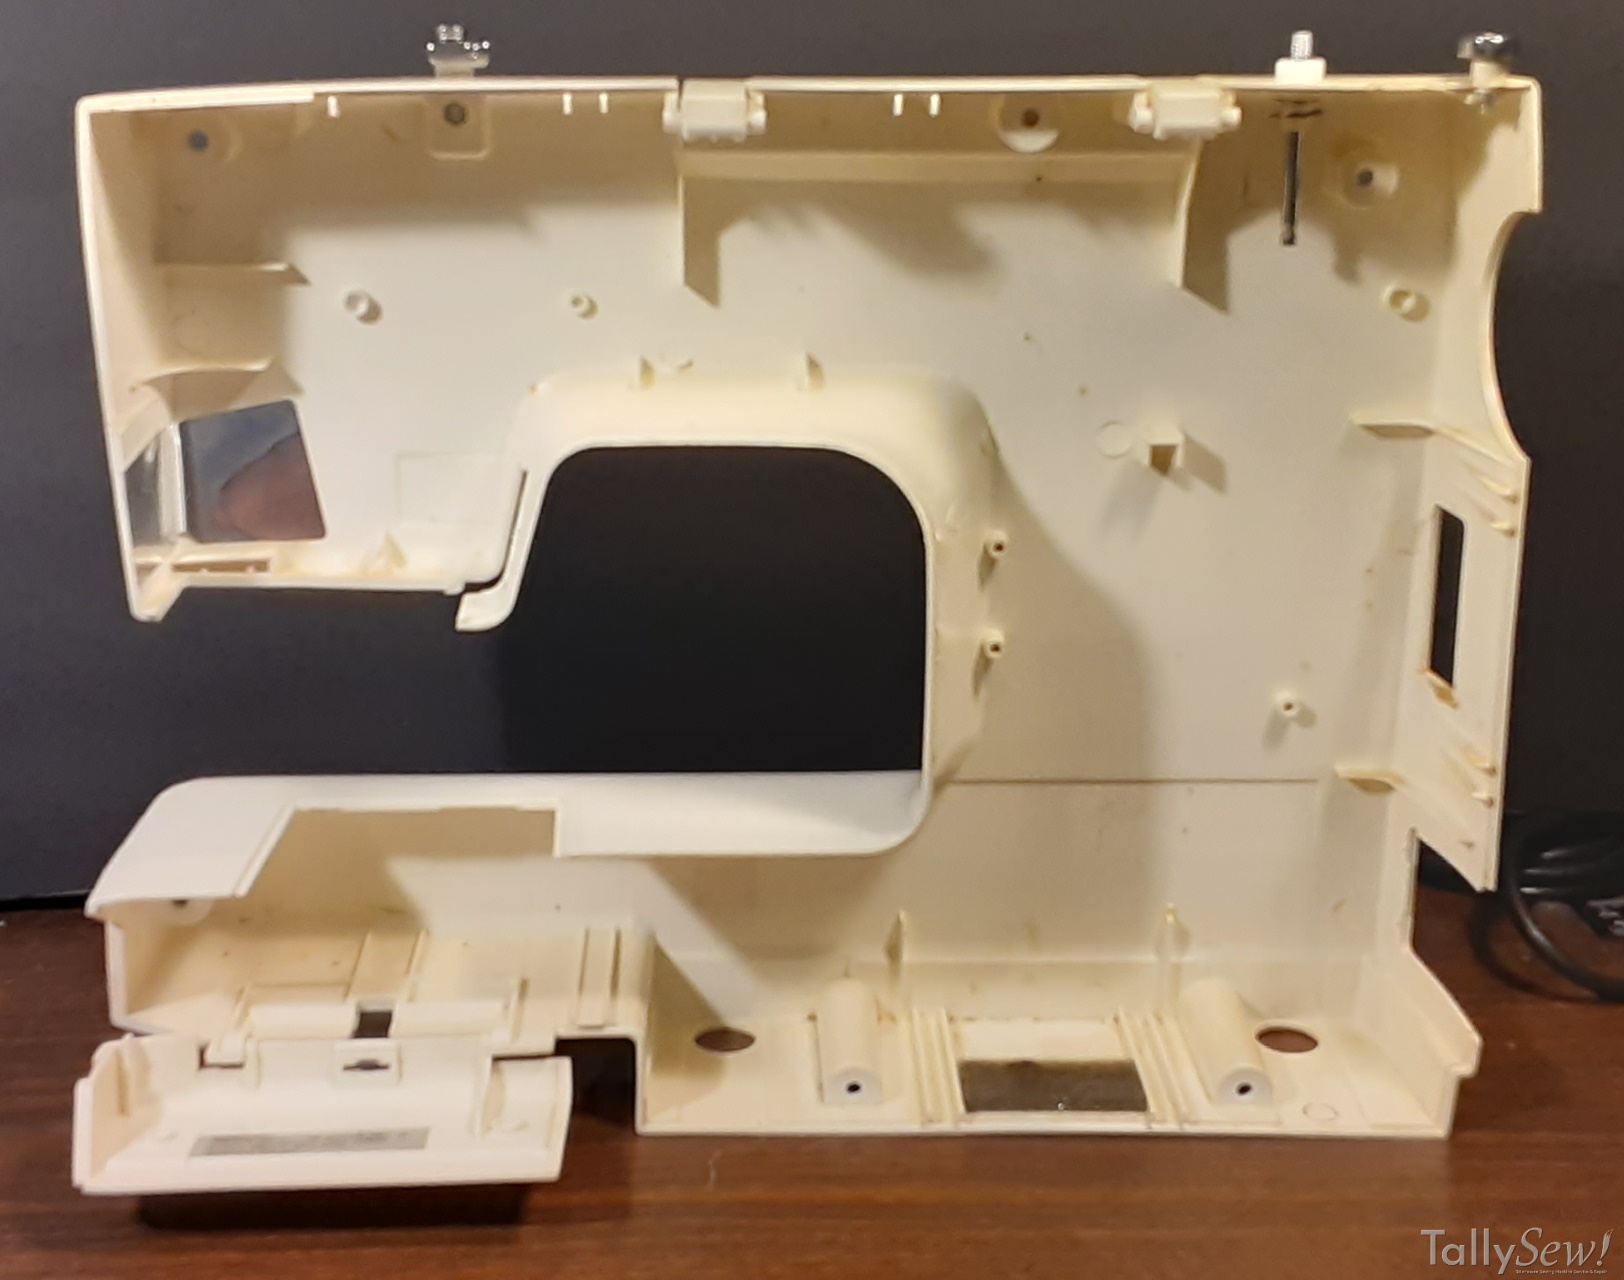
Next remove the nose cap of the machine by removing the screw that holds it on. Then unscrew the back cover of the machine. You’ll need to open the bobbin area cover and make sure the presser foot is in the down position to remove the back cover. Take your time and don’t force the cover. Make sure you work the plastic over the control plug on the right end of the machine, and gently pry the front and back covers apart. If you have to use any real force then you’ve missed something. take your time.
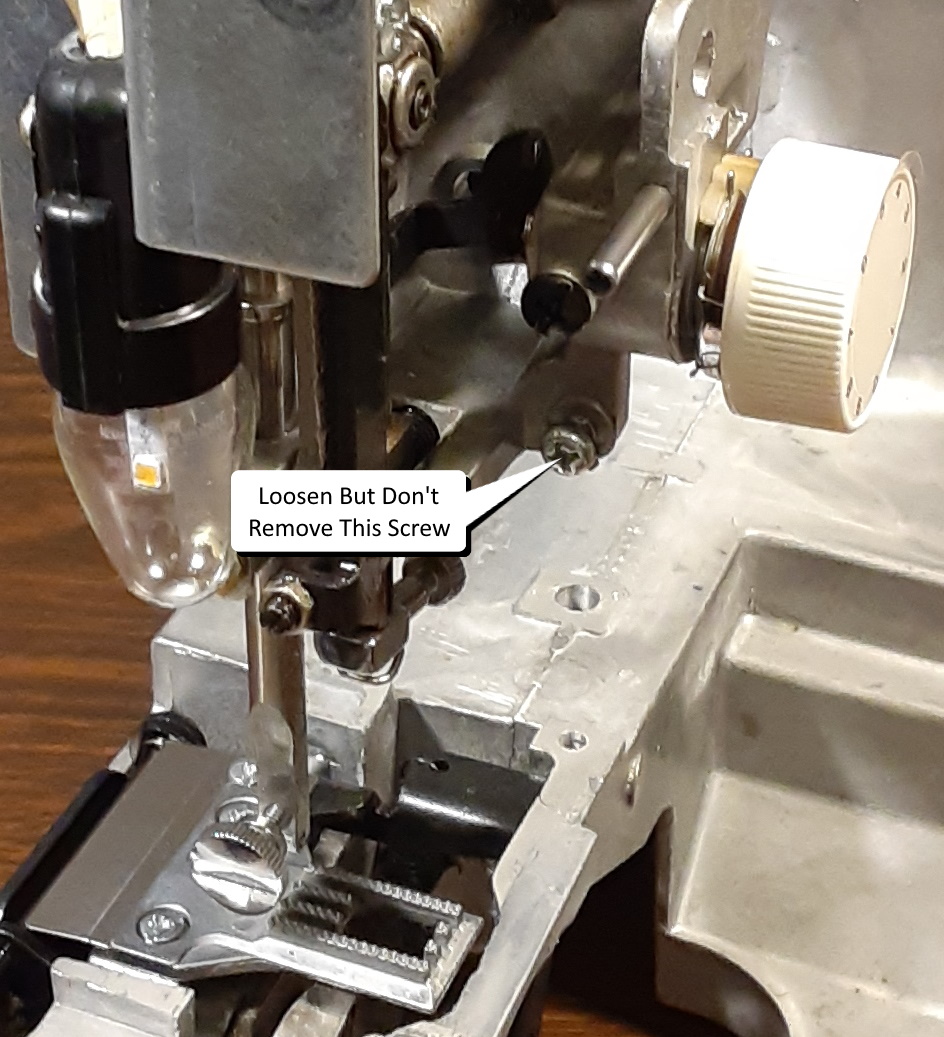
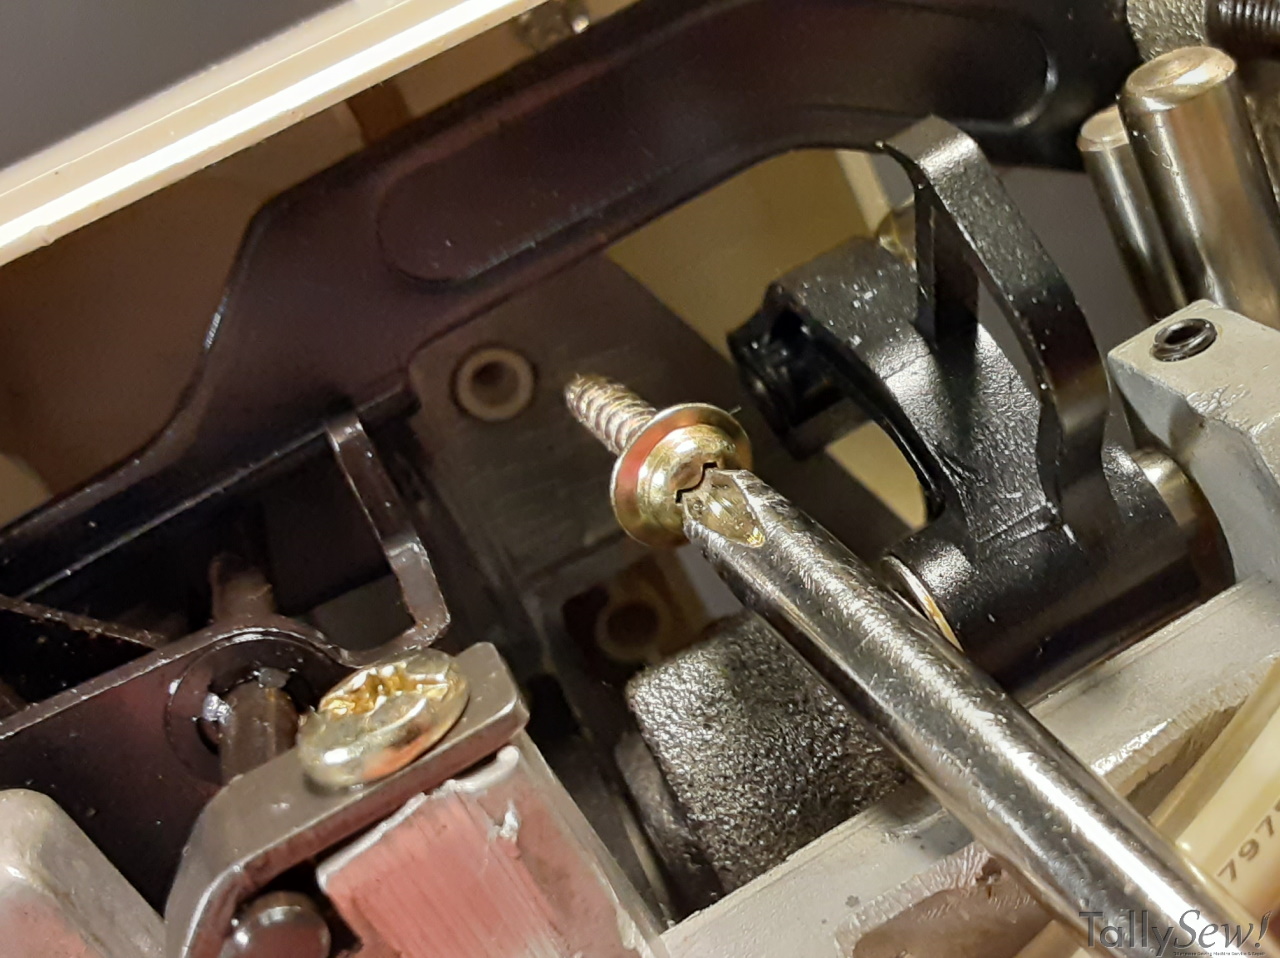


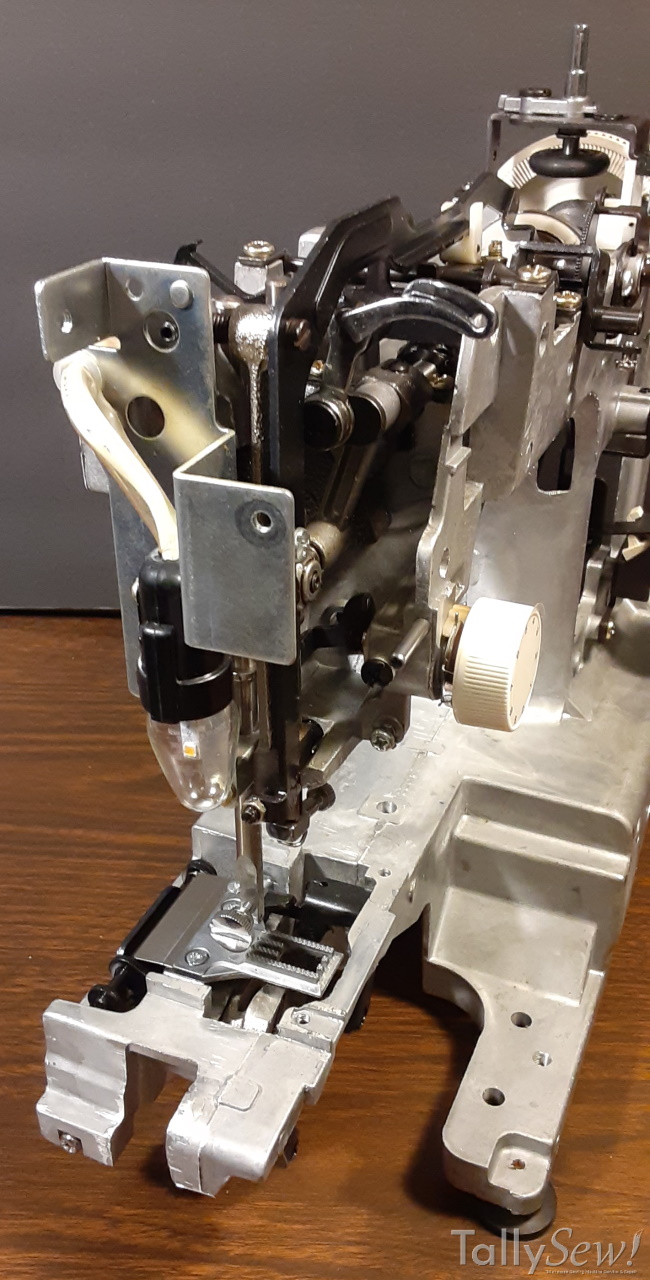
Font cover removal. In the needle bar area, beneath the tensioner there’s a screw that holds a slotted tab for the front cover, loosen this, but don’t remove the screw. If you look near the top of the machine from the now open back you’ll find a screw near each end of the machine that holds the front cover plastic on. See photos above. Remove those two screws. Remove the screw and front leg cover if needed. Take your time and work the front cover plastic shell off of the machine.
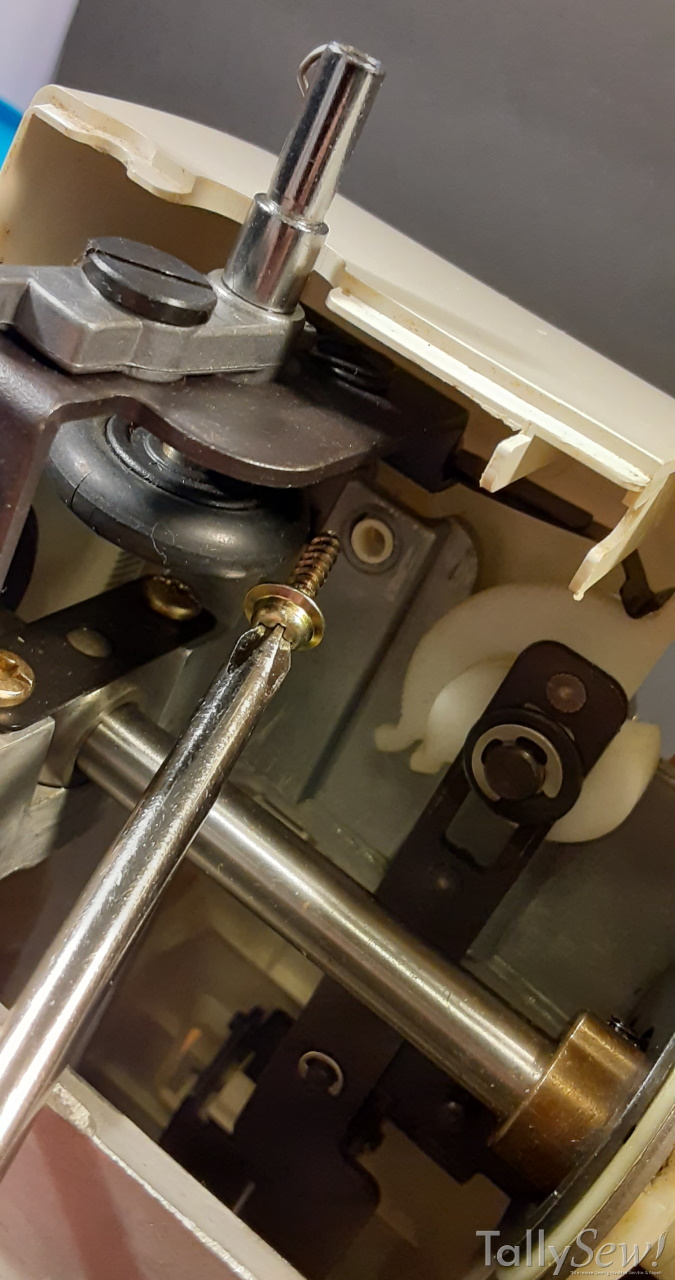
Balance wheel, bobbin winder and motor belt.

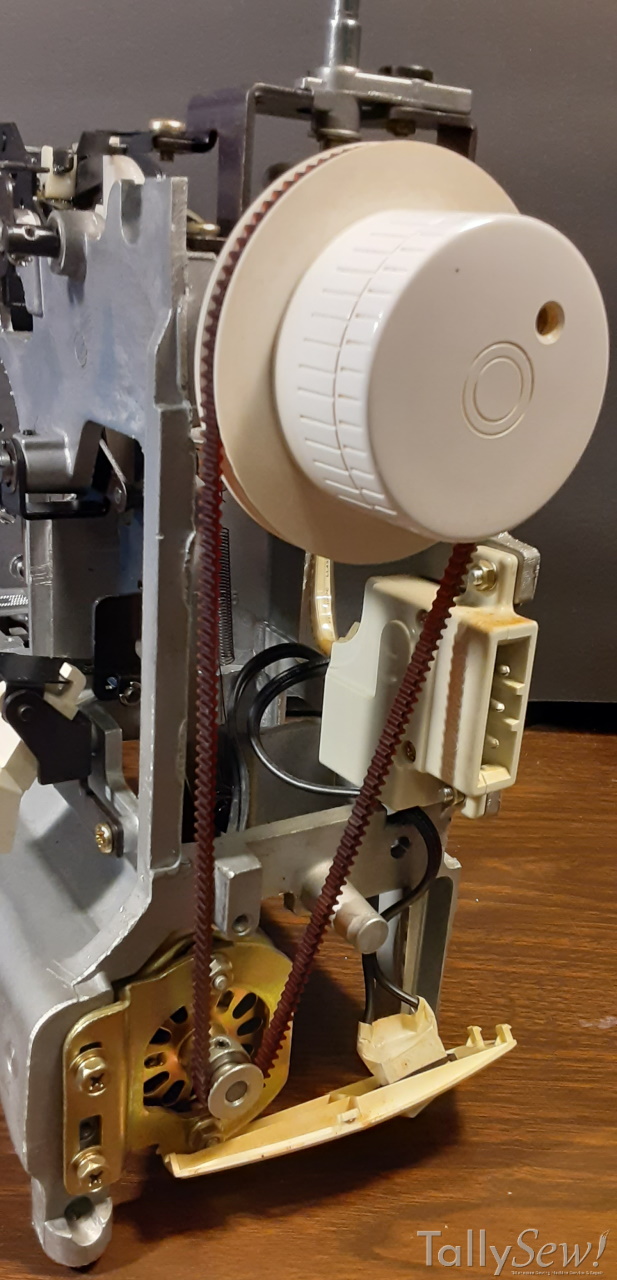
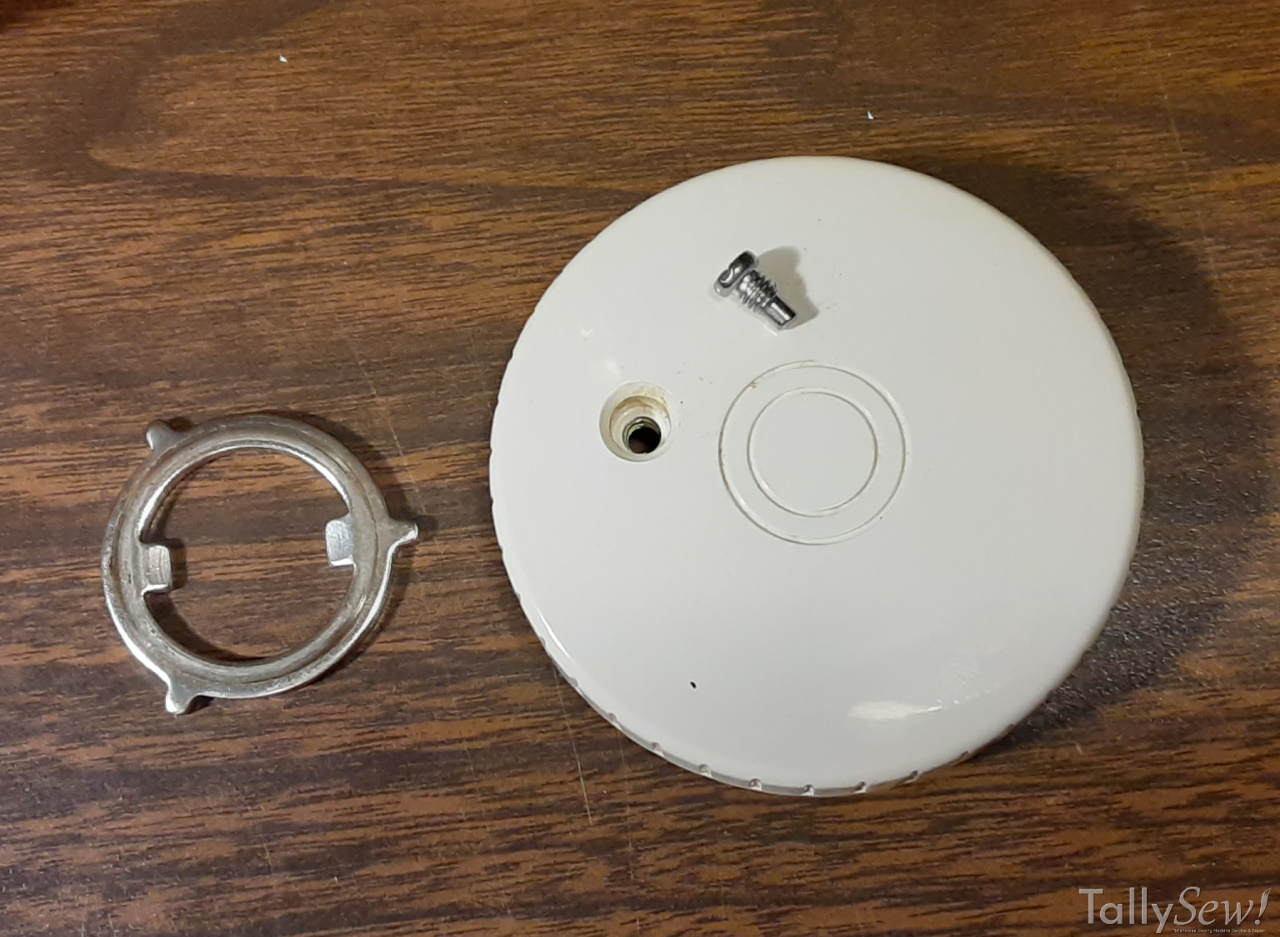
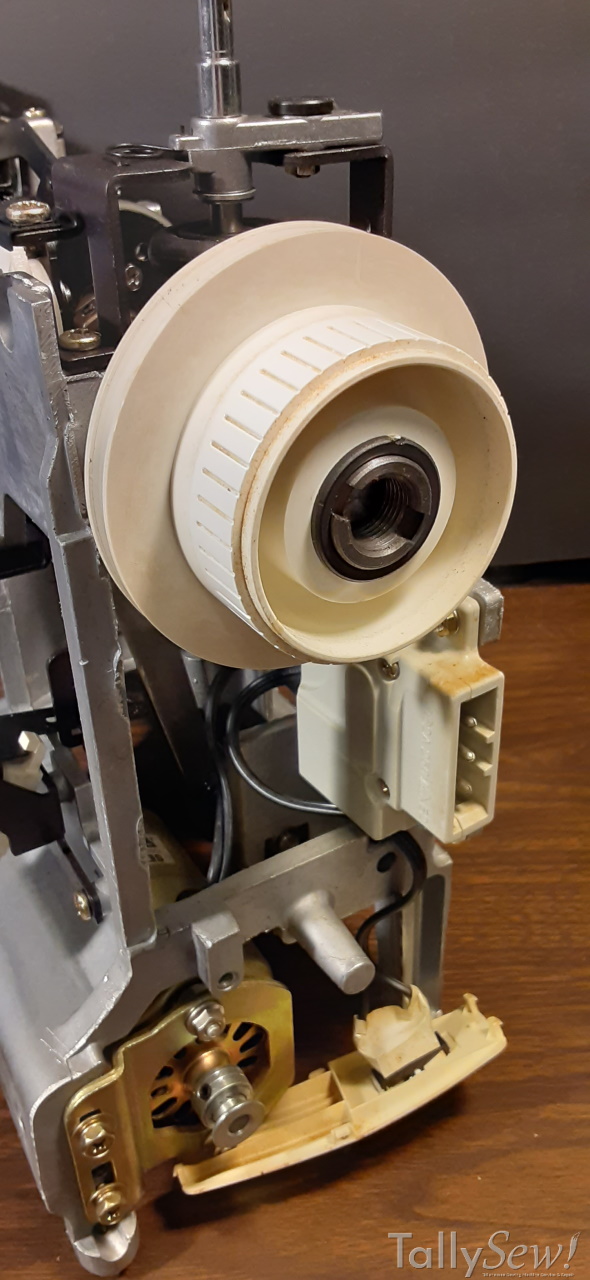
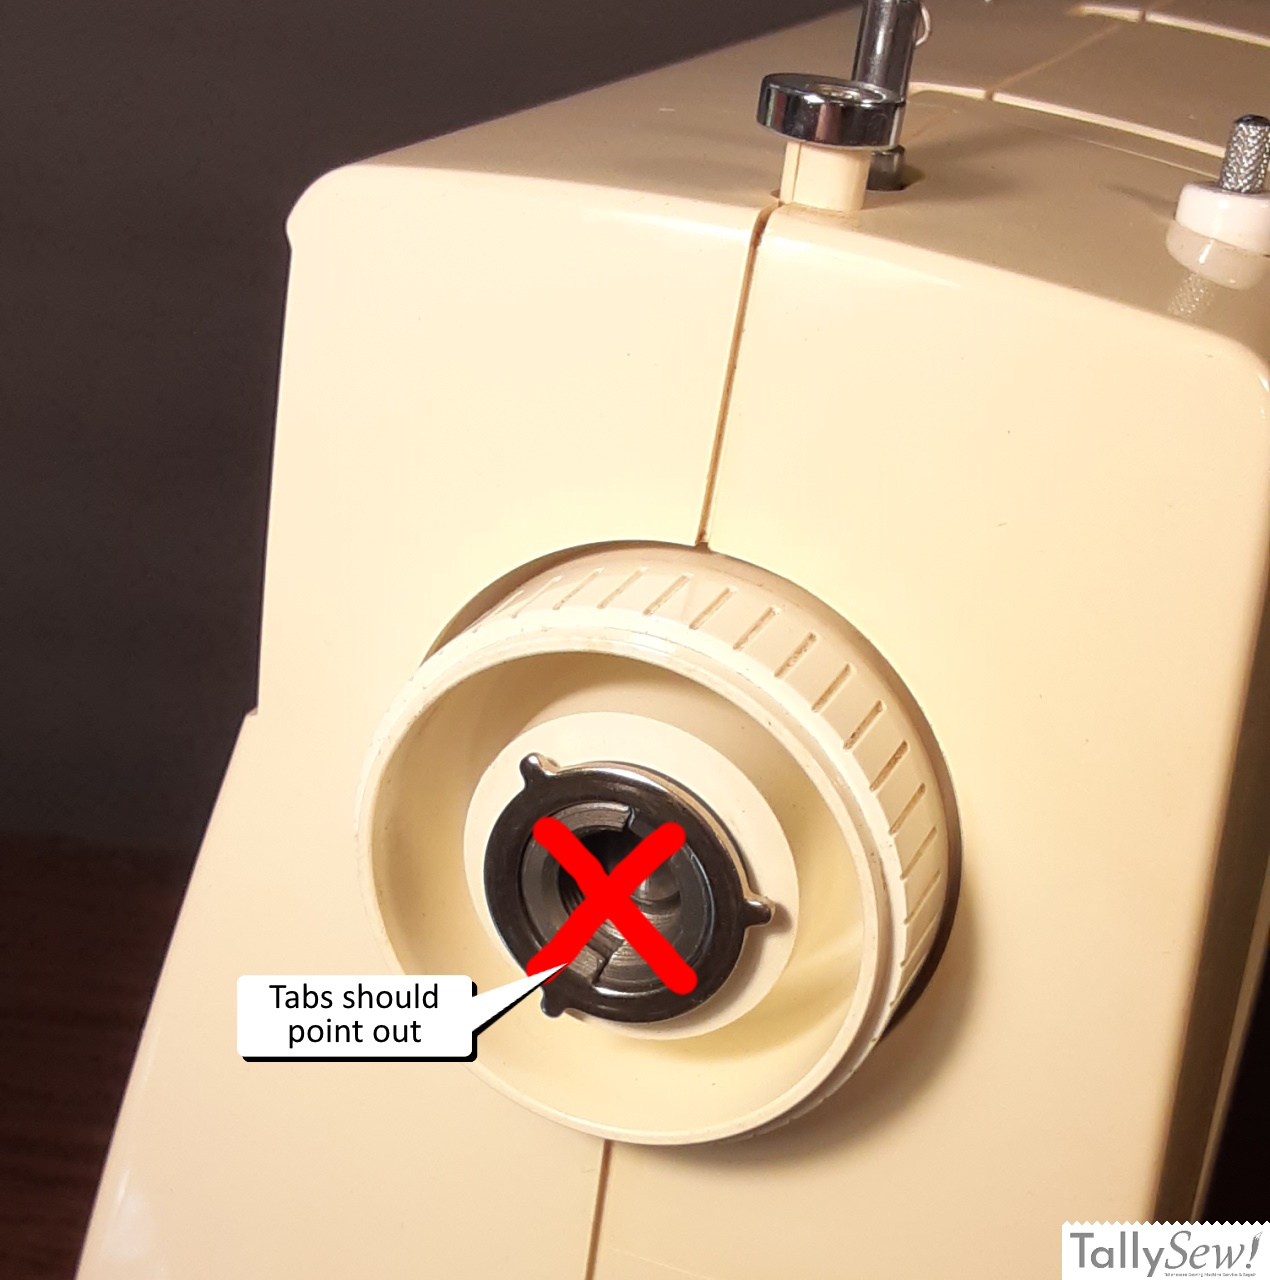
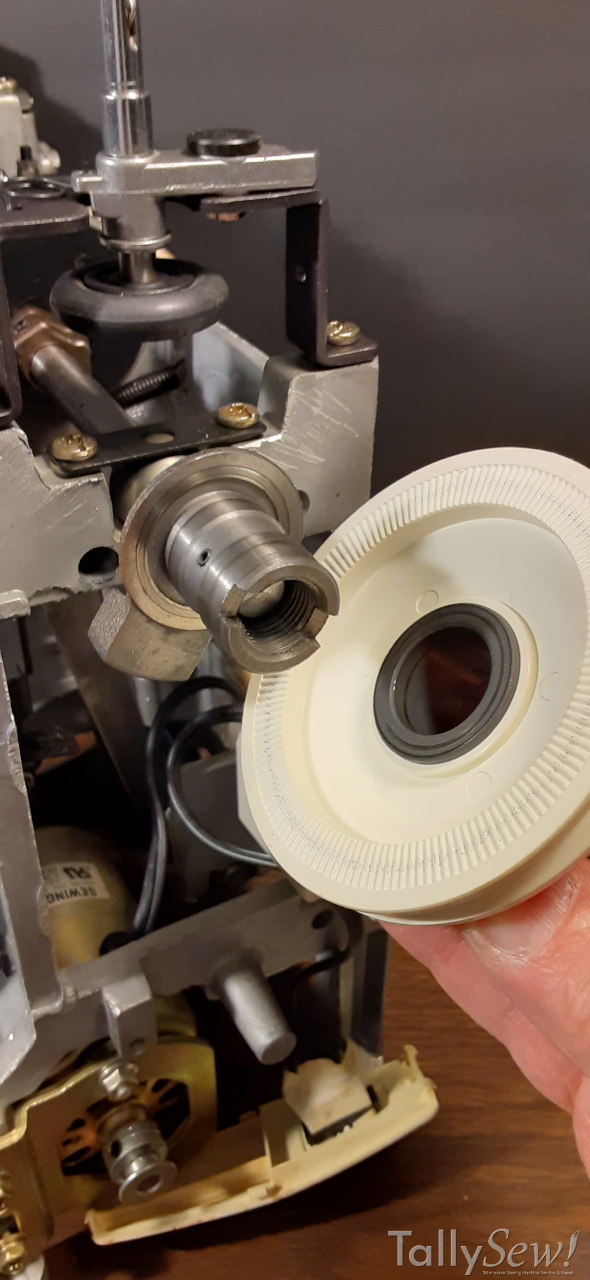
You can see the bobbin winder tire and bobbin winder spring in the photos above. Be careful not to dislodge the spring, it will be hard to find if it lets go, (ask me how I know). Remove the small screw from the clutch wheel, then unscrew the clutch wheel counter clockwise from the balance wheel. There is a clutch washer between the clutch and balance wheels. When you put it back together make sure it’s inner tabs point away from the machine. If you get it backwards the clutch will fail to hold and the motor will spin without moving the needle. It isn’t great for the motor to run it without any resistance to control it’s rpm, but when it happens you will probably let off the gas before you hurt anything. If/when this happens, remove the clutch wheel and flip the washer over and put it back together.
The plastic gears.
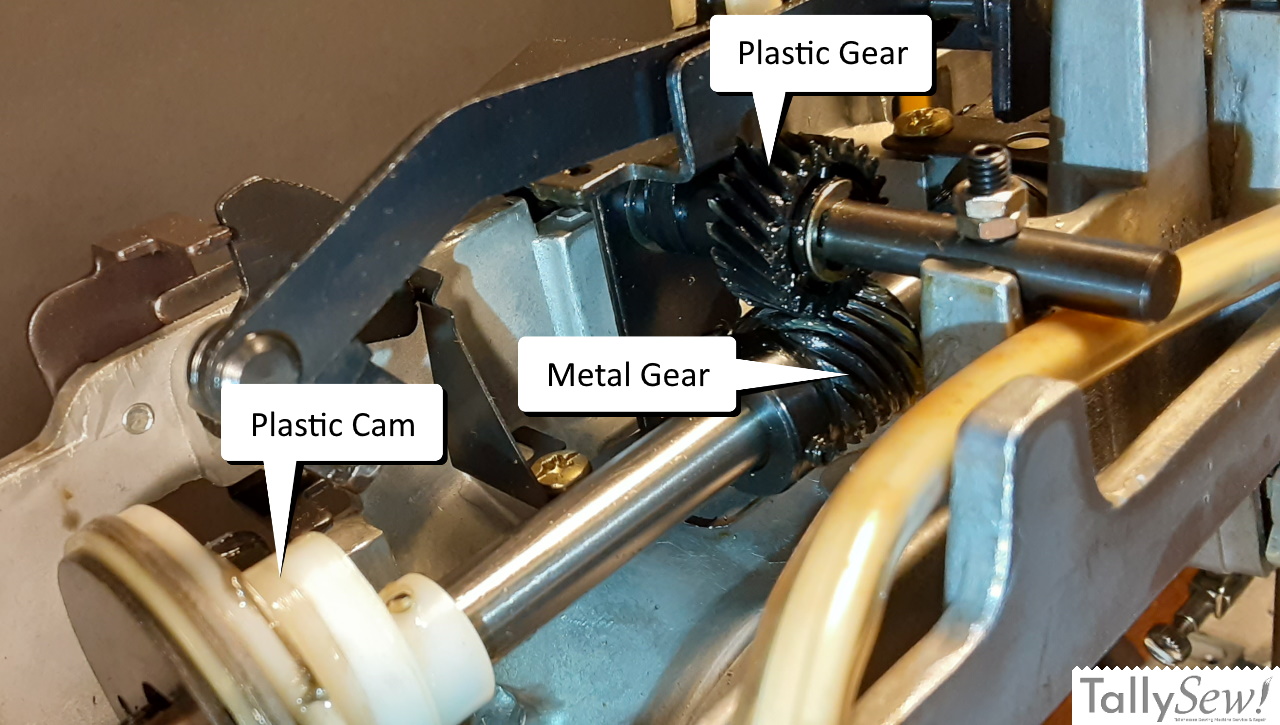
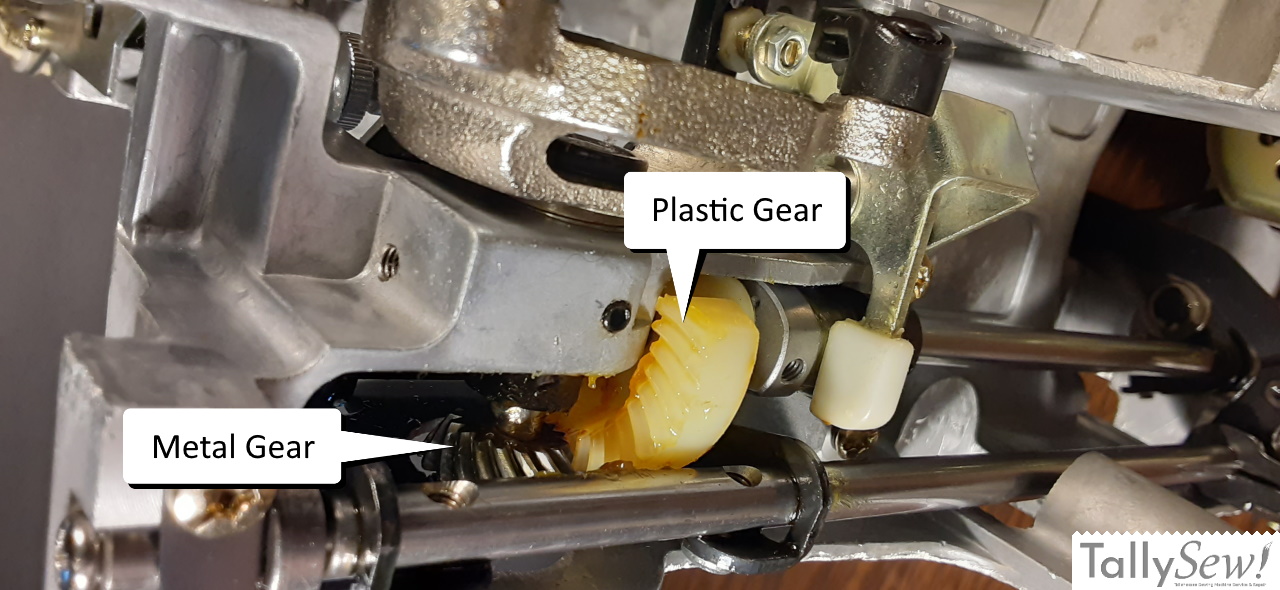
There are a few other plastic parts not pointed out in the photos above. None of them should be of great concern as far as I can tell.
Yes, I took the photos before I got my hands dirty cleaning the machine…
Specifications
| Brand | Brother |
| Model | VX-1100 |
| Hook Type | Oscillating |
| Bobbin | Class 15 |
| Bobbin Case | Class 15, “1 o’clock” position finger |
| Needle System | 15×1 |
| Foot Type | Low Shank |
| Construction | Plastic shell, Metal Frame |
| Construction Drivetrain | Mixed |
