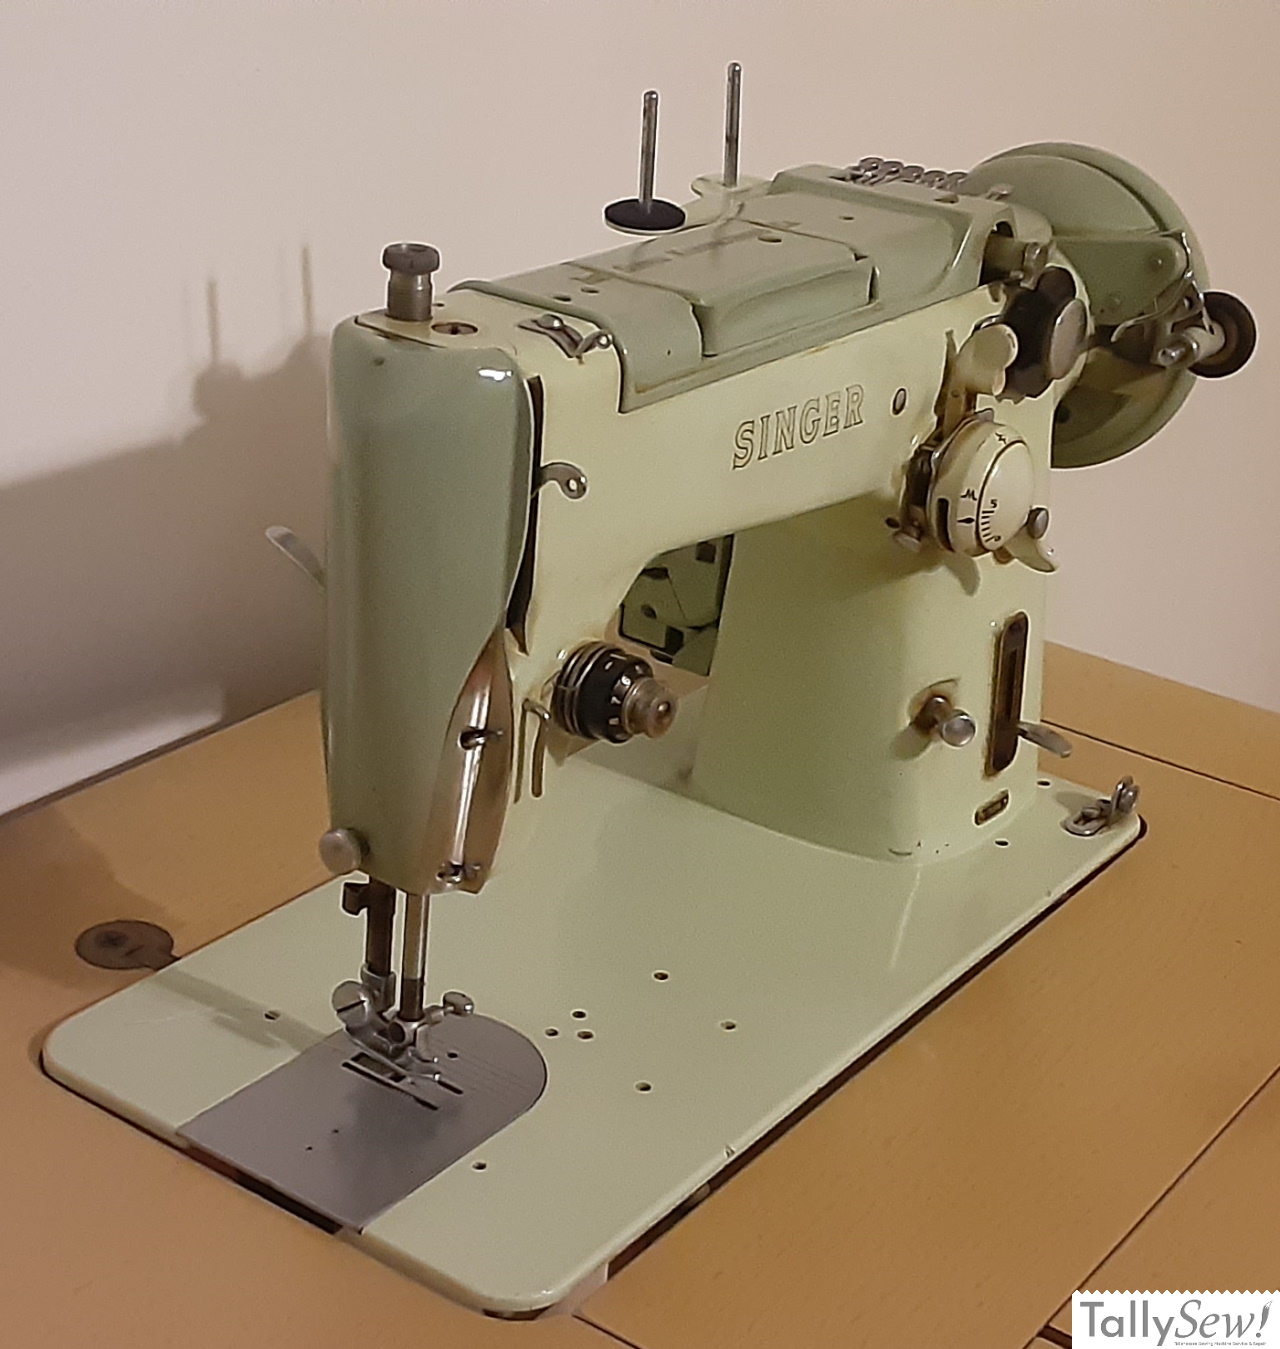
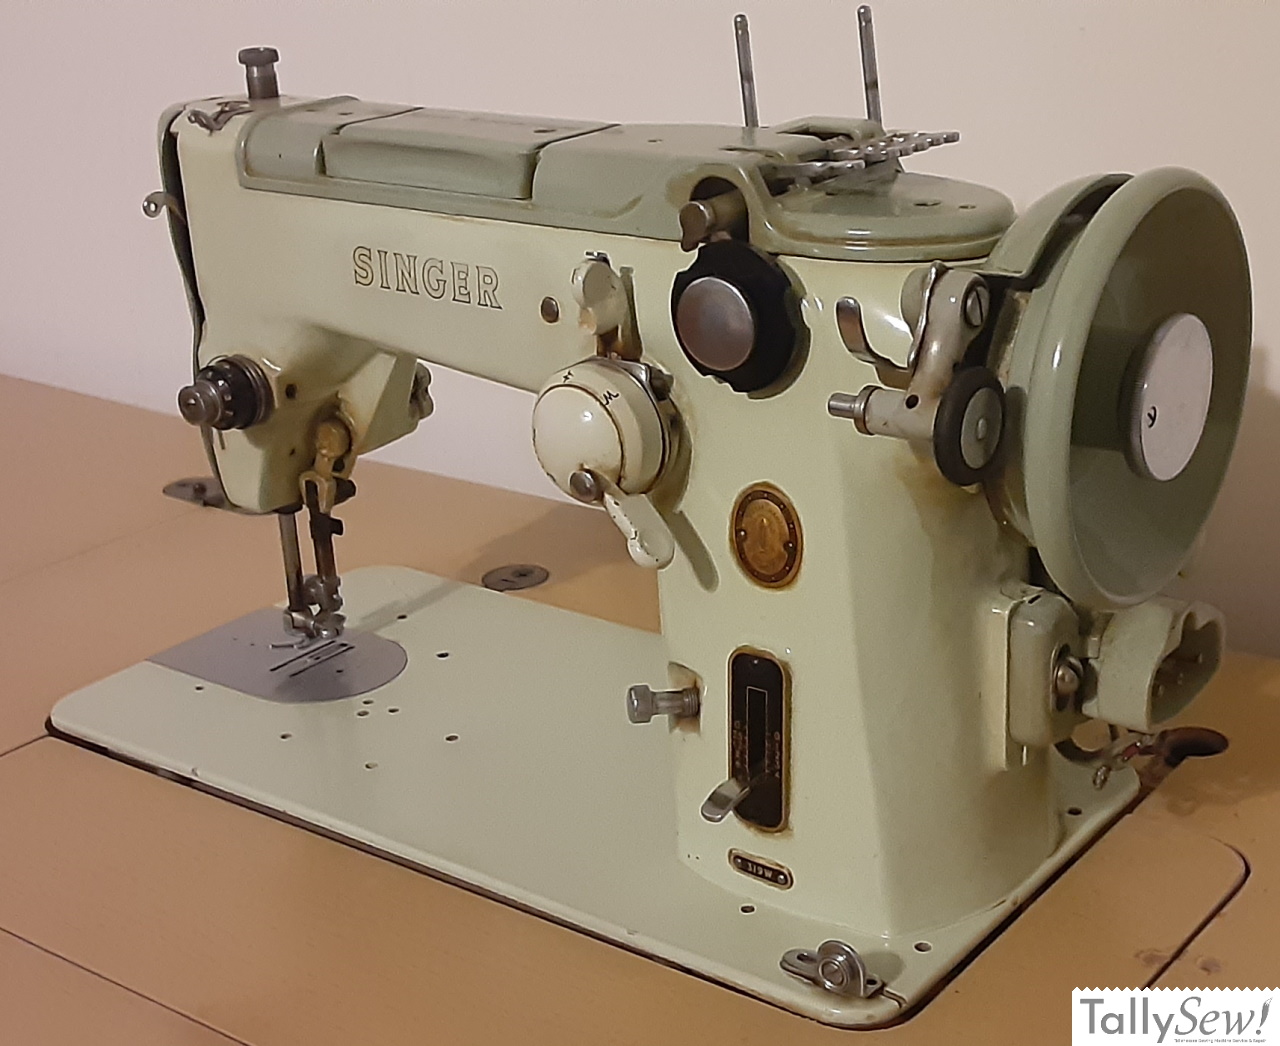
Singer 319 Swing Needle
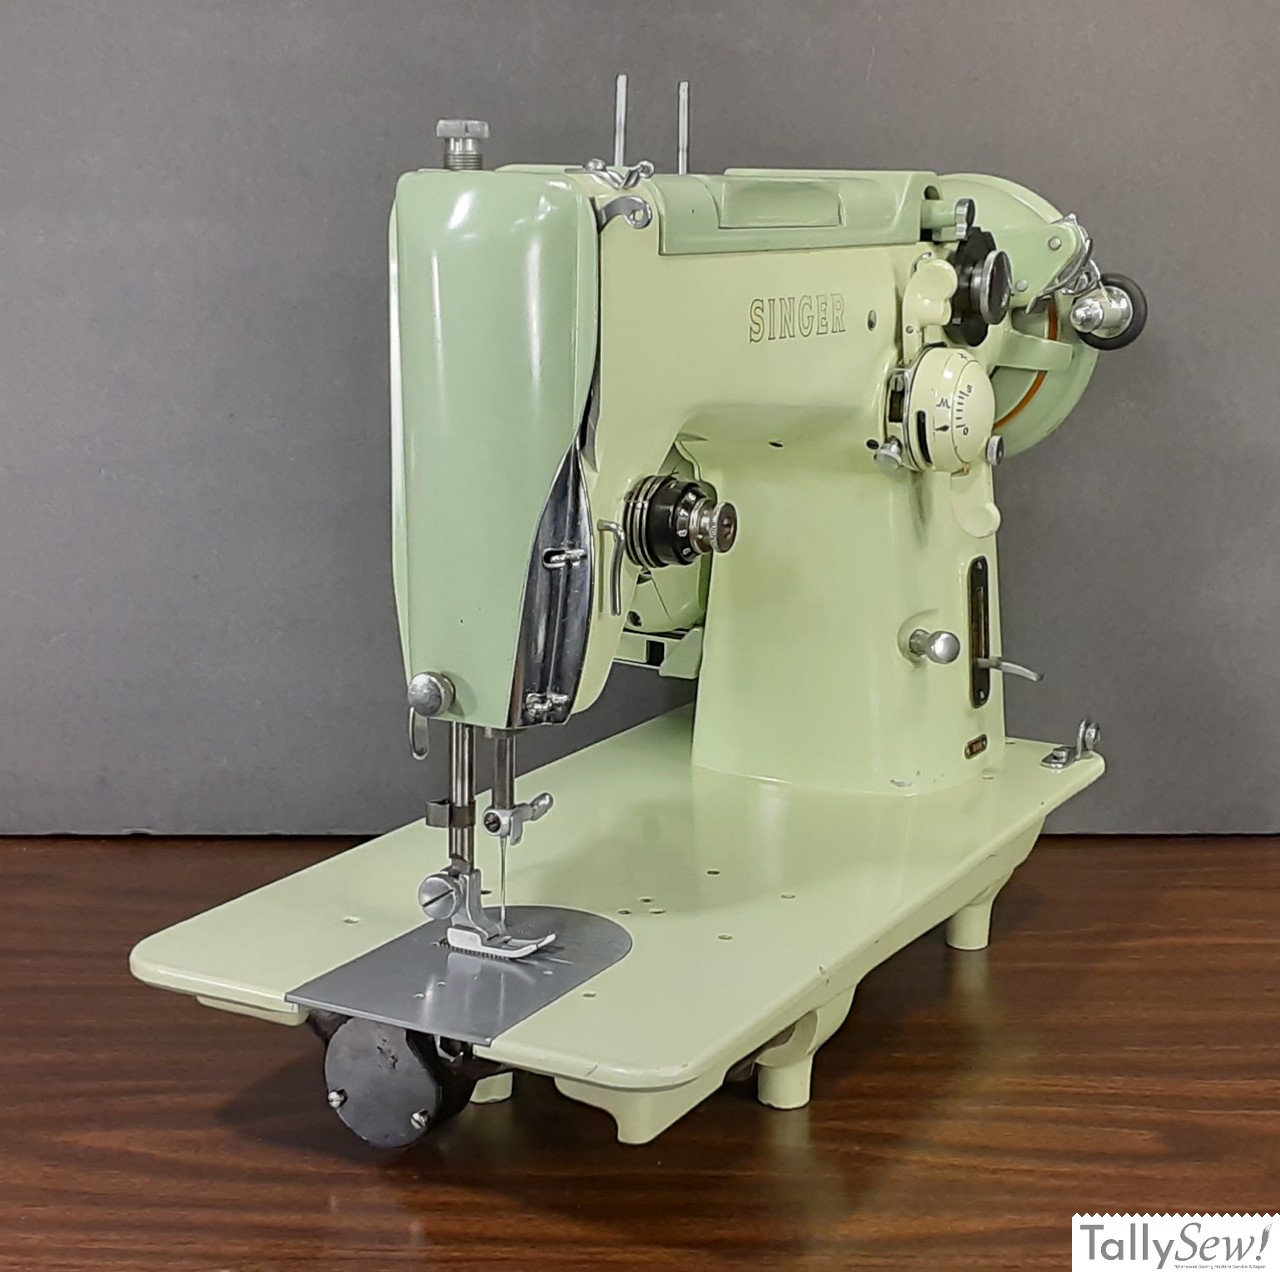
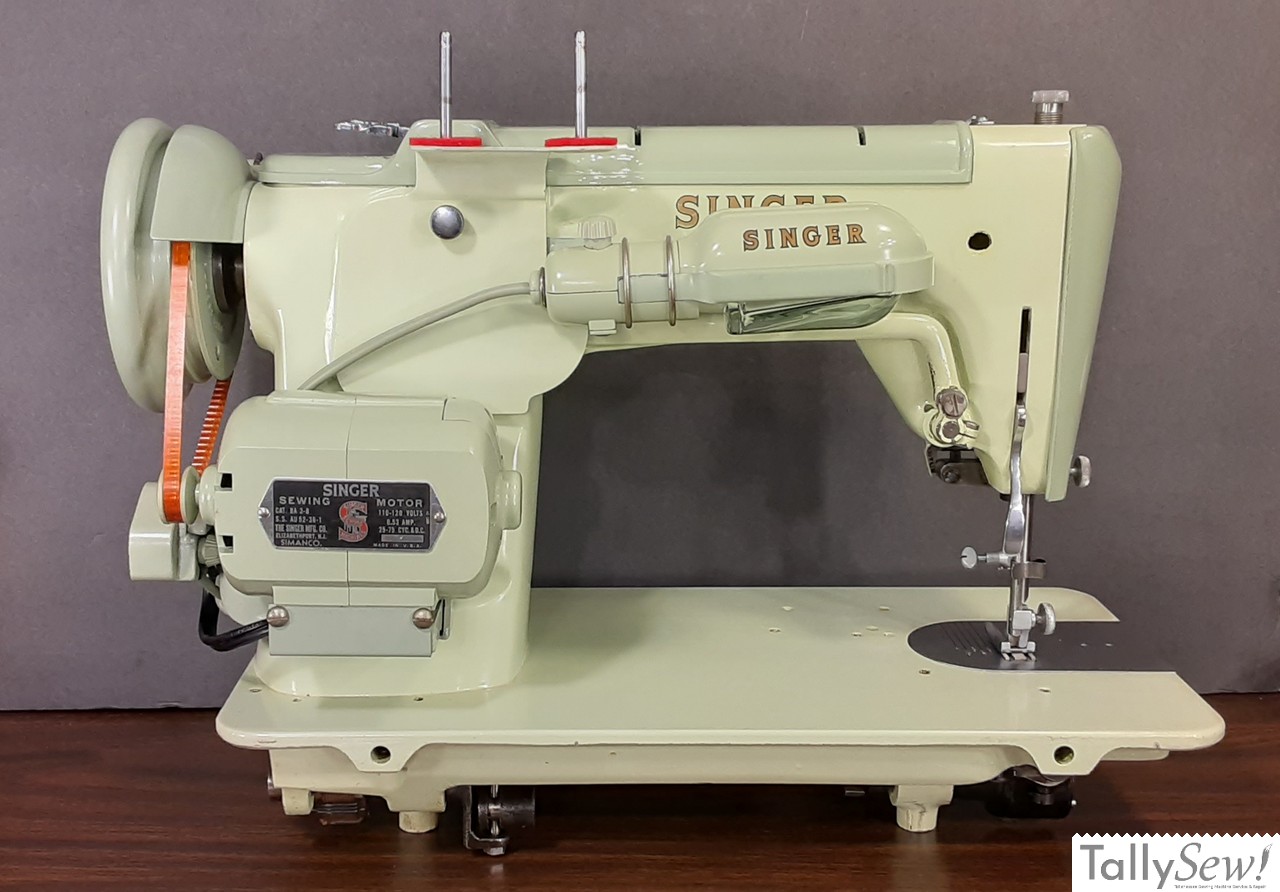
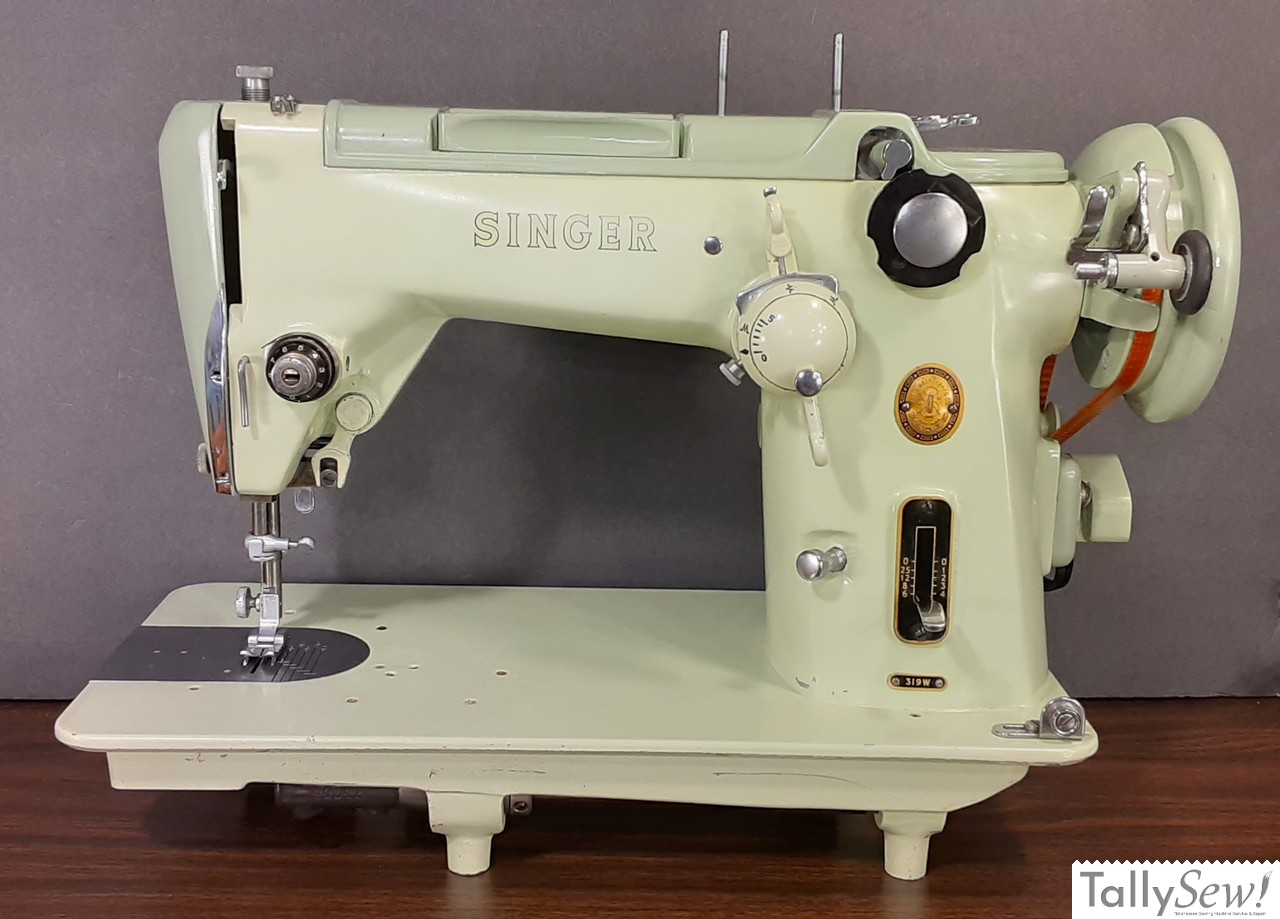
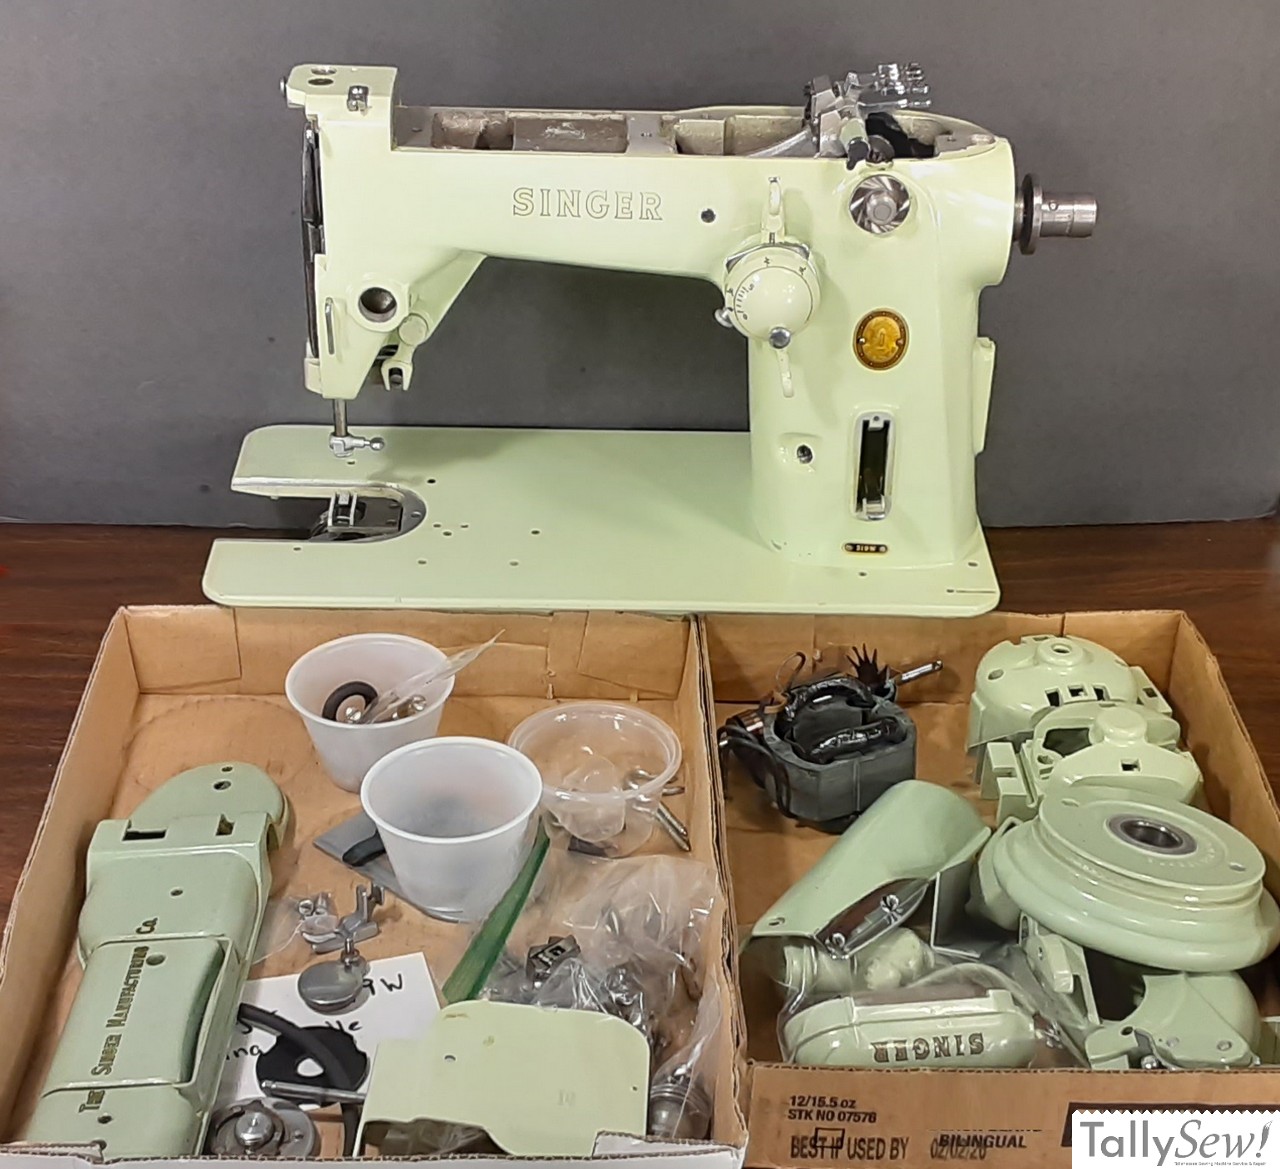
The photos above are of the Singer 319 Swing Needle after a good cleaning and a rewired motor.
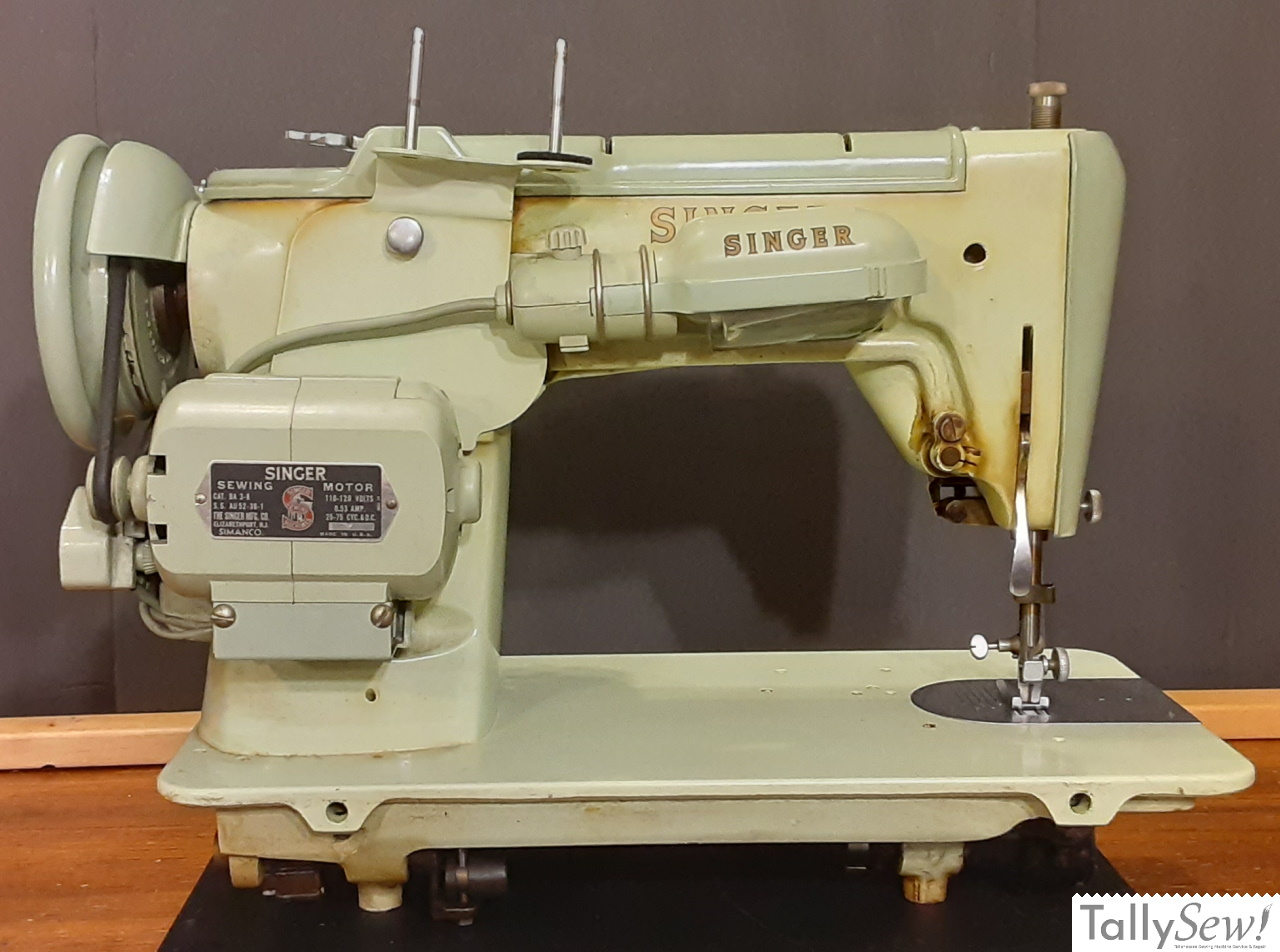
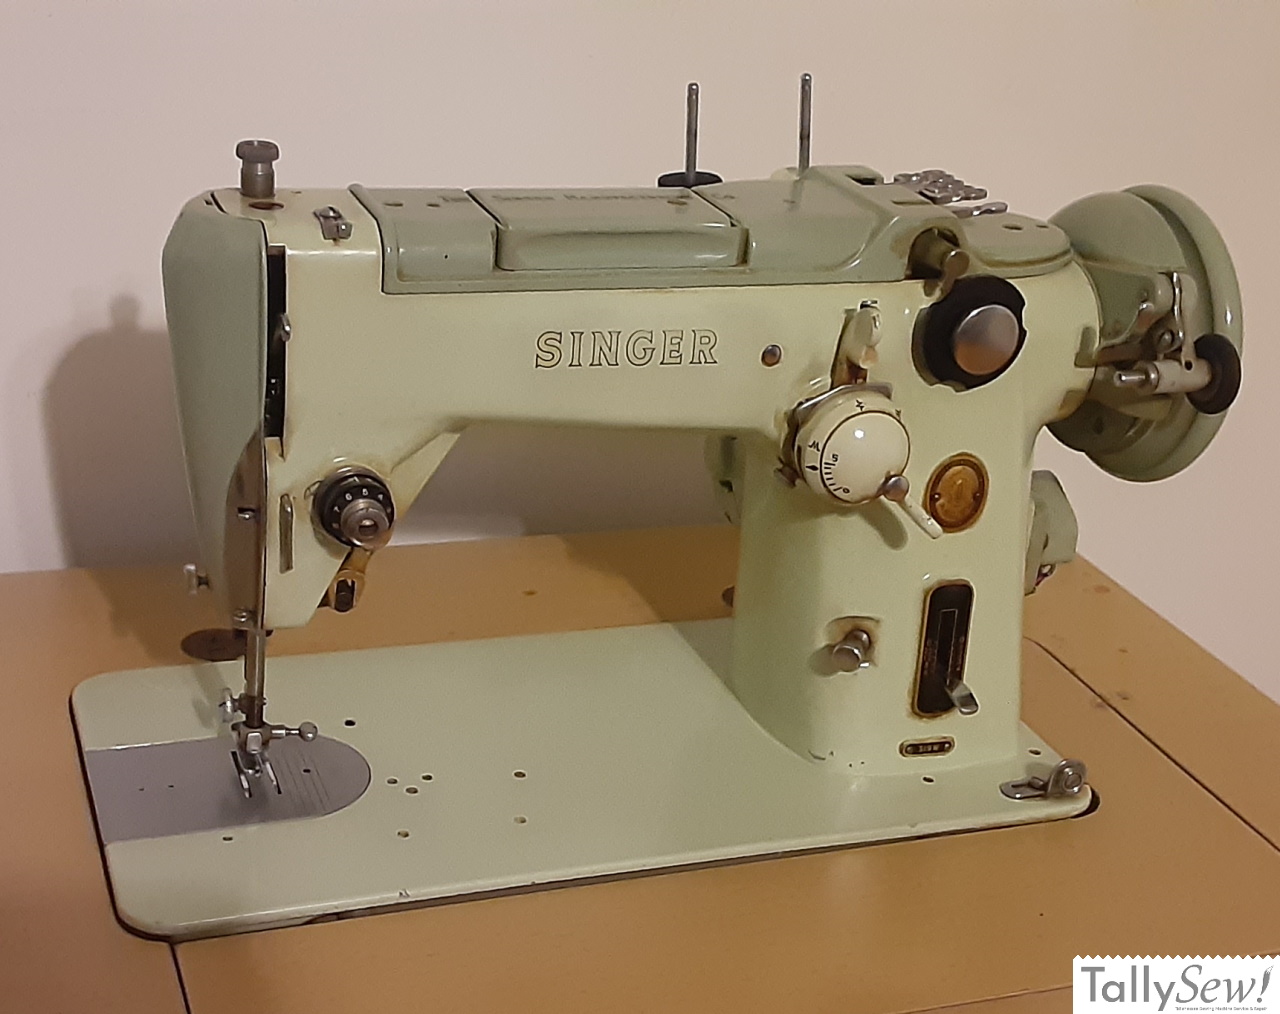
When the 319W arrived in my shop, it had that lovely two-tone green paint. However, that paint seems to attract grime and old oil like a sponge.
About this machine
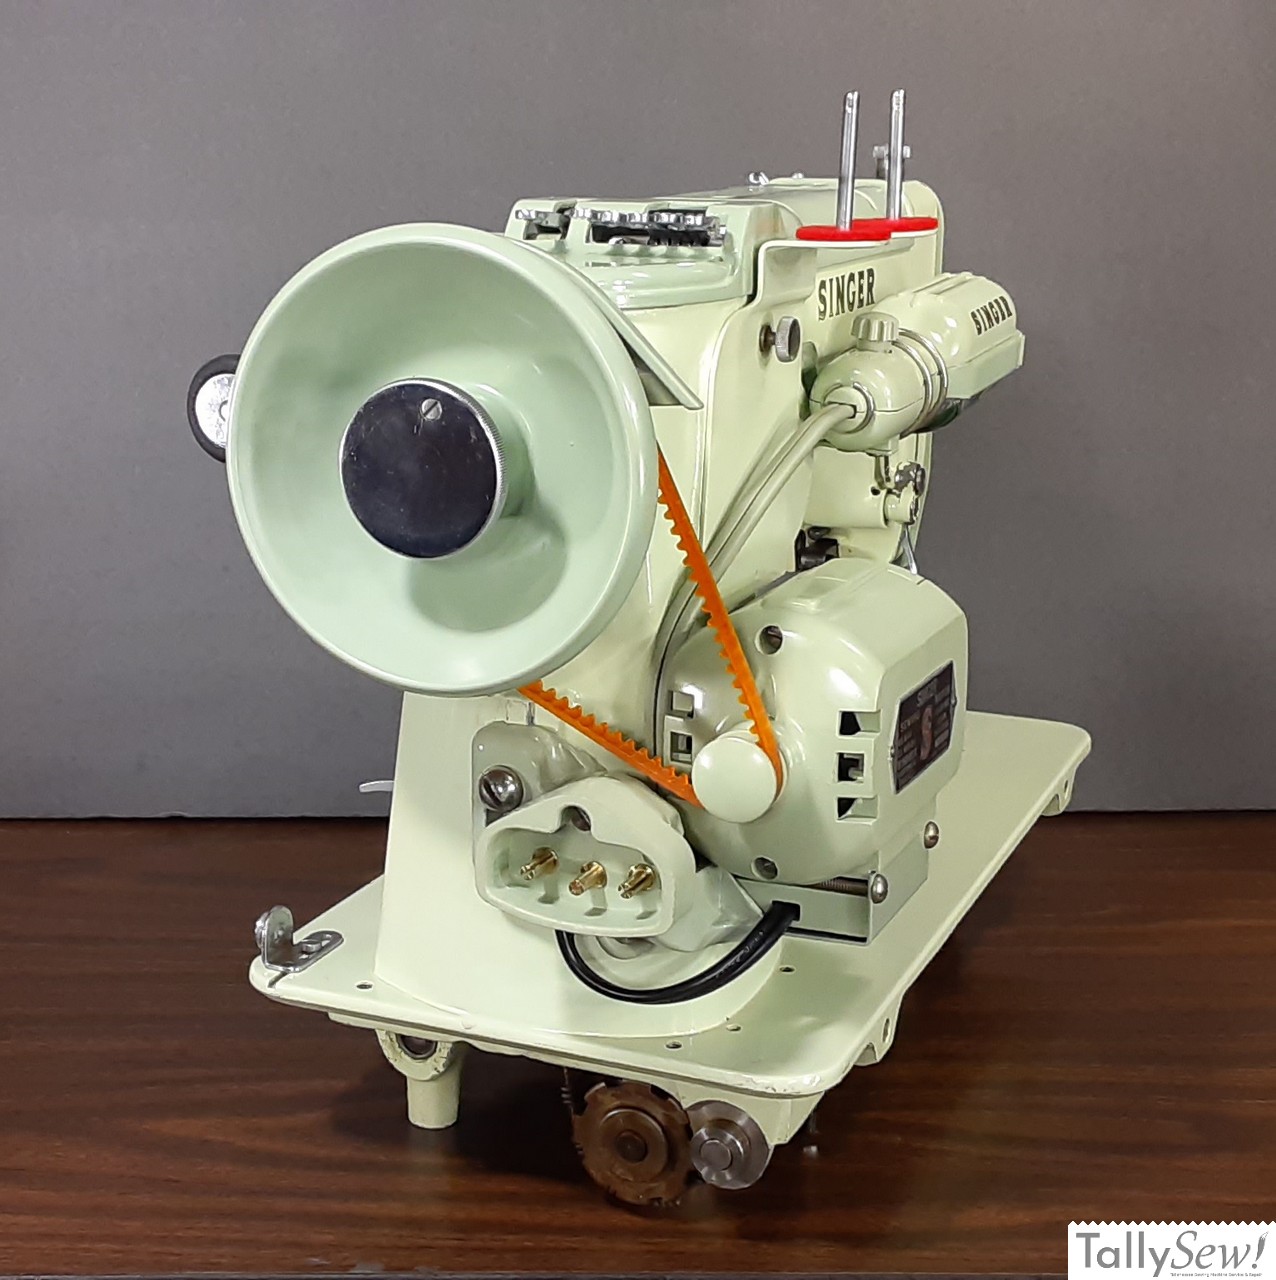
The Singer 319W Swing Needle sewing machine was manufactured in 1956 or 1957 at the Wheeler & Wilson plant in Bridgeport, Connecticut. It features a rotary hook mechanism with a metal cleated cloth timing belt. Inside, there are five plastic stitch cams, and it also has an external mount for an additional cam. The machine comes in a two-tone green color, although other options include brown, two-tone brown, and black. It’s powered by a .53 Amp Singer Motor (CAT. BA 3-8) and includes a green Singer Lamp (CAT.S-4).
Noisy motor sounds good now
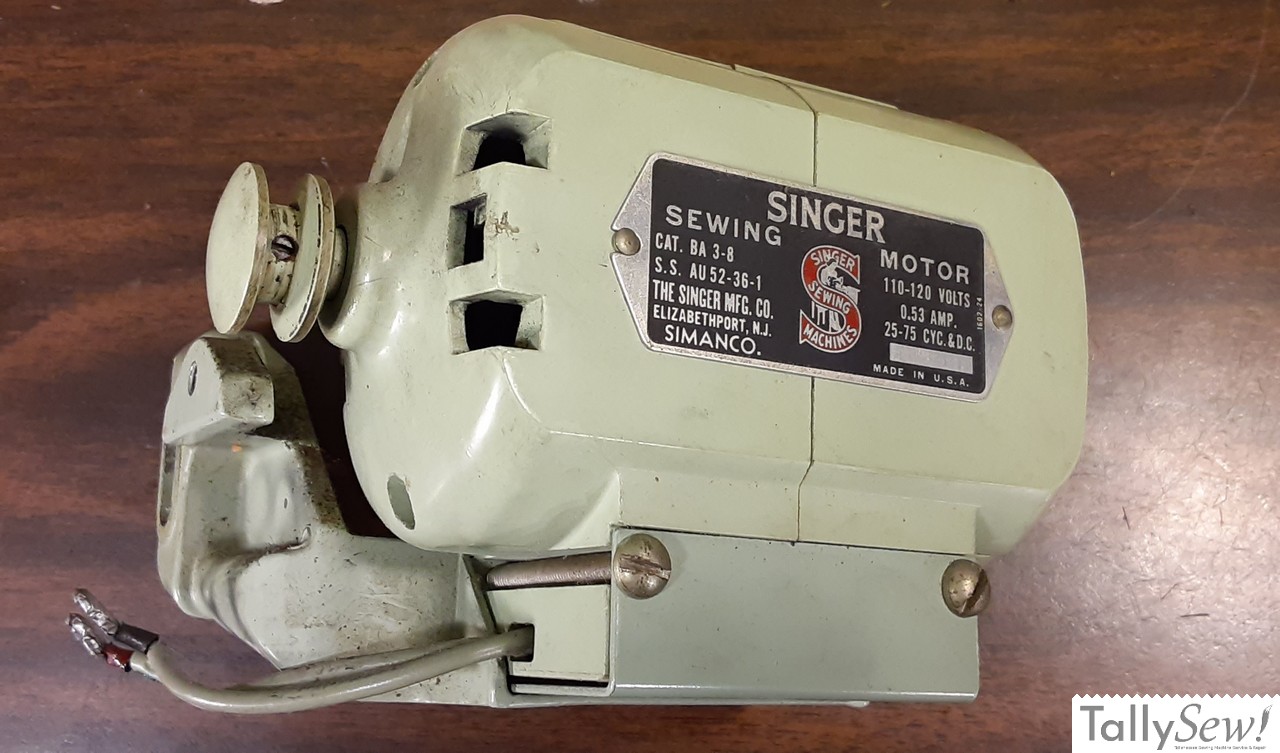
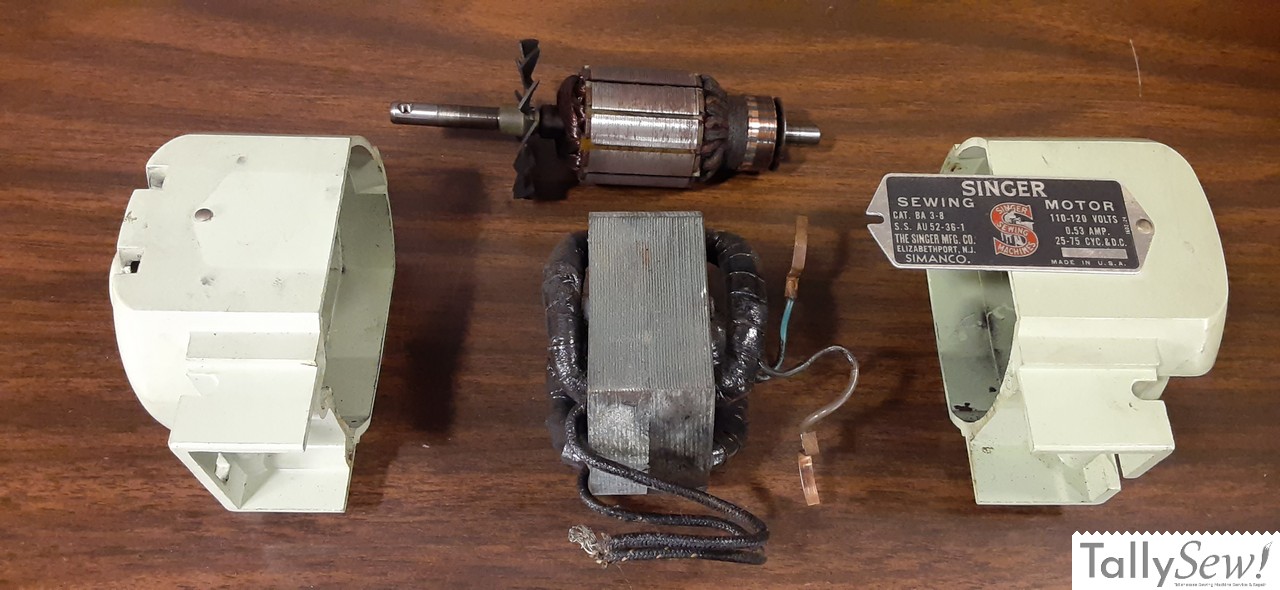
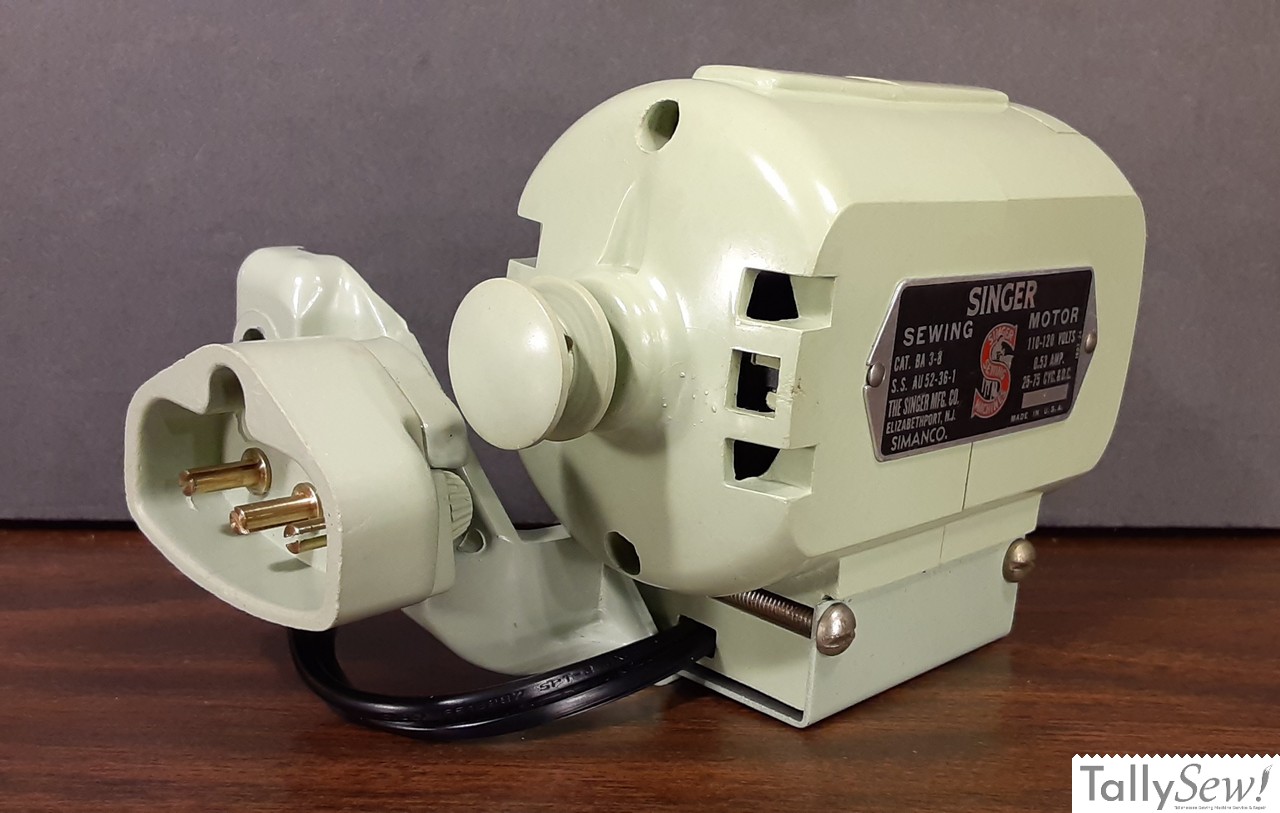
As mentioned, this machine came equipped with the .53 Amp Singer Motor, designated as CAT. BA 3-8. During testing, the motor emitted a sound similar to a cement mixer. Initially, I set the motor aside, planning to find a replacement. Between purchasing the machine and starting the actual repair work, I had the opportunity to work on several motors with a similar design. Interestingly, some of these motors sounded poor before rebuilding but improved afterward, while others showed no improvement regardless of efforts. In summary, I proceeded to clean this motor, and fortunately, it performed strongly.
The BA 3-8 is one of the easier Singer motors to service due to its modular design. However, this specific model lacks provisions for lubrication. The solid bearings were originally impregnated with lubricant during manufacturing, but over 50+ years, that lubricant has been depleted. Consequently, the motor shaft and bearings experience wear. Since there’s no oil reservoir, it’s essential not to over-oil these motors.
Upon inspection, the motor’s wires were in good shape. I cleaned all the parts and replaced only the wire connecting the motor wires under the motor to the machine plug.
Singer Lamp CAT.S-4 Green

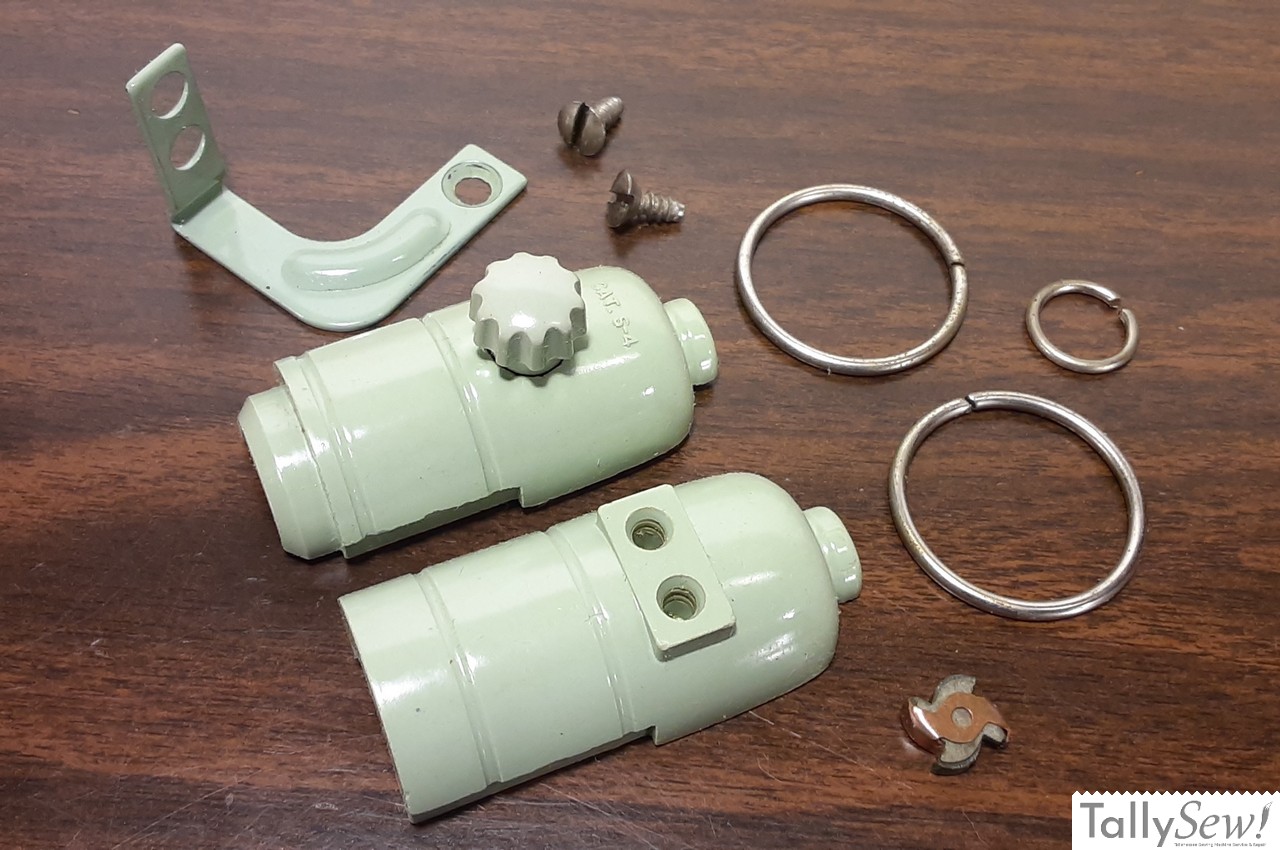
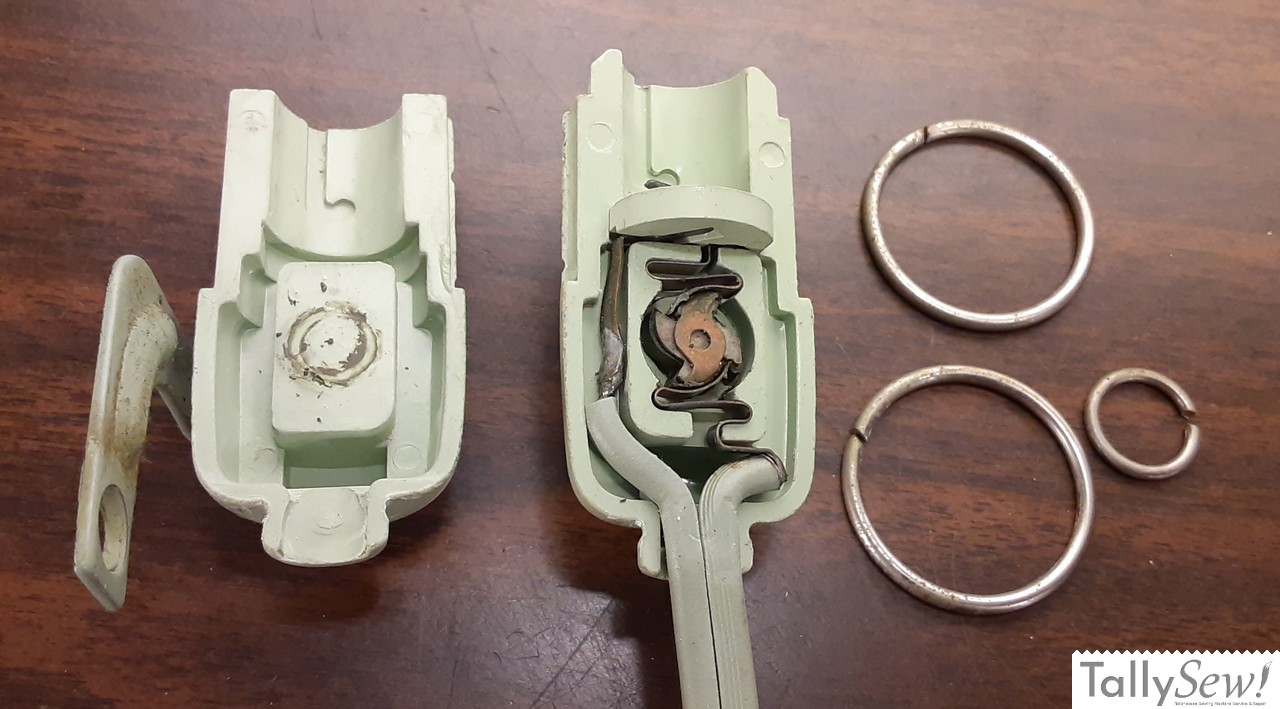
The CAT S4 style lamps were standard on many of Singer’s household machines, and it’s a good design. When these lamps do need repair it’s usually to replace derogated wires.
I’ve opened this example up so you can see what’s inside, but since the lamp switch and wires were in good condition I just cleaned and reassembled it.
This lamp uses BA15D bayonet push-in style bulbs, and I highly recommend using an LED replacement.
Sluggish or non functional Zag-Zag
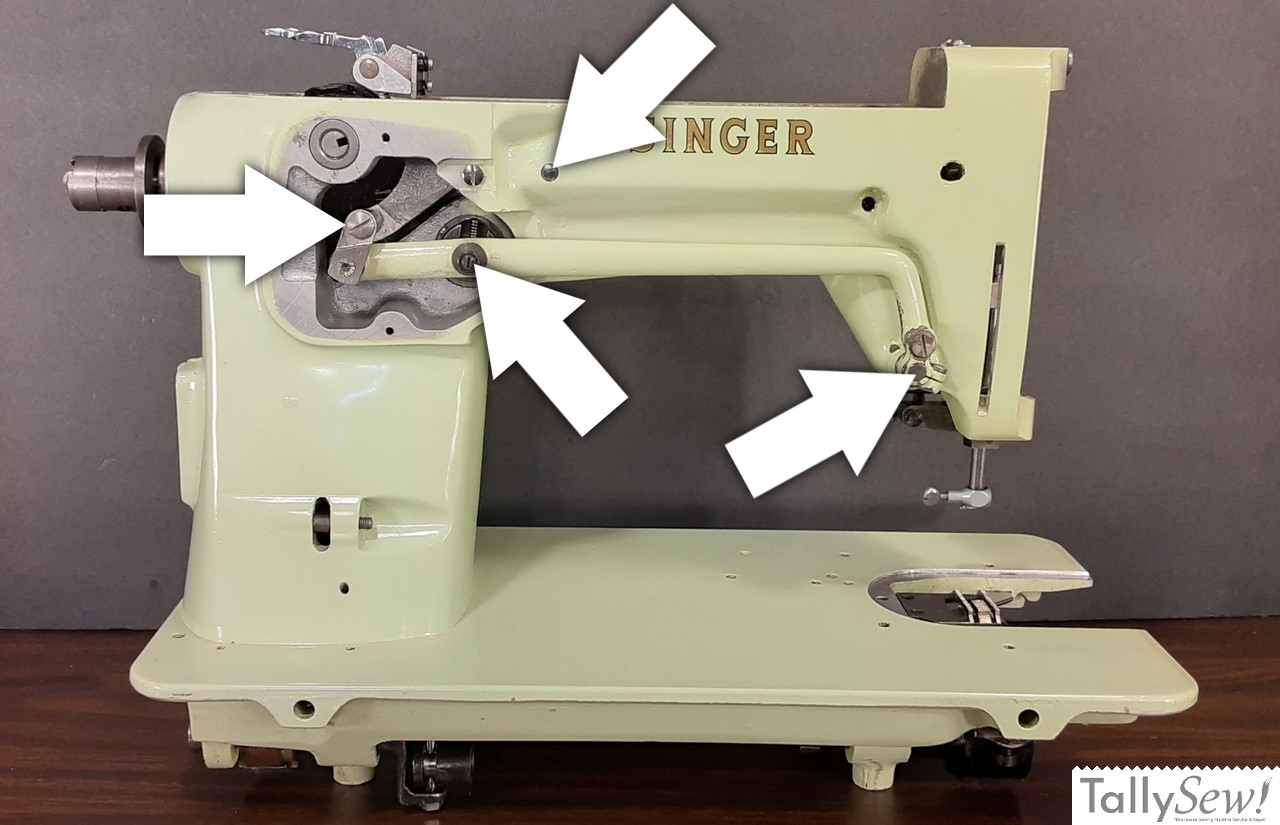
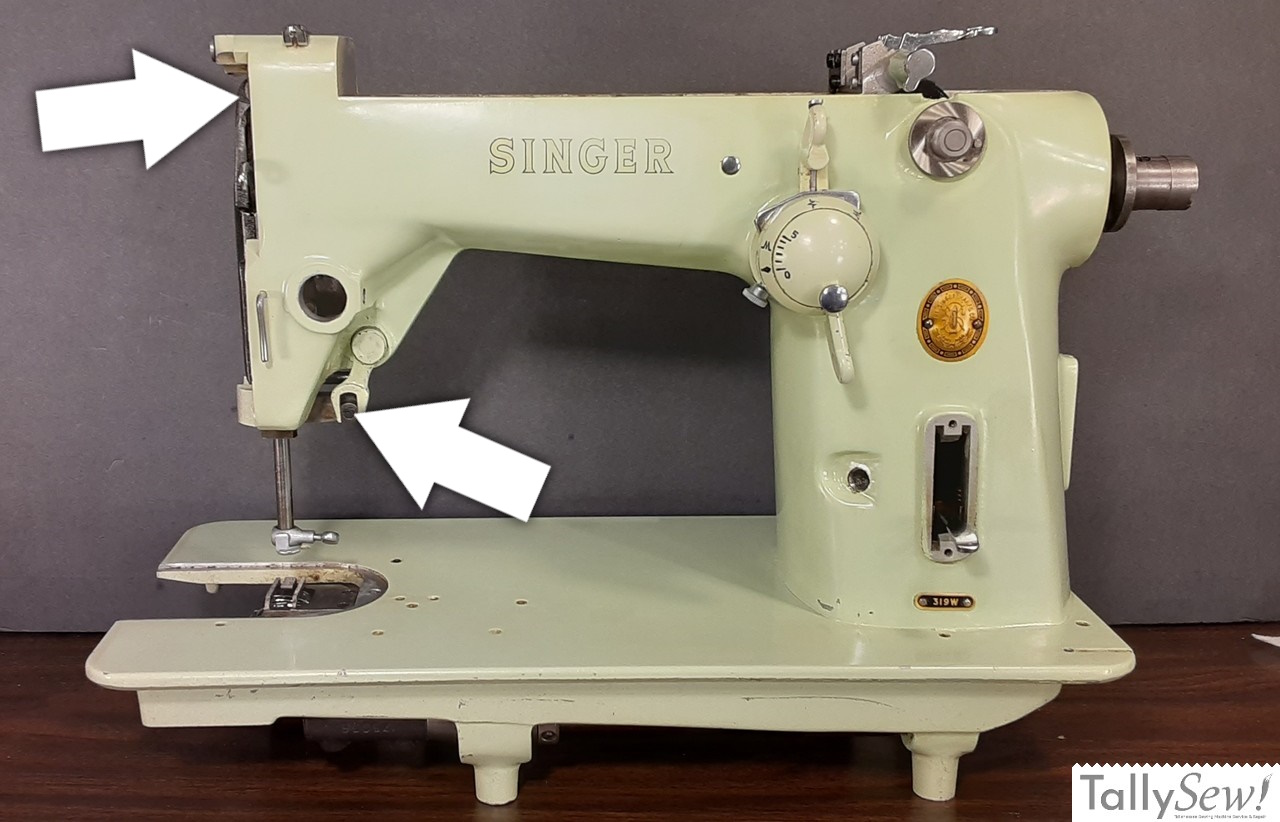
The motion transferred to the stitch cam follower from the stitch cam, also undergoes several directional changes before transferring motion to swing the needle bar back and forth. Unfortunately, some energy is lost due to friction during each of these direction changes, resulting in minimal energy reaching the needle bar. Proper maintenance, including keeping the zig-zag mechanisms clean and well-lubricated, is essential for optimal function.
Semi deep cleaning
Please be aware that if you follow the cleaning method I describe below, you do so at your own risk. I’m sharing the procedure I used on this specific machine, but since each vintage machine has unique history and materials, results may vary. It’s essential to test and decide the best cleaning approach for the specific machine you’re working on. I won’t be responsible for any damage to you, the machine, or other property. Proceed with caution and take responsibility for your actions.

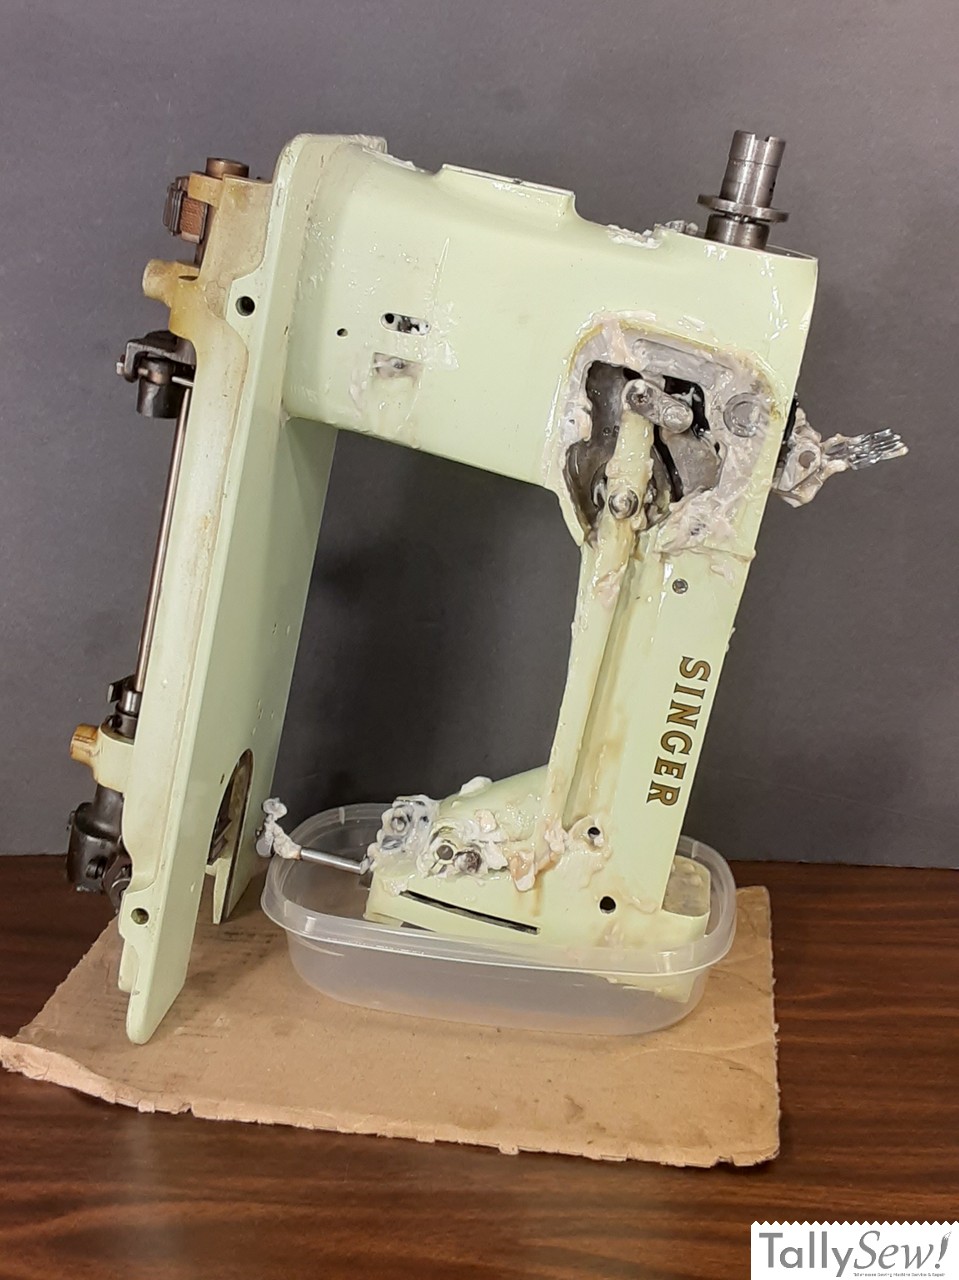
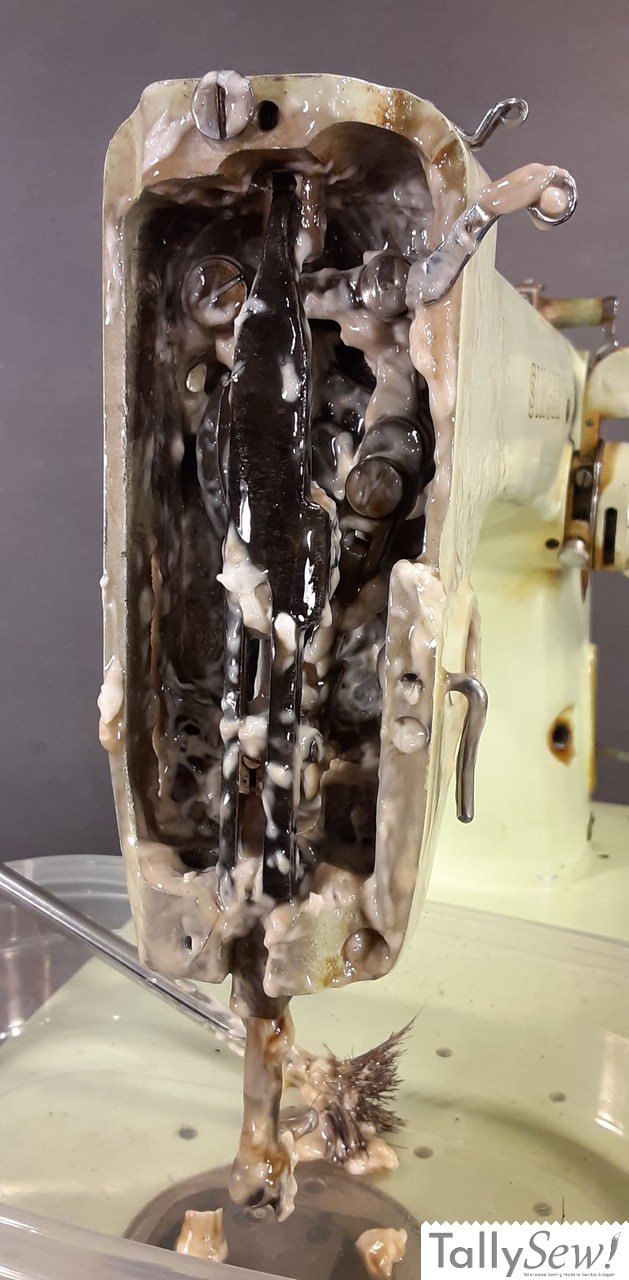
This machine was a mess when I got it. It had been well loved and used for many years, but after that it had been sitting in it’s cabinet untouched for a very long time.
A few notes before I go into how I cleaned this machine.
- Disconnect the machine from the wall plug, and disconnect the power and control wire(s) from the machine.
- Wear protective gloves and eyewear throughout the cleaning process.
- Don’t remove anything from the machine you don’t already know how to reinstall and adjust.
- Remove both the motor and light fixture from the machine before starting the cleaning process.
- Do not get Non-pumice mechanics hand cleaner, sewing machine oil, or anything else on the timing belt.
- Non-pumice, mechanics hand cleaner may/will damage or remove the finish and decals from your machine.
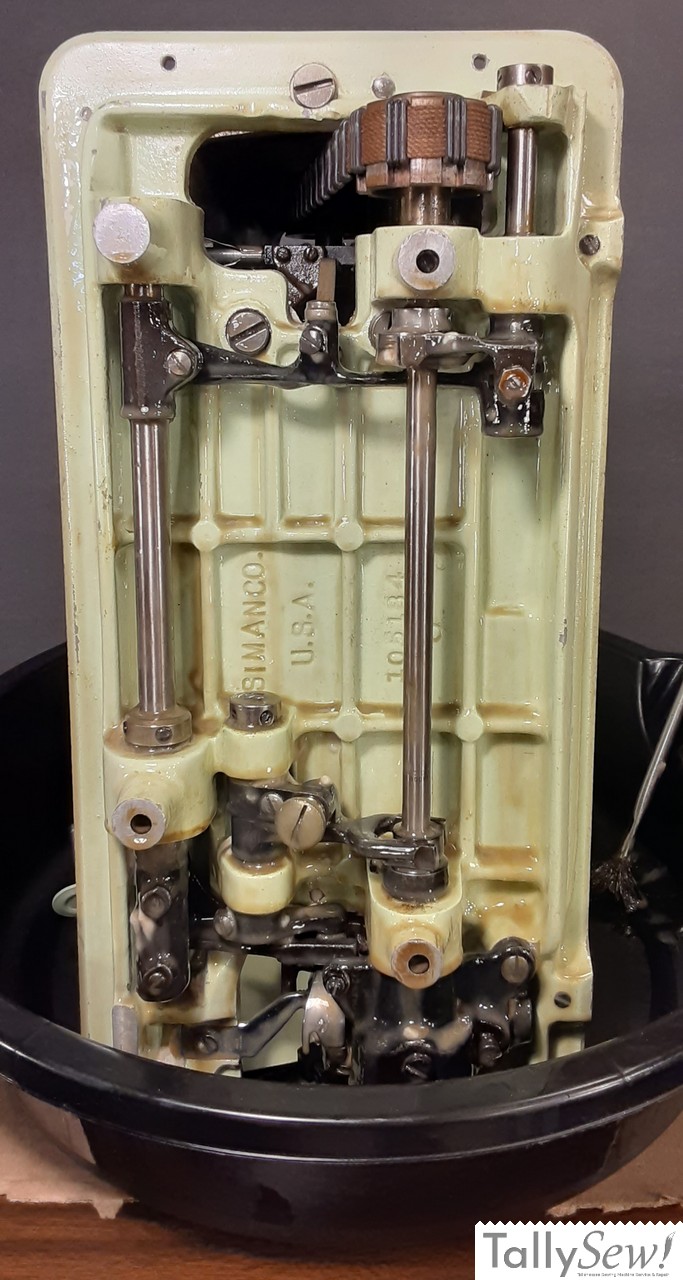
You may have noticed that I have the machine positioned oddly in the gallery above. This is done to keep the cleaning agents away from the timing belt that connects the main (top) driveshaft to the hook (lower) driveshaft.
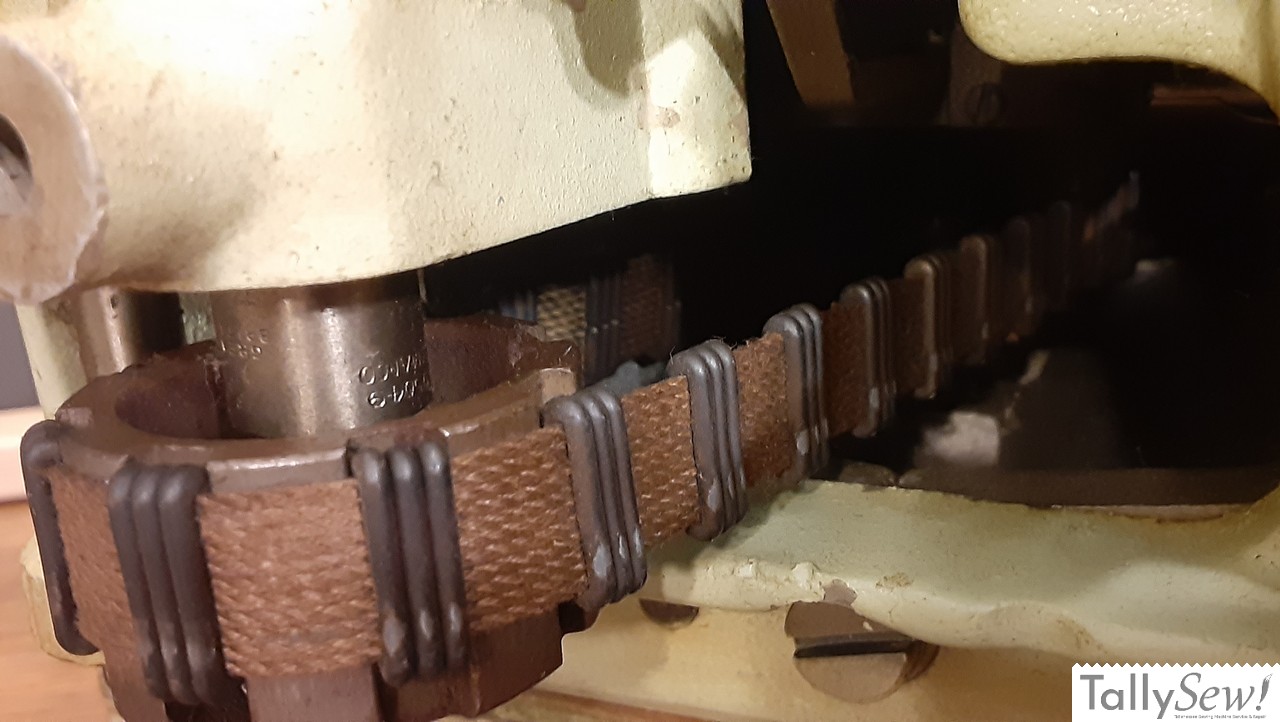
The original timing belts are made of a continuous cord with metal cleats that fit the upper and lower cogged wheels. You need to keep oil and cleaning agents off of these belts since it may cause deterioration. Even if your machine has a replacement belt made of some material other than the original, it’s a good idea to keep it free of oils and solvents.
Another reason to control where the cleaning agents go as gravity moves them, is to protect the finish (in this case Green), and the decals on the front, back, and top of the machine.
You will also need to make sure you have the machine set in a container to catch the cleaner as it drips off of the machine, and it’s a good idea to put something under the machine to keep the finish out of the cleaner in the catch container.
Cleaning solution
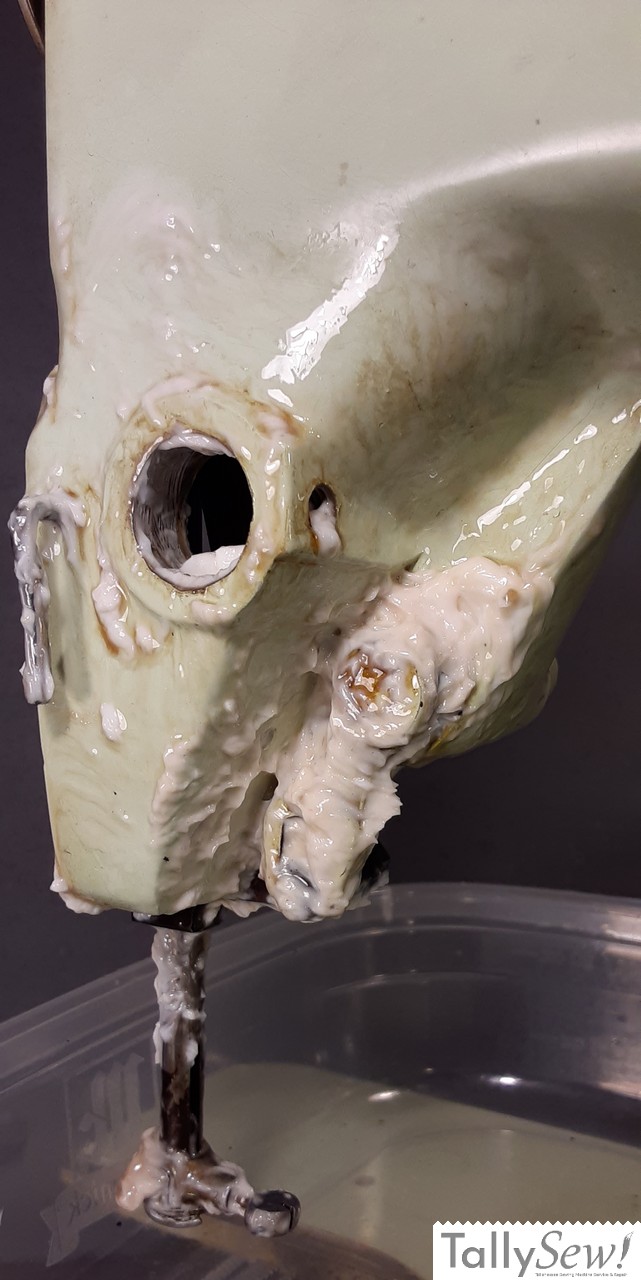
I use a non-pumice mechanics hand cleaner, commonly known as ‘Go-Jo.’ It’s essential to avoid cleaners containing pumice or citric acid. Even the regular mechanics hand cleaner without pumice or citric acid can harm your decals and potentially damage the machine’s finish. Please proceed with caution.
Do not put the cleaner on the decals, or let it drip onto them.
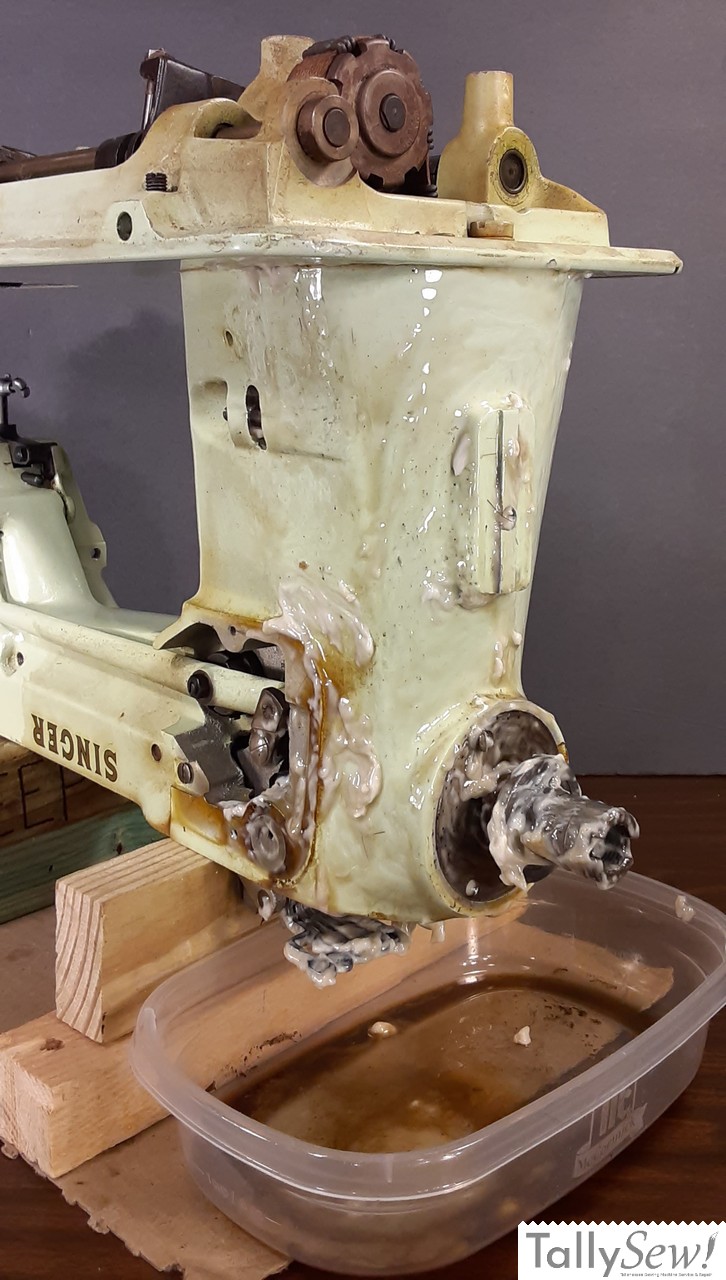
Do one section at a time
I position the machine so that as the cleaner dissolves it does not go near the timing belt or pool on the machine finish. I use a small acid brush to generously coat the section I’m working on.
If the section you are cleaning is under the base of the machine, on inside the needle bar area, then you can leave the cleaner on overnight. Make sure that you’ve set up something to capture the cleaner as it drips off. Since the underside of the machine is so large, I use a plastic oil drip pan from an auto parts store when I’m cleaning that area. You can put a plastic food container under the needle bar area when cleaning that.
Bobbin case and bobbins
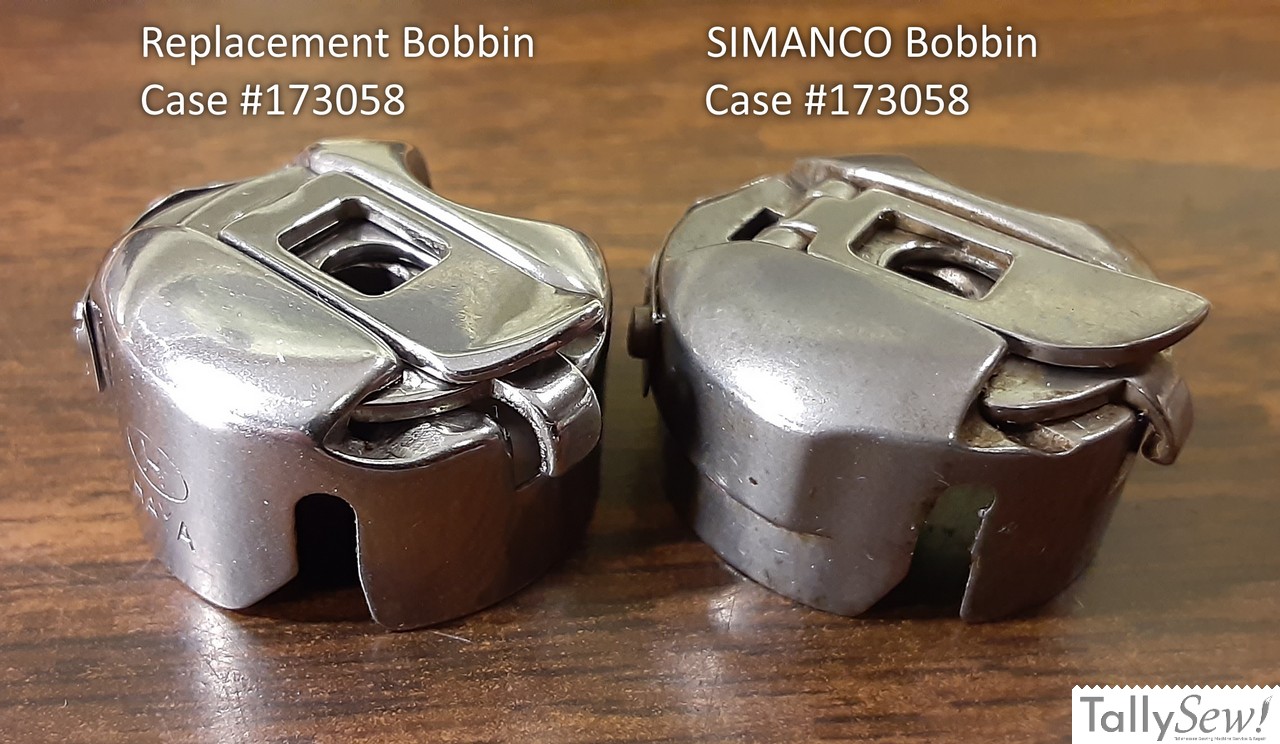
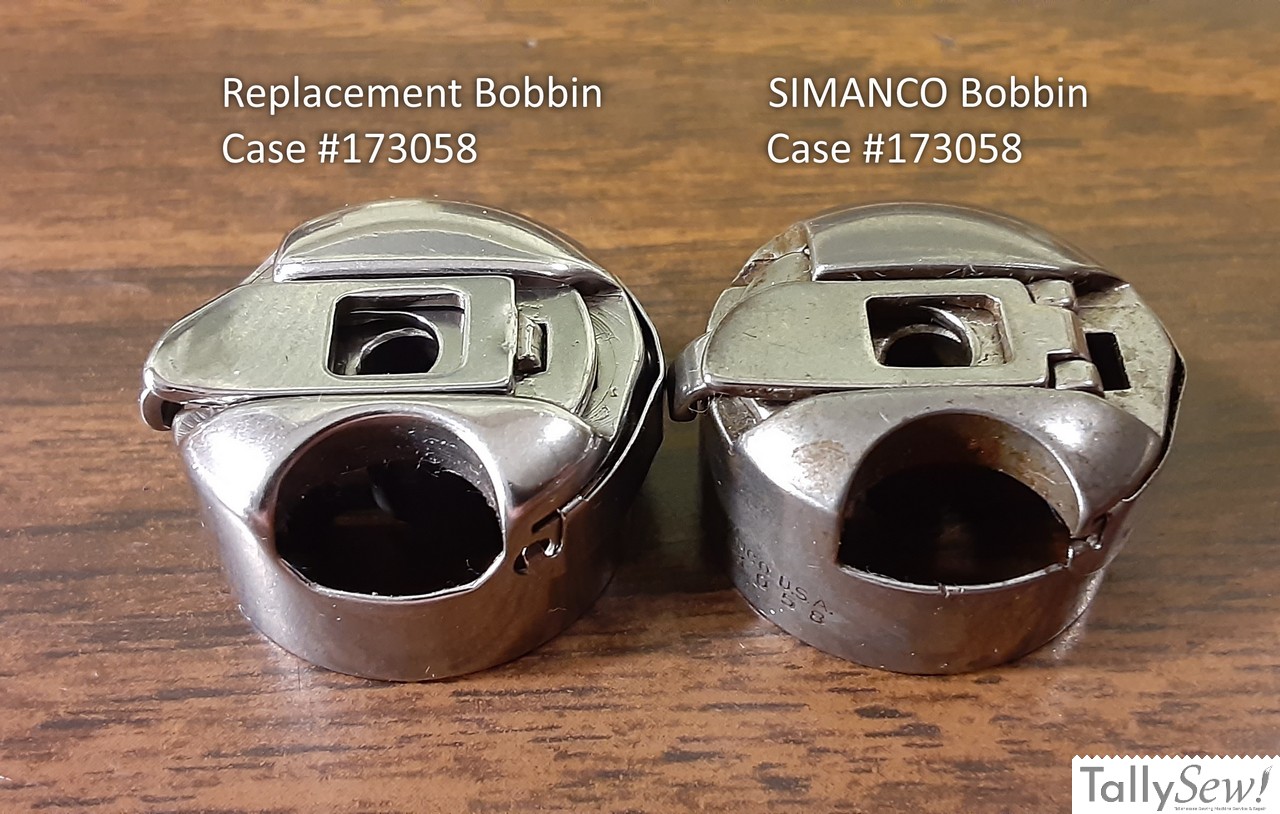
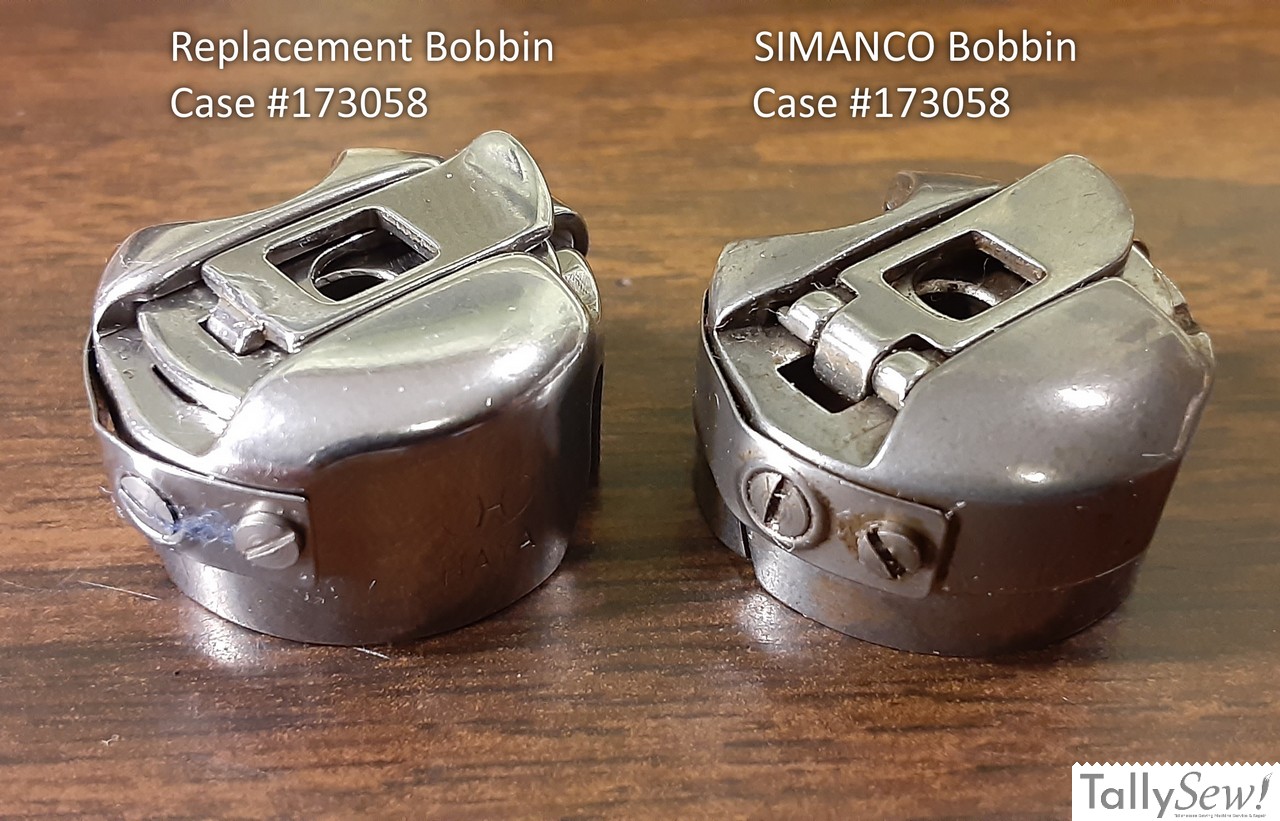
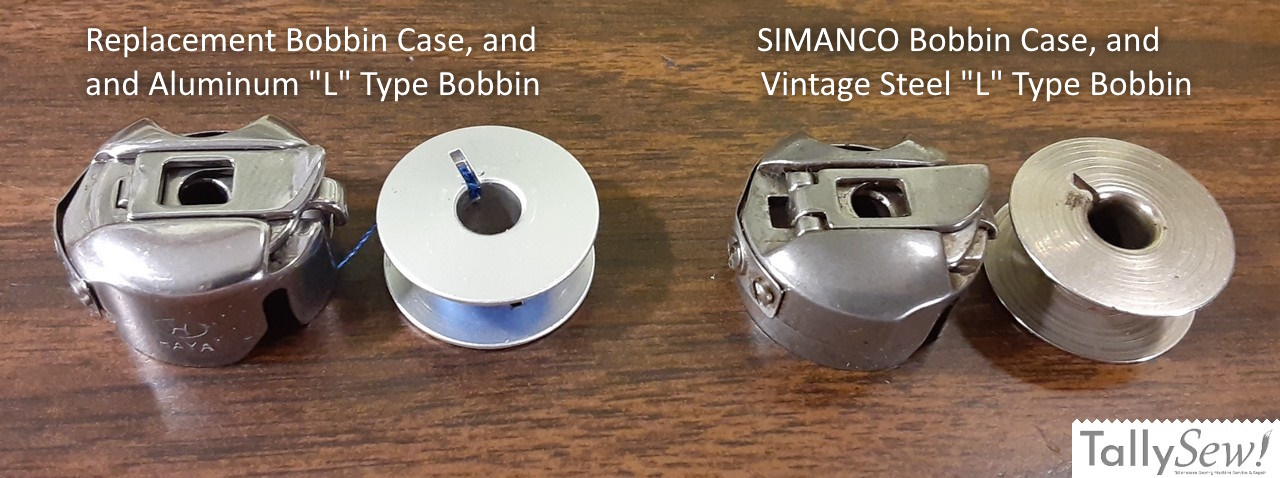
The Model 319 uses bobbin case SIMANCO part number 173058. This case has slot in the side of the case in the 5:00 position for the single guide pin in the hook carrier. Aftermarket replacement bobbin cases are available using the 173058 part number. The replacement bobbin case in the gallery above was manufactured by “HAYA”. This is the only aftermarket bobbin case I’ve tried in this machine, but it works without issue.
The unbranded aluminum bobbins work fine for sewing, but don’t fit the 319 bobbin winder post (the hole is too small), and won’t allow the bobbin winder release arm to close properly (space between sides is too narrow). You can modify them to work, but they really aren’t worth the effort.
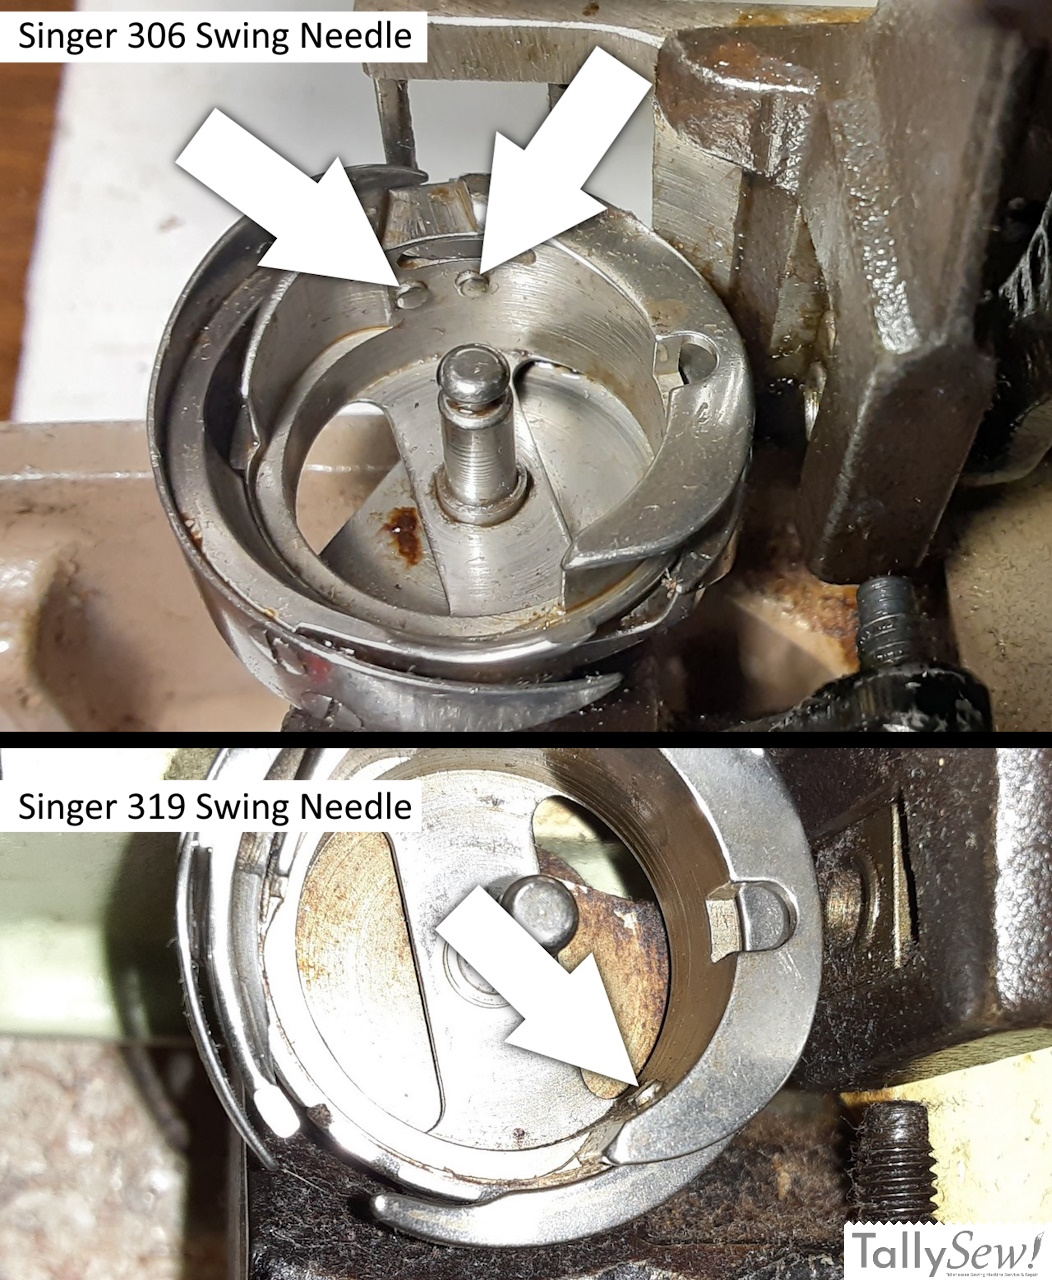
Vintage bobbin cases and household 15×1 needles…
The Singer Swing-Needle machines (206,306,319,320) are all designed to use the 206×13 style needles. The difference between the standard household 15×1 needle and the 206×13 needle is that the distance between the hole in the needle and the point of the needle is shorter on the 206×13 needles. The distance from the top end of the needle to the hole in the needle is the same for both.
The difference between these two needle systems is only relevant at wide to full width zig-zag because the slightly longer 15×1 needle can collide with the bobbin case. 206×13 system needles are still available, but they are more expensive and the selection of size and type needle is more limited than it is for the 15×1 system needles.
If you’re just using the machine for straight stitch, you can simply use 15×1 needles… Just remember to swap back to 206×13 system needles for zig-zag.
Suggestion: Tape your 206×13 needle to your zig-zag throat plate so you’ll remember.
I bought the replacement 173058 bobbin case because it was suggested that the new bobbin cases are manufactured with clearance built in to allow the use of 15×1 needles. I tested the replacement bobbin case and found that I could indeed use 15×1 needles at full width.
I decided to carefully test to see if my original 173058 SIMANCO bobbin case would get in the way of the needle, and to my surprise, it didn’t.
Though I’m able to use my original bobbin case at full width zig-zag, you shouldn’t expect the same results.
My guess is that either my original bobbin case was modified, or the machine has been adjusted to limit the zig-zag width to allow the use of household needles. I’ll update the article if/when I figure it out.
Safety goggles required!
Whether you’ve purchased a bobbin case advertised as being able to use household needles, or you’ve purchased a modified bobbin case, or even if you just want to see if your machine will function using 15×1 system needles, be very careful. Start each test by slowly turning the hand wheel by hand and checking for any interference between the needle and bobbin case. Even after you’ve tested, you need to be very careful because that needle may not land in the same position when the motor is moving it.
Specifications
| Brand | Singer |
| Model | 319 Swing-Needle |
| Manufactured By | Singer |
| Years Produced | 1956-1961 Includes the 319K and 319W |
| Hook Type | Rotary Hook |
| Bobbin | Type “L” |
| Needle System | 206 |
| Motor Belt Size | MB390 |
| Foot Type | Low Shank |
| Construction | All metal except for stitch pattern cams |
| Construction Drivetrain | All metal |