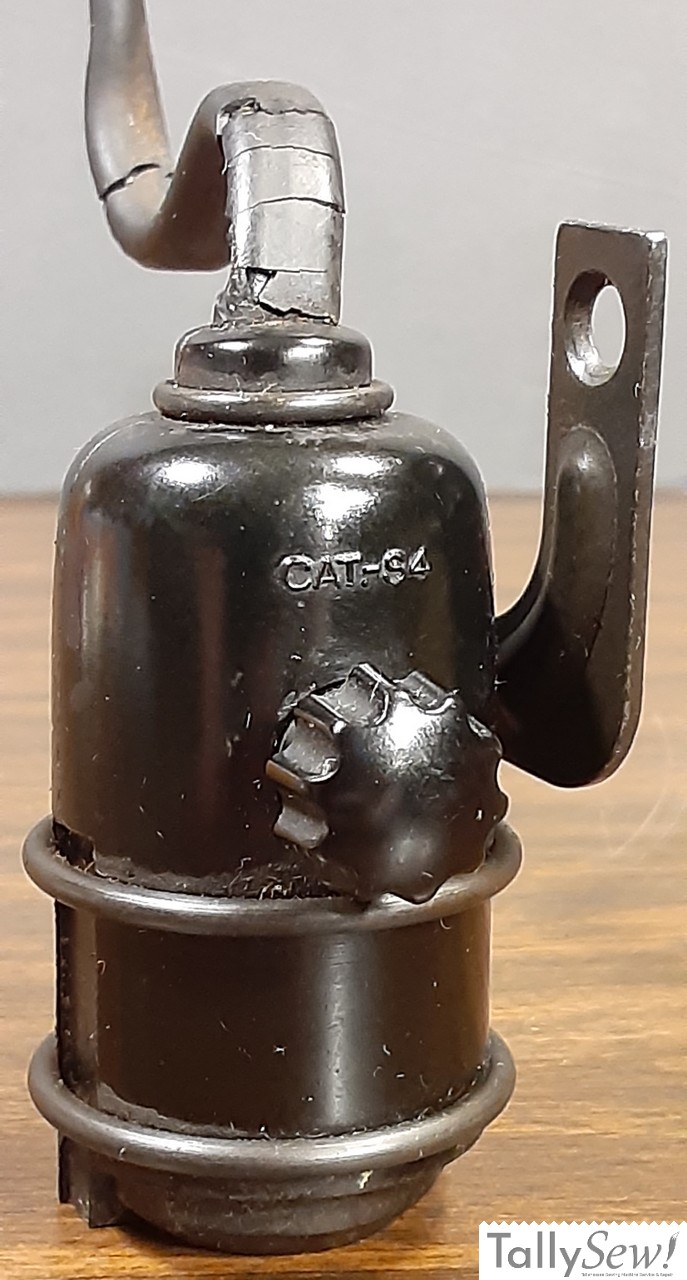
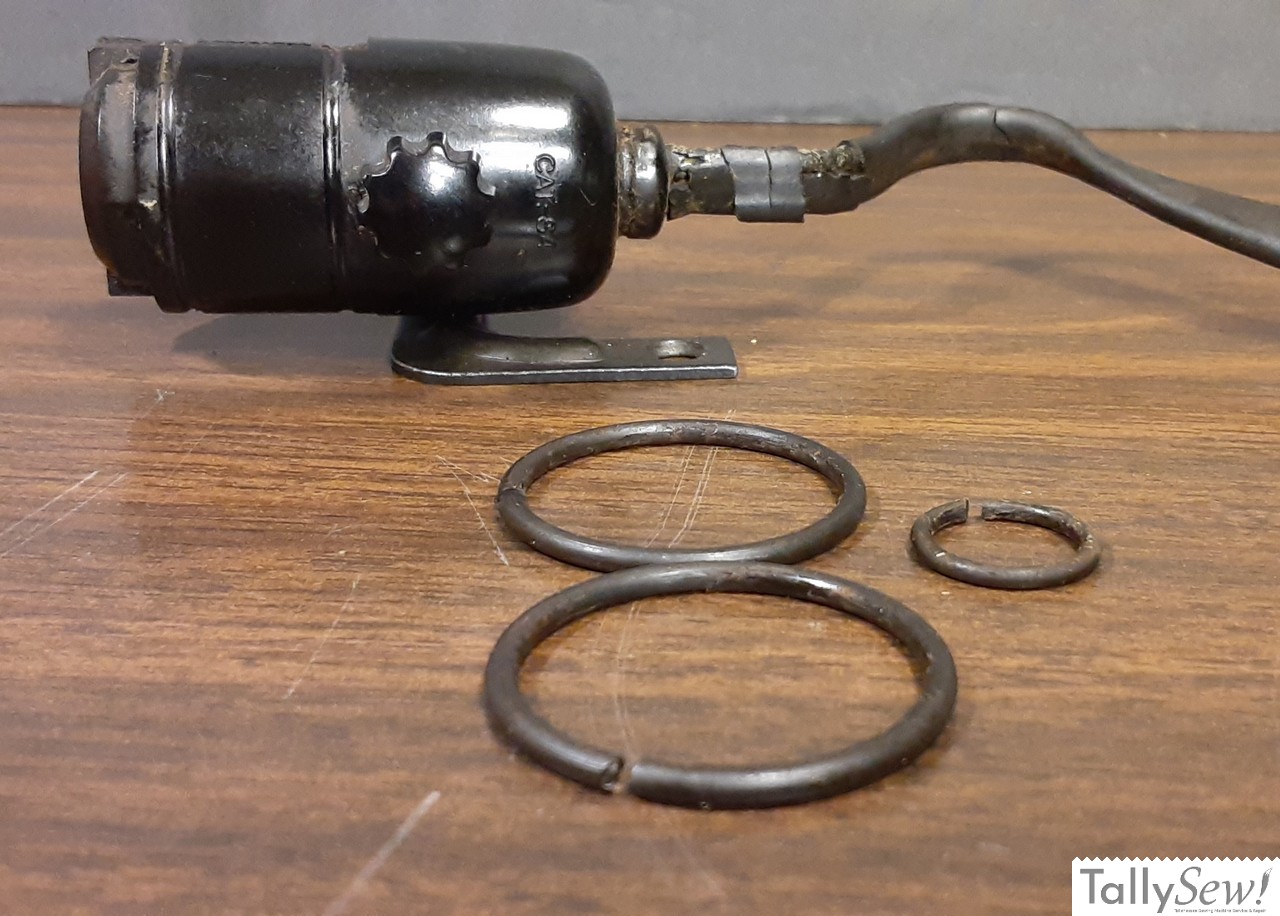
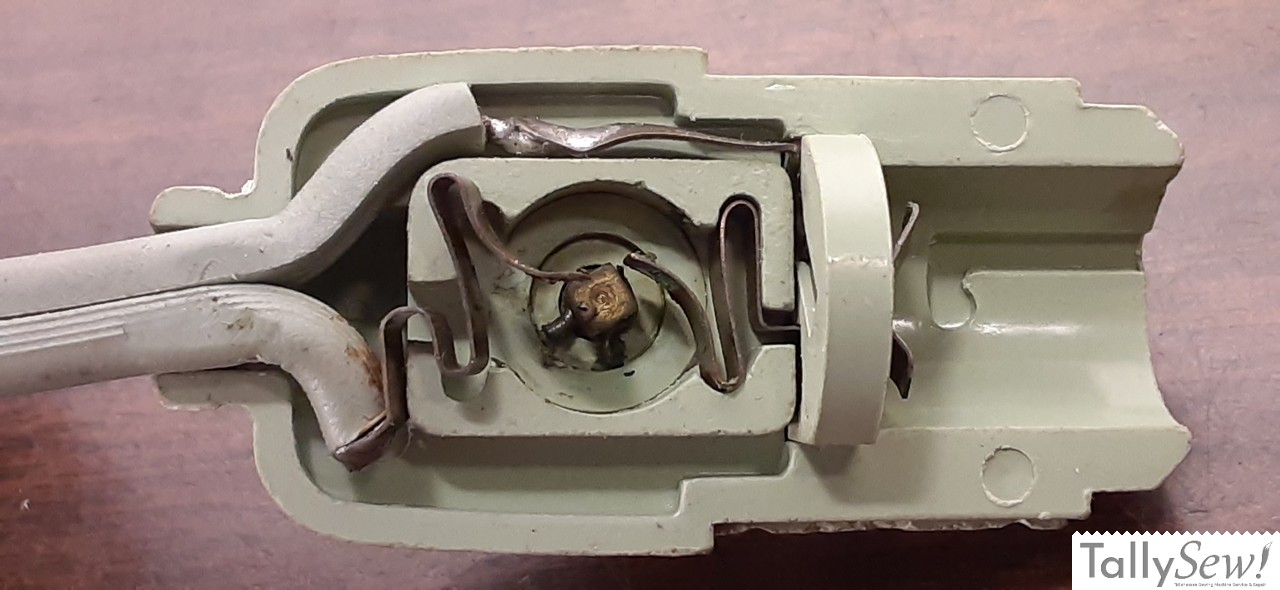
Singer CAT.-S4 lamp
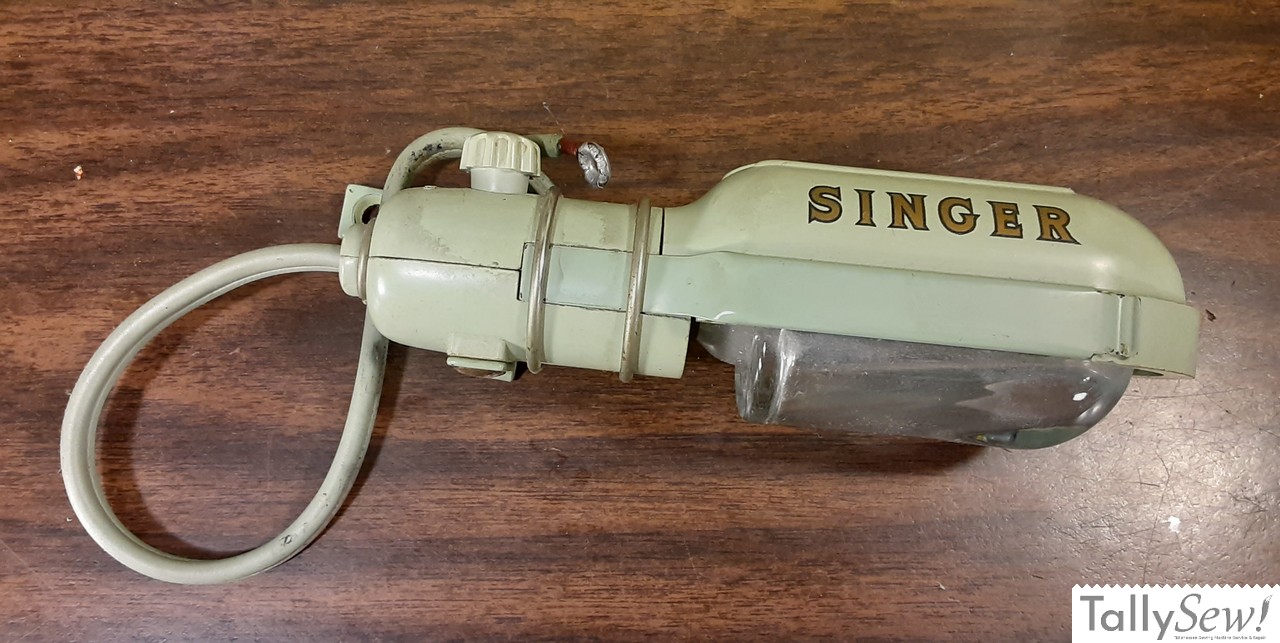

The Singer lamp model CAT.S-4 was used on several Singer sewing machine models. It was usually black, but was also produced in green, and in brown. The example above is from a green Singer 319W Swing-Needle.
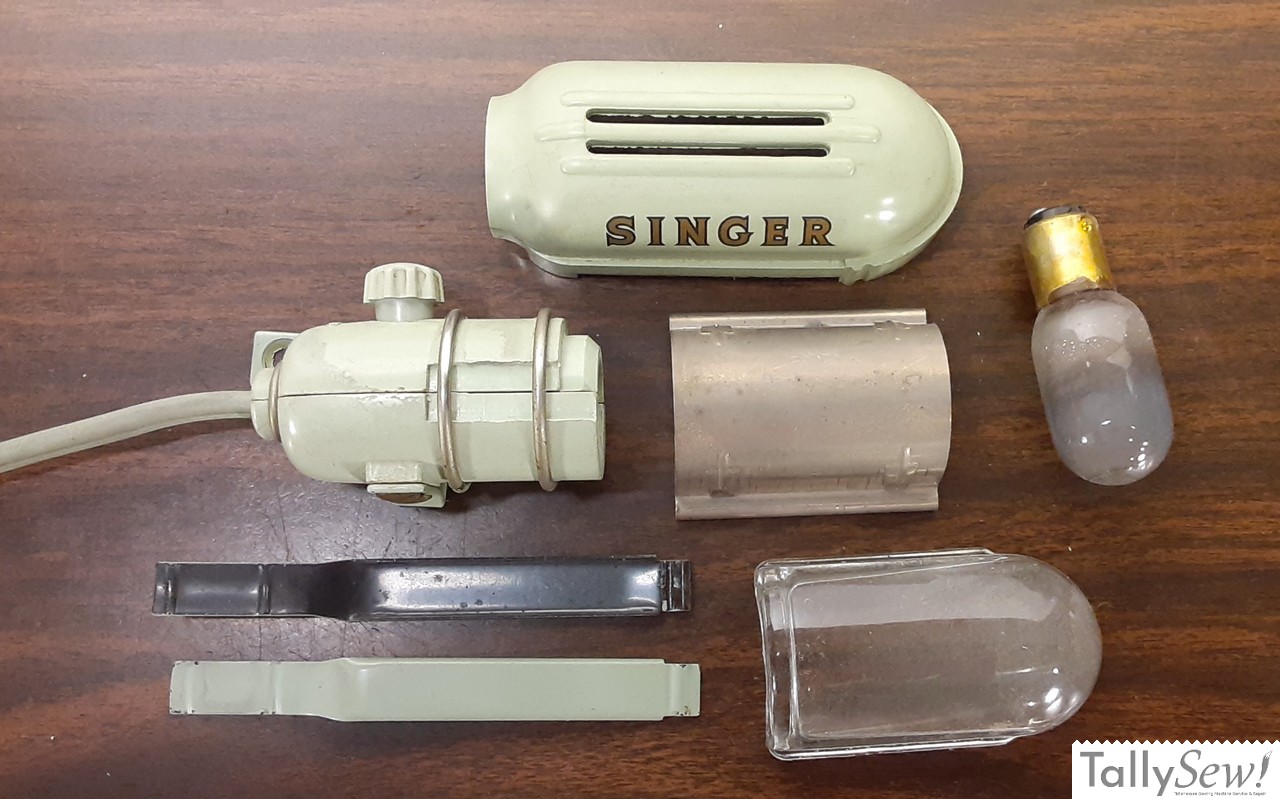
Removing the shade and lens
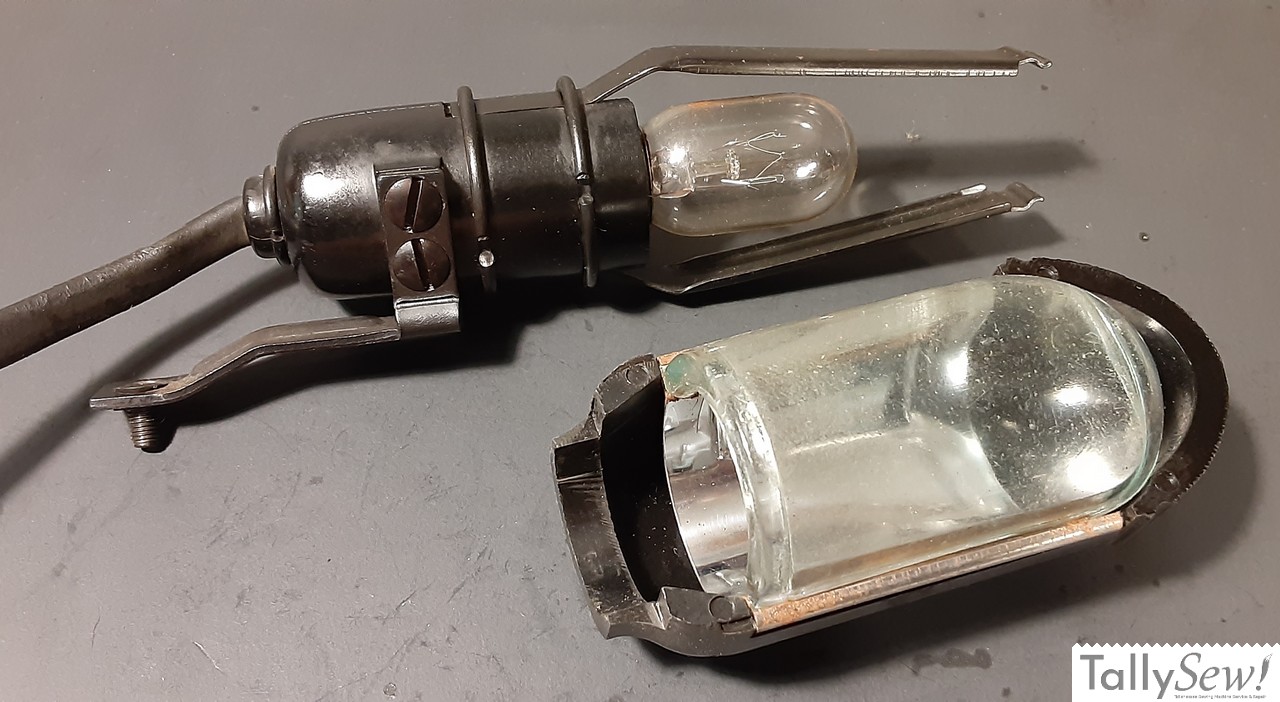
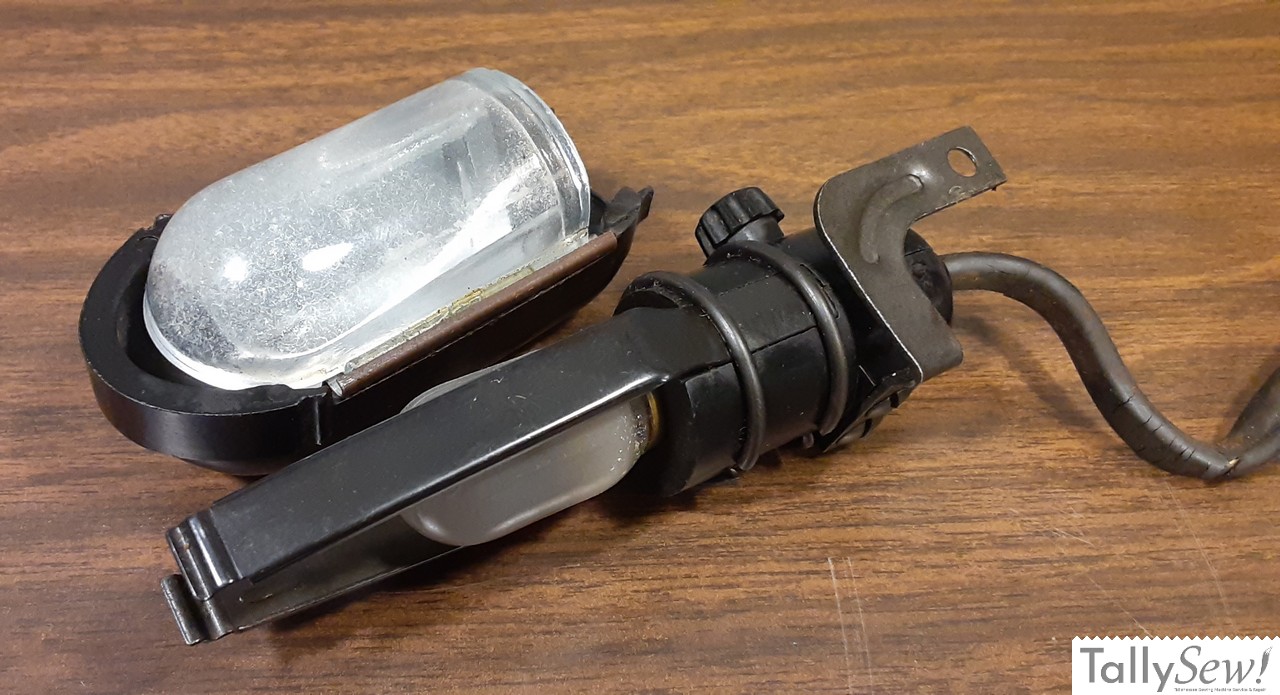

You can remove the shade and lens by pushing the shade assembly away from the socket base along the spring rails. The shade, lens, and reflector come off as a unit. This is also the easy way to change the lightbulb.
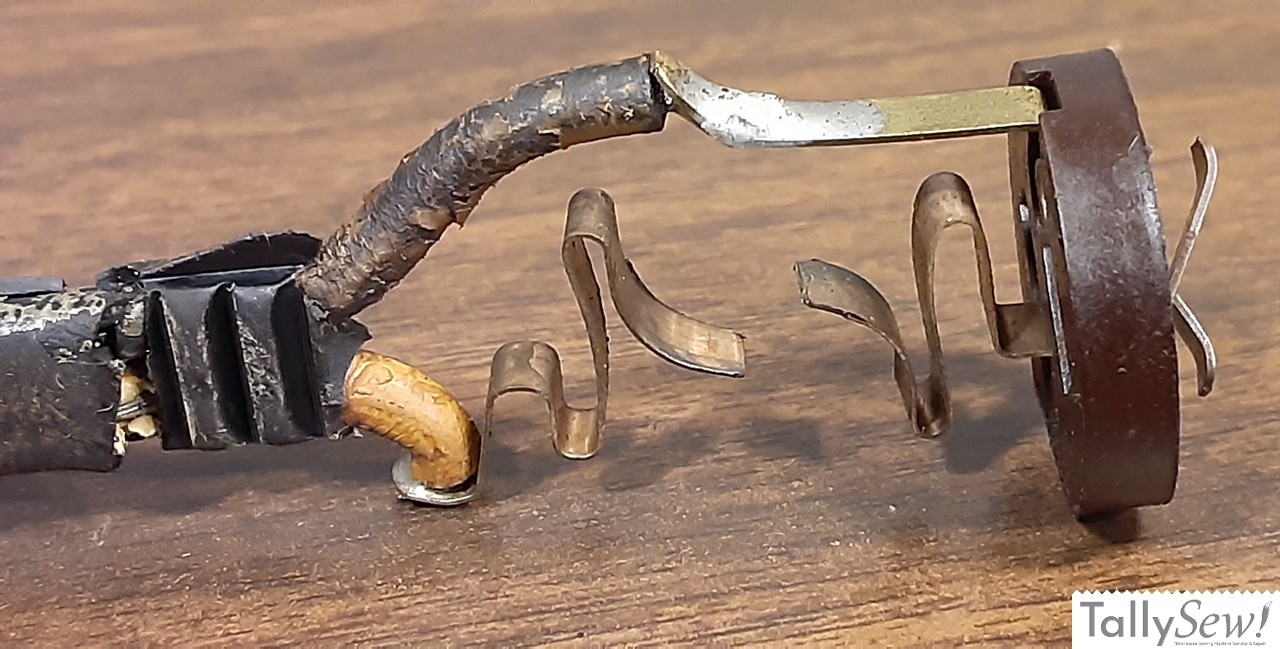
After you remove the lightbulb you can pull the spring rails off of the socket by pulling them straight, out one at a time.
You can remove the lens from the shade by pulling the lens away from the shade and reflector at the open end. Remove the reflector from the shade by simply lifting it out.
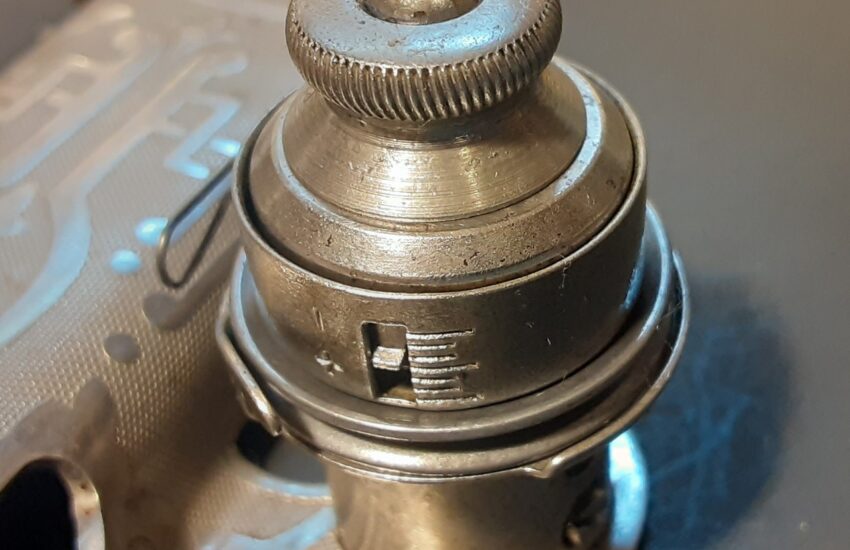
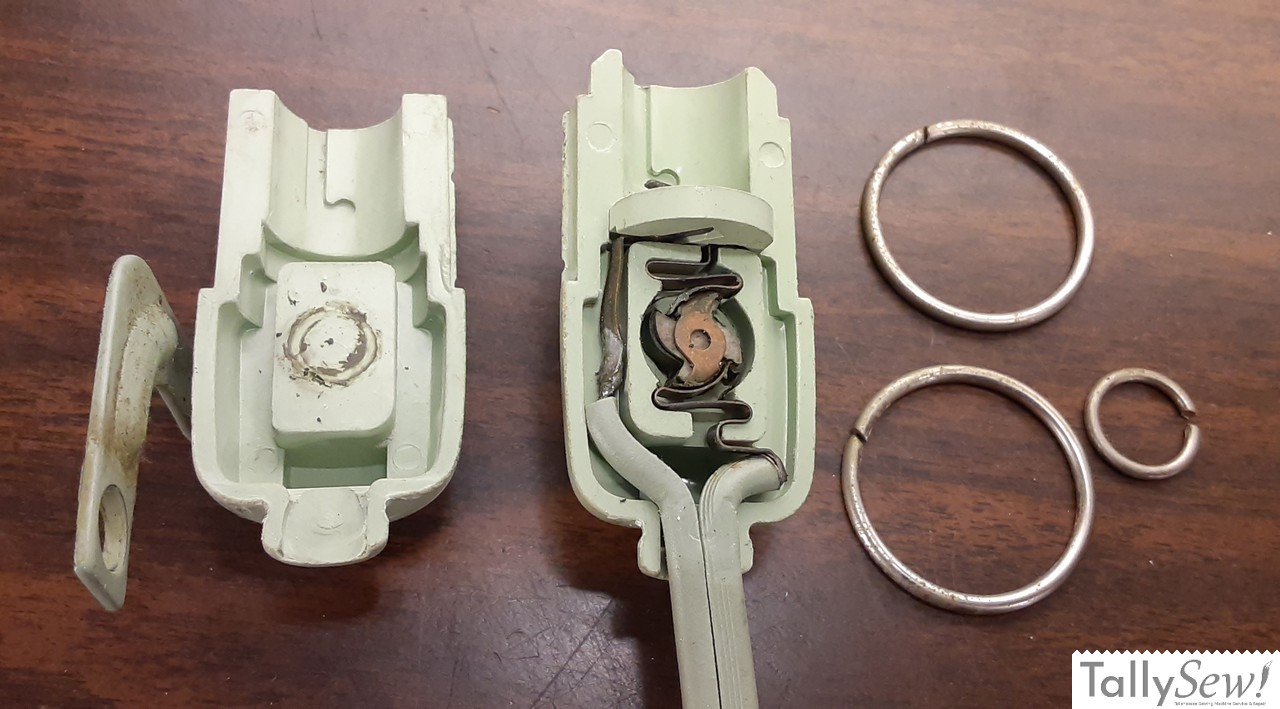
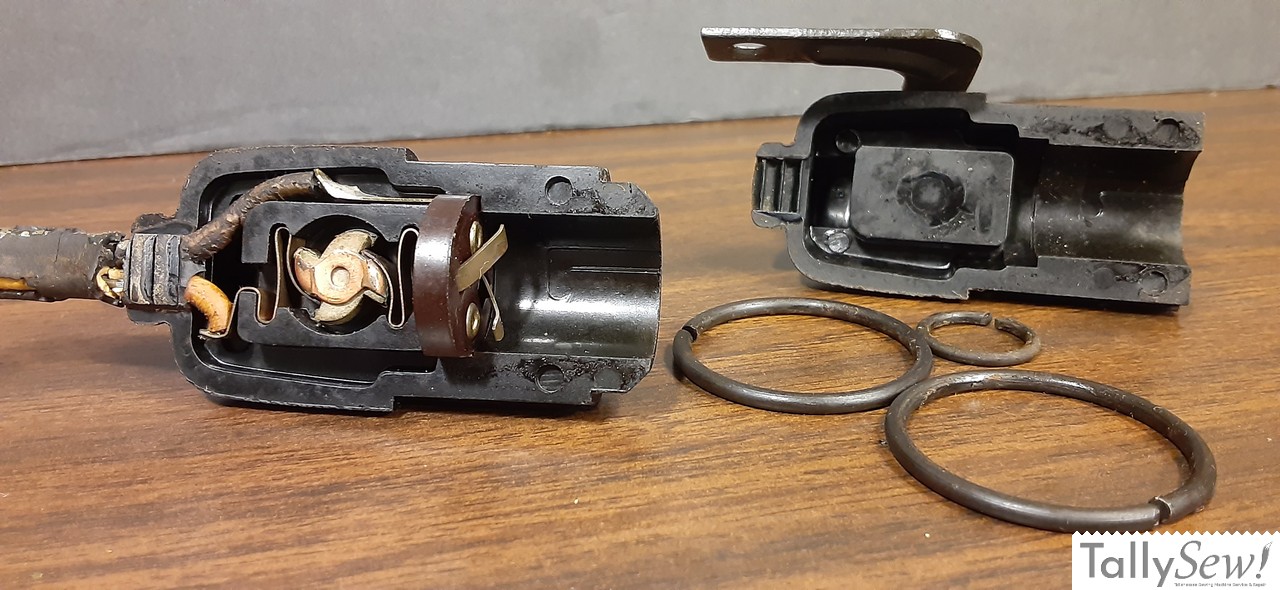
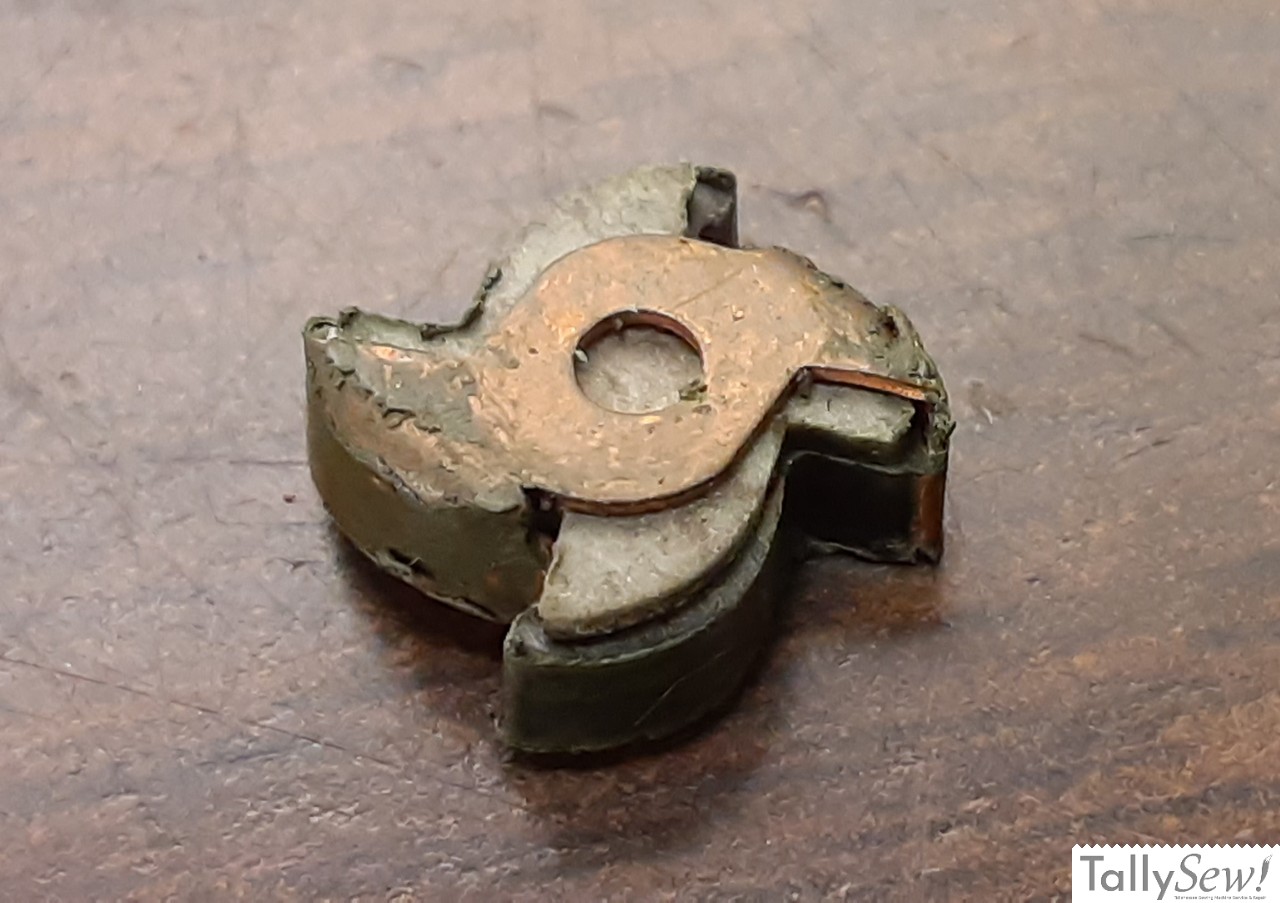
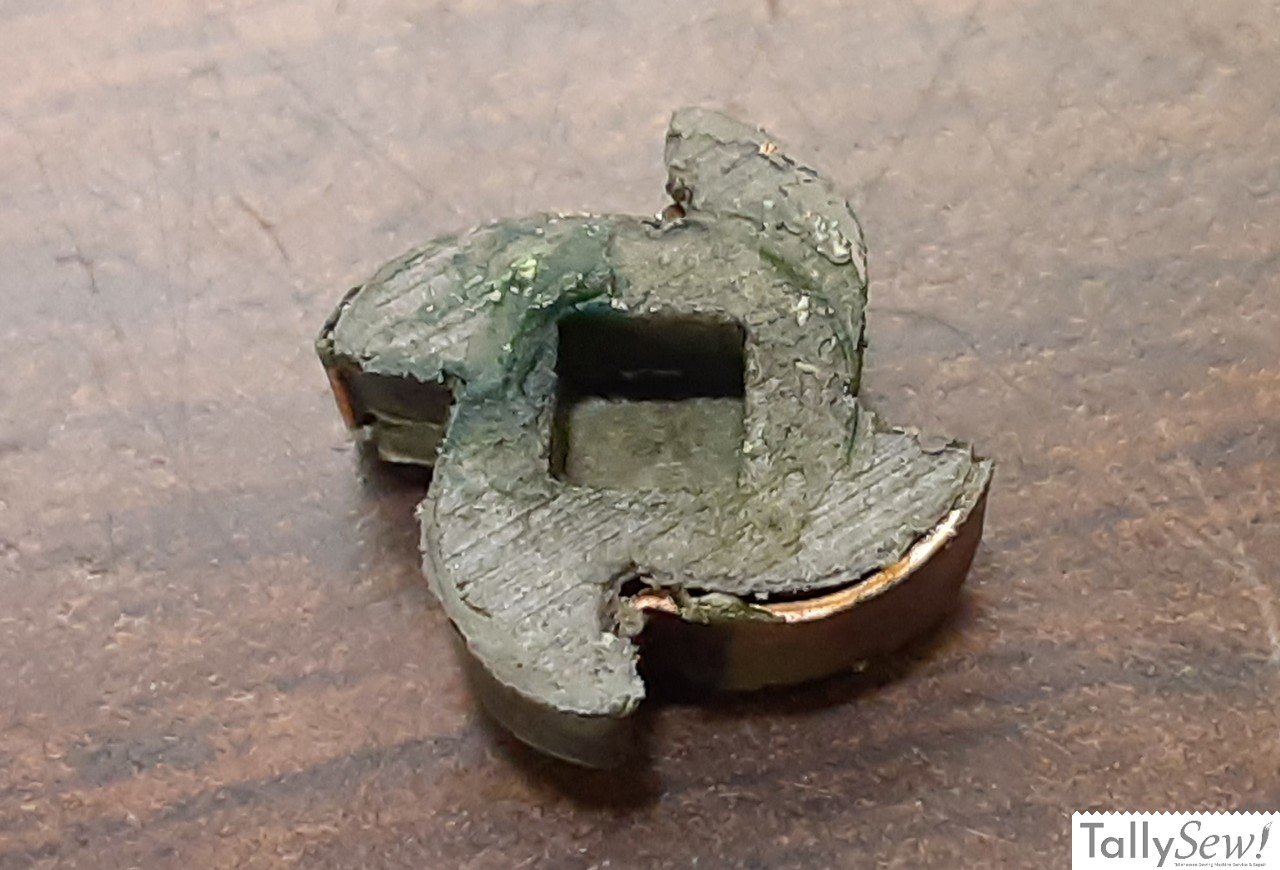
Removing the ring clips

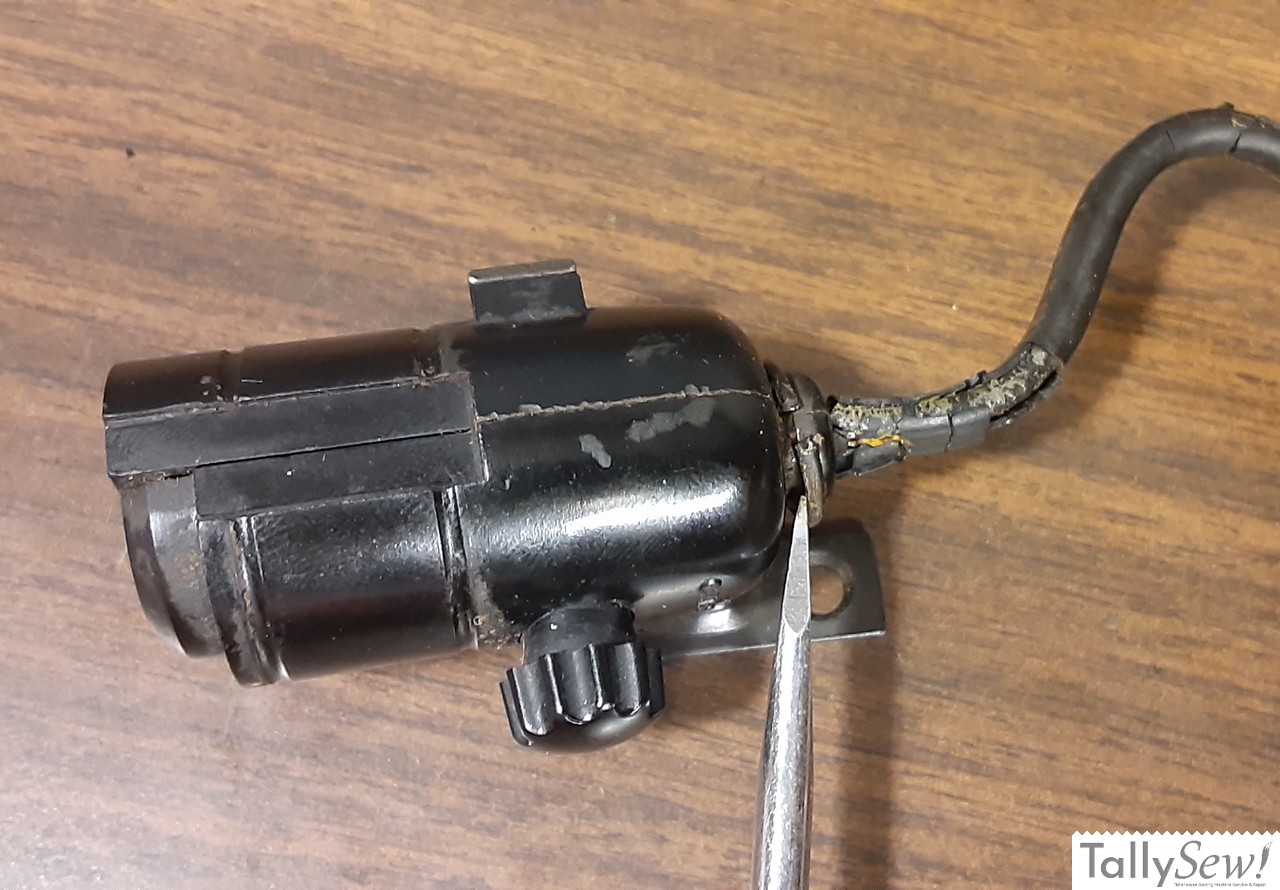
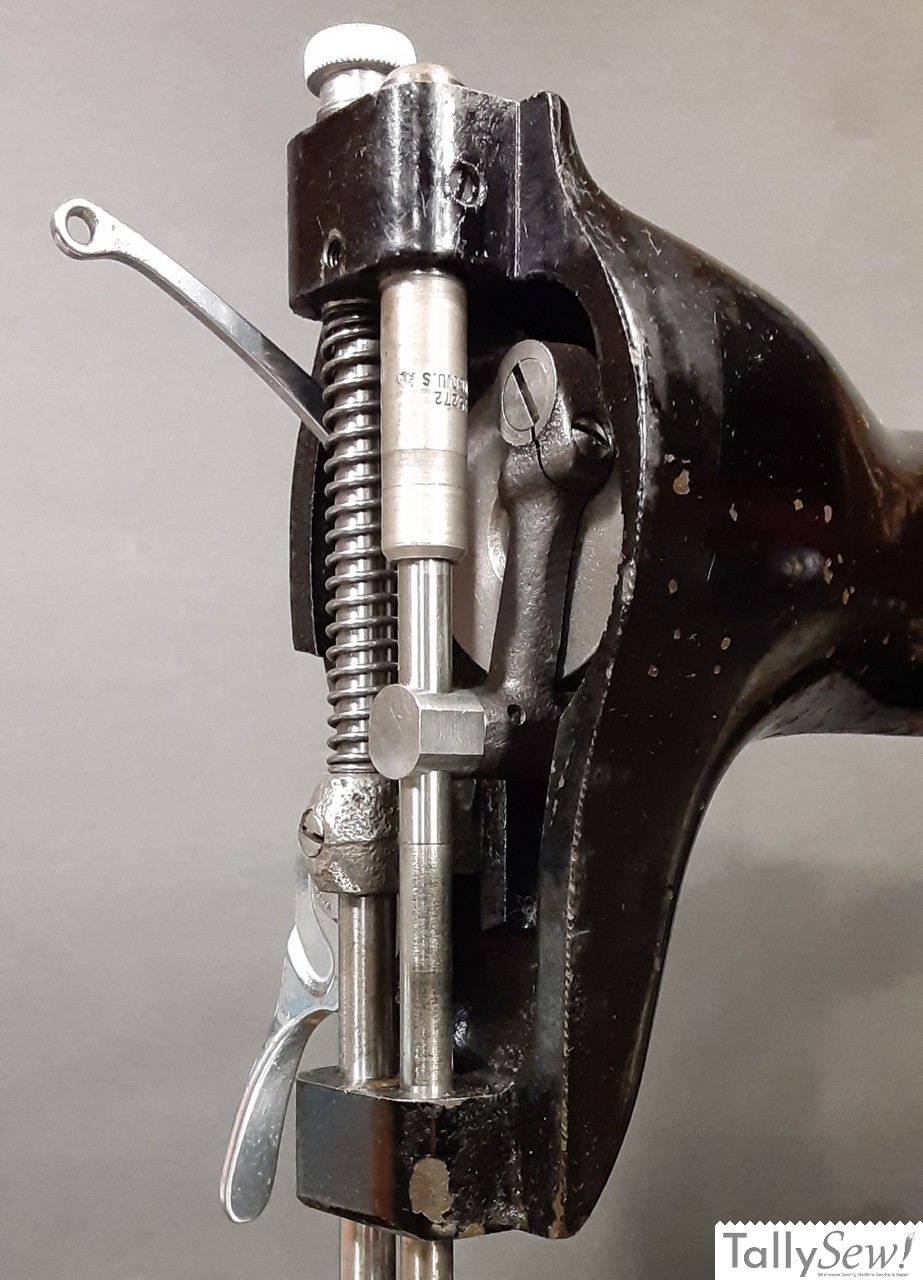
With the spring rails removed use the flat blade of a screwdriver to spin the rings so that their gap is lined up with the space left by the spring rail. This will keep the ends of the rings from scratching the socket as you work them off the end.
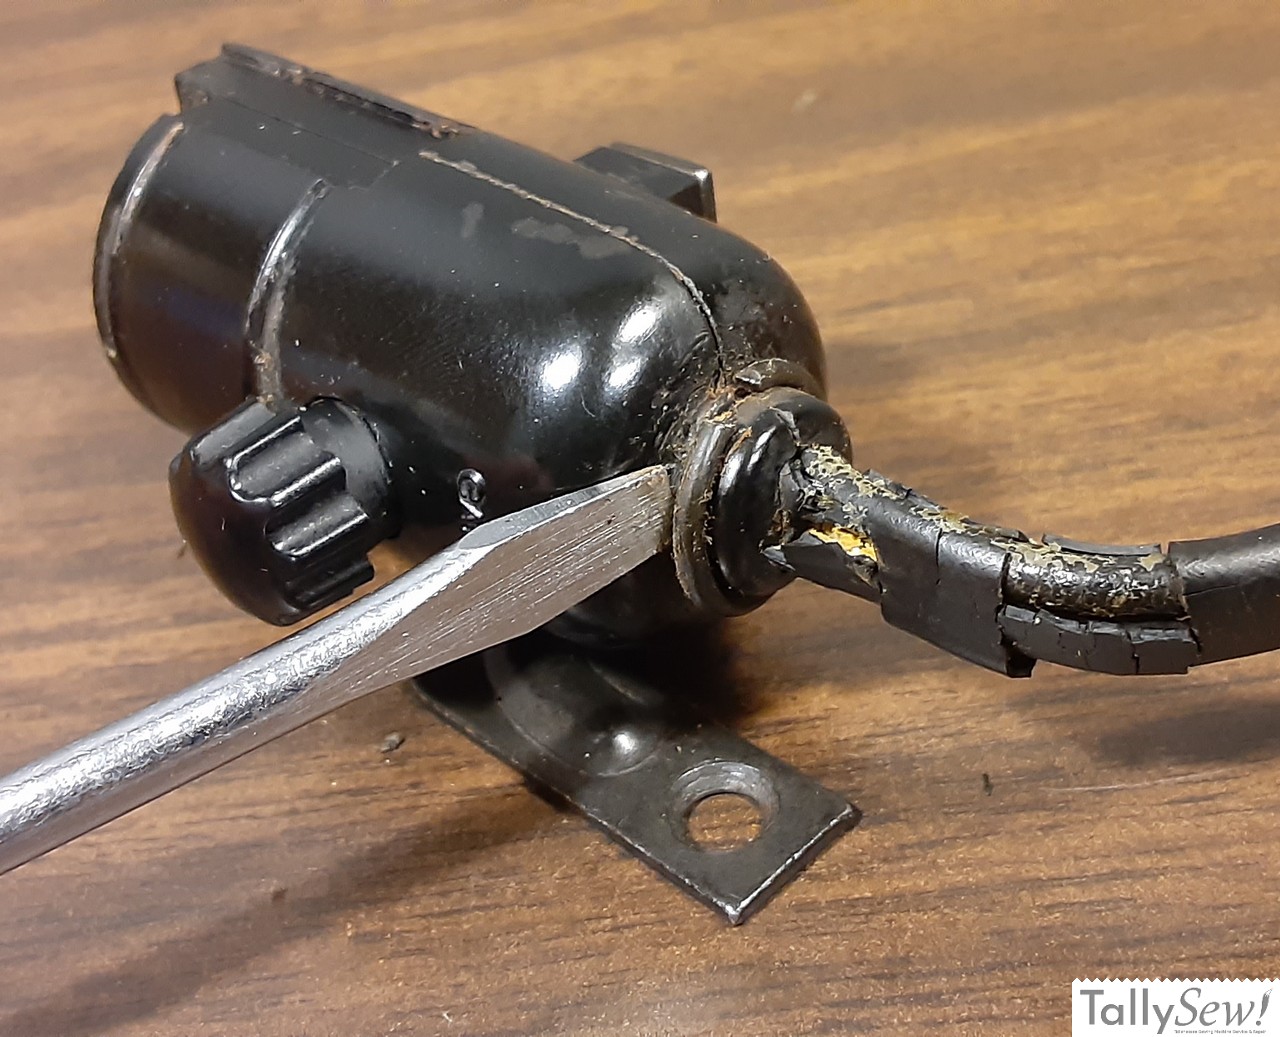
Now you can work the large springs off of the socket one at a time. Use your flat blade driver to work the ring out of it’s groove and then off the socket.
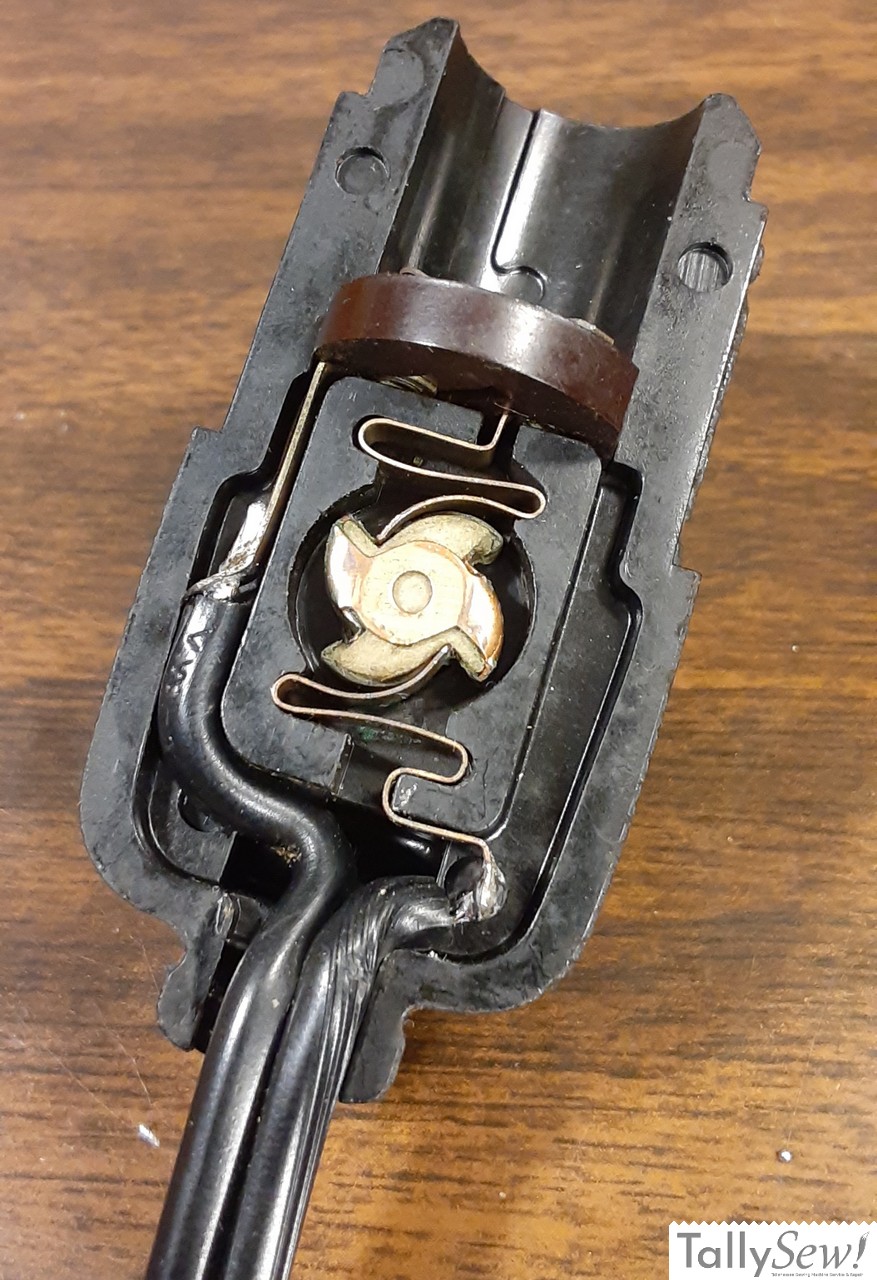
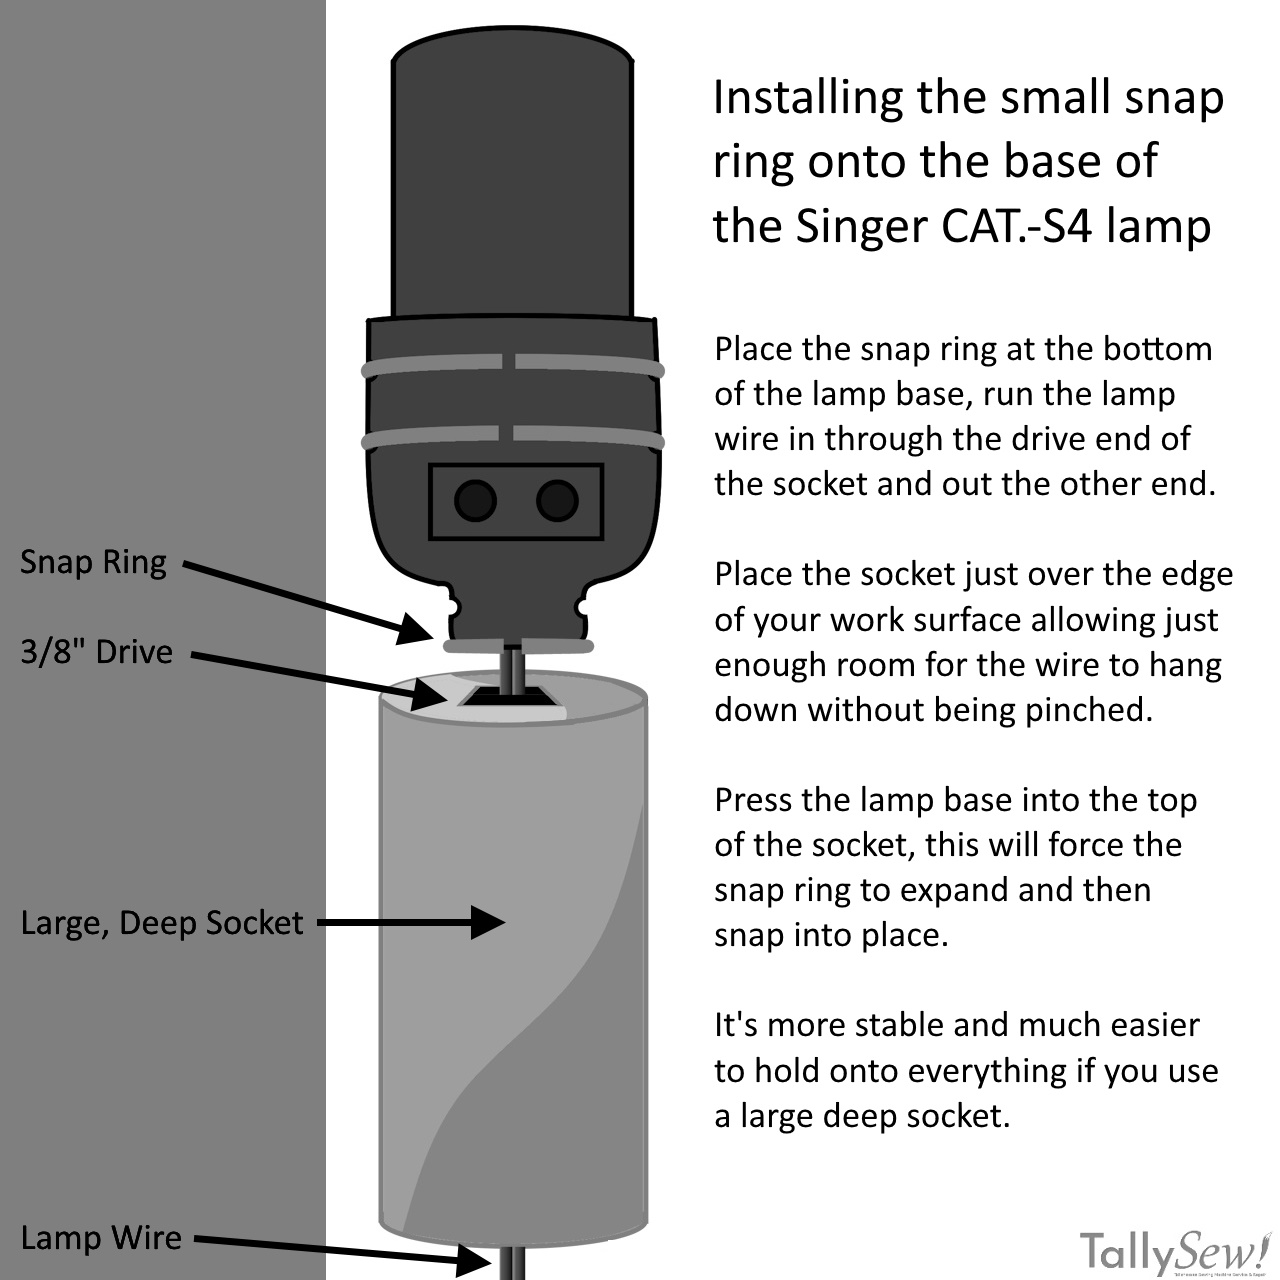
Removing the small ring is the same concept but much harder to do. You have to be careful so you don’t hurt yourself, and patient so you don’t damage the socket.
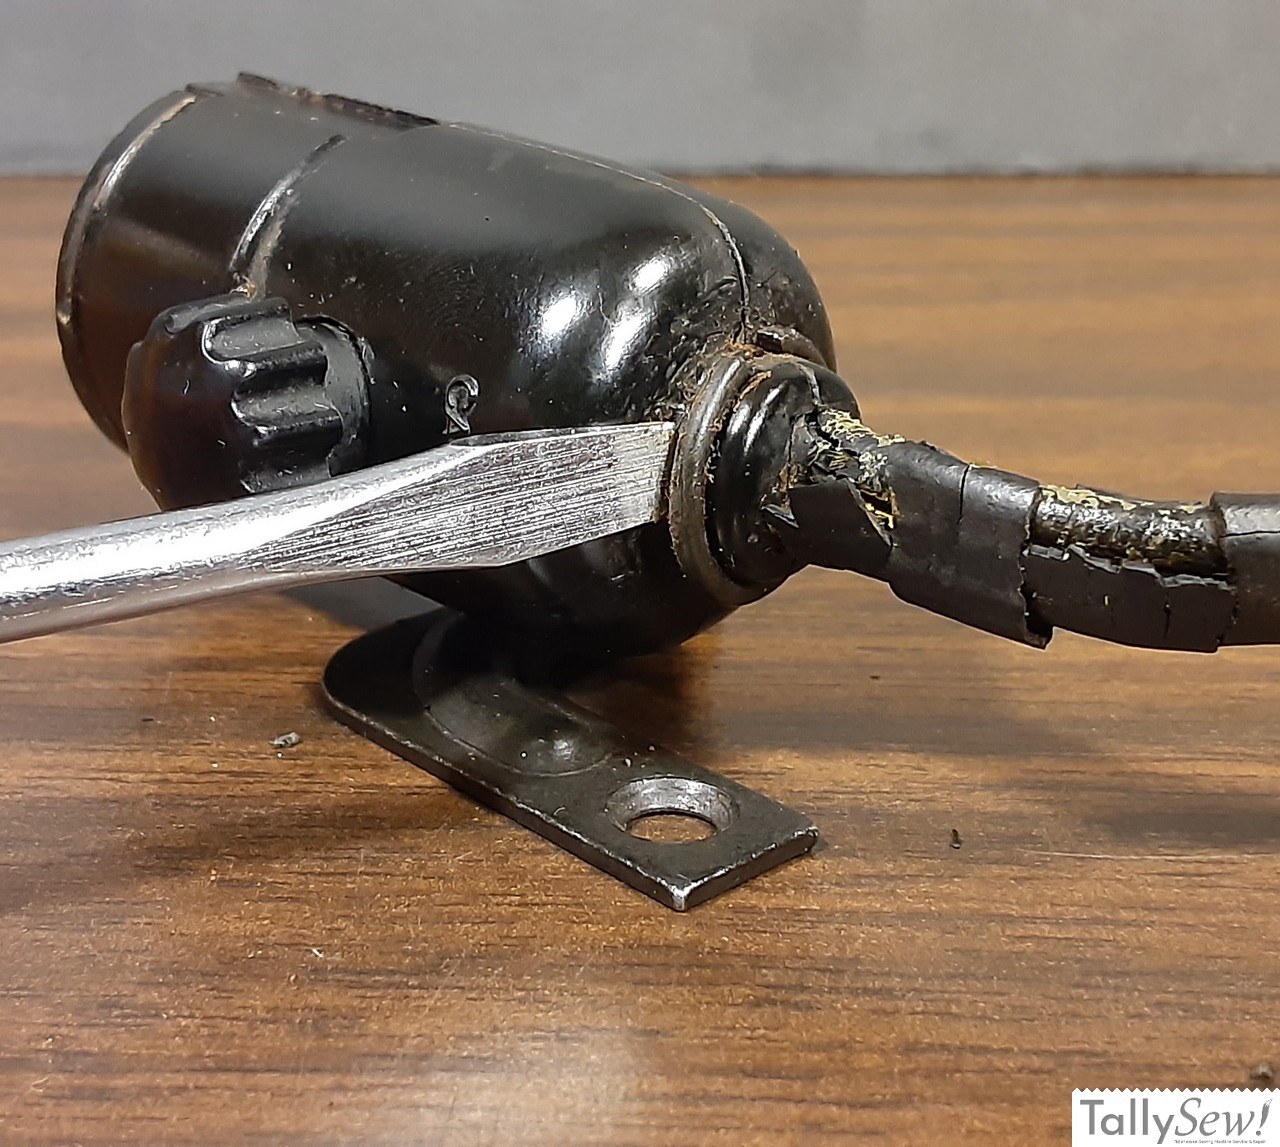
Find yourself a flat blade screwdriver that’s just small enough to let you work the blade between the hip of the socket and the ring. Work it (the driver) in next to the the gap in the ring and gently twist so that the end of the ring in up on the ridge of the groove. Move the driver down into the gap and lever the ring a little more, working your way around. You may end up trying to do this several times before it works, but take your time.
The photos of the small ring being removed aren’t exact since it’s not something one can do while holding a phone in one hand, the screwdriver in the other, and the socket in a third hand that I don’t have.
Please note that it’s VERY easy to slip and jab yourself with the screwdriver, and I will tell you from personal experience that this is quite unpleasant, so please be careful, and if you’re a person who doesn’t heal well, then have someone else do it for you.
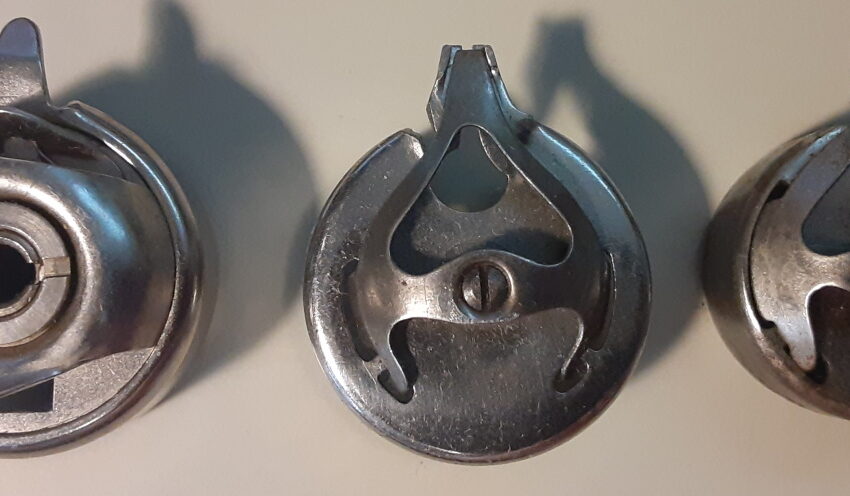
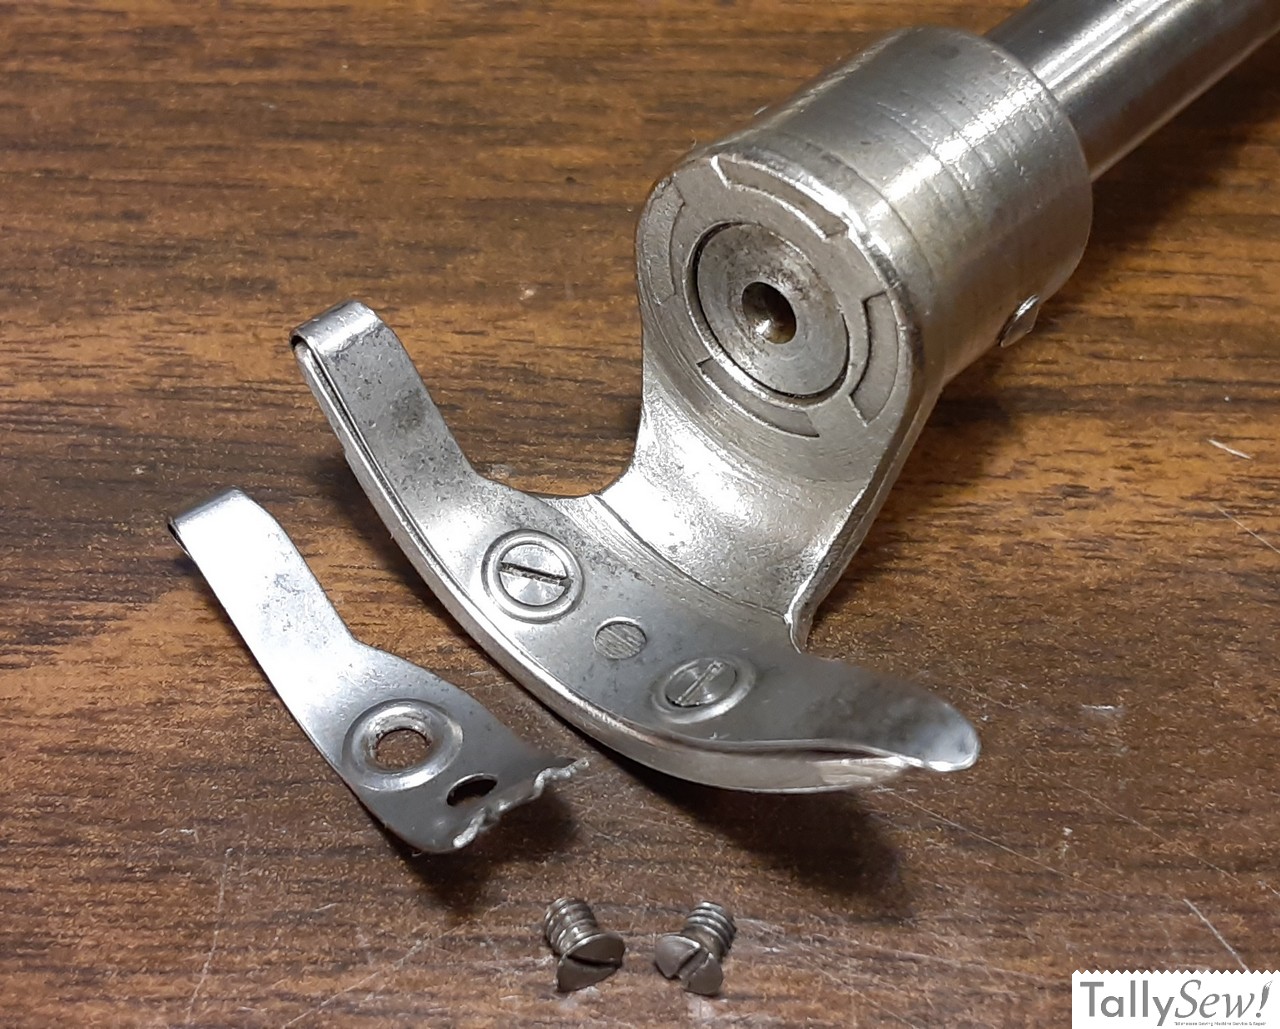
The socket

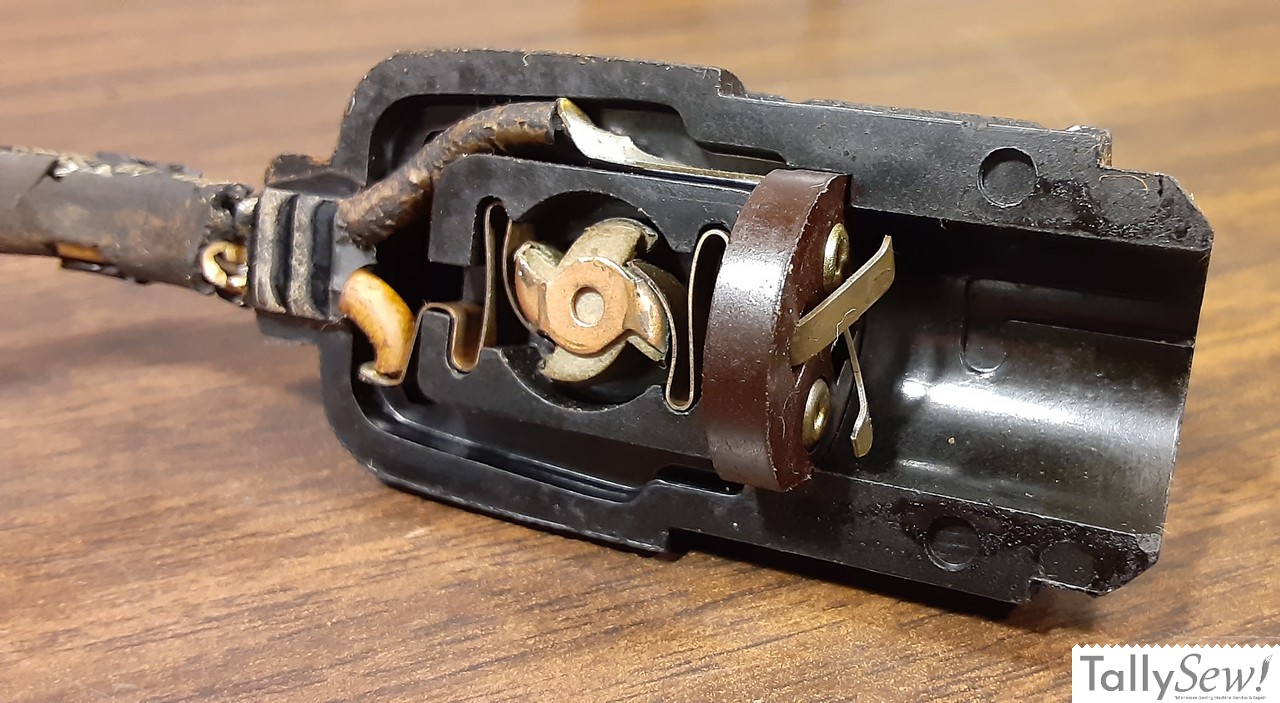

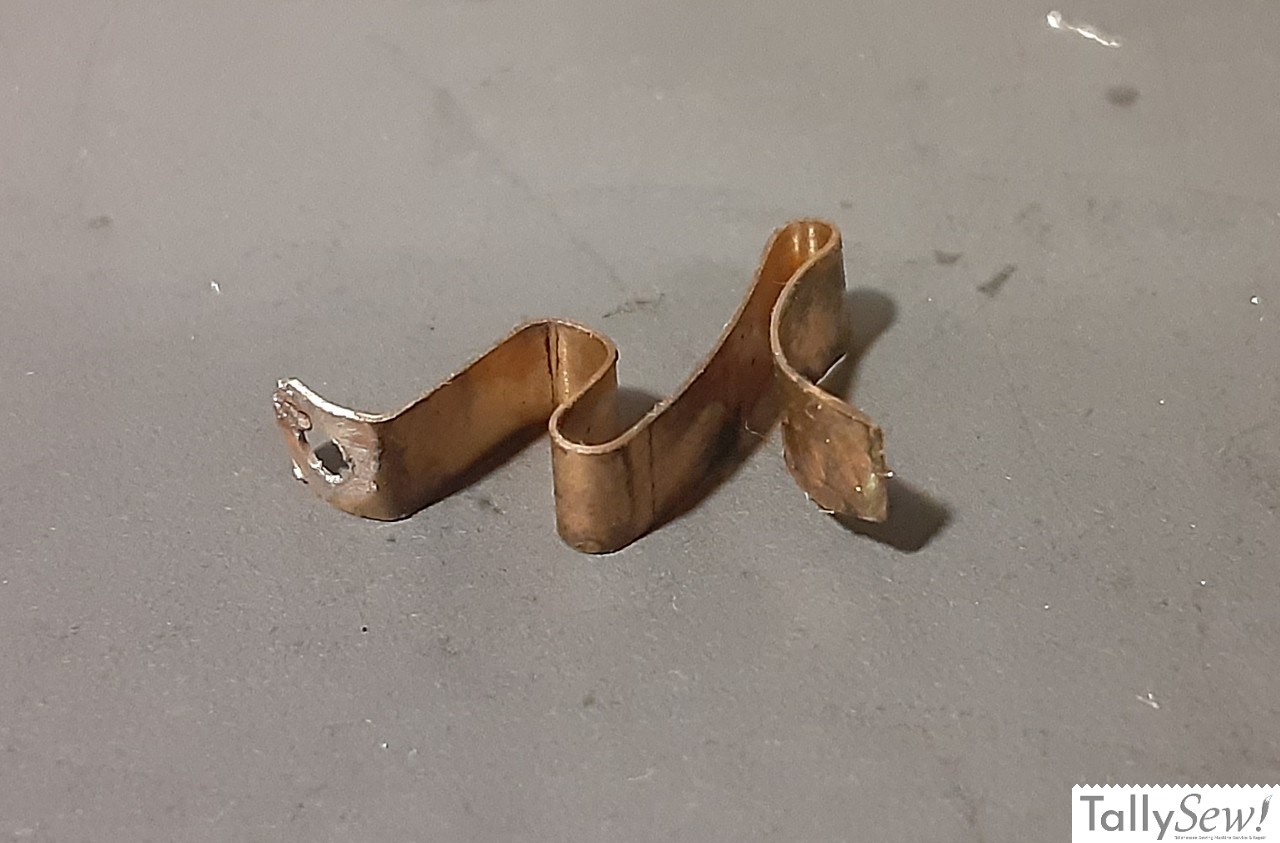

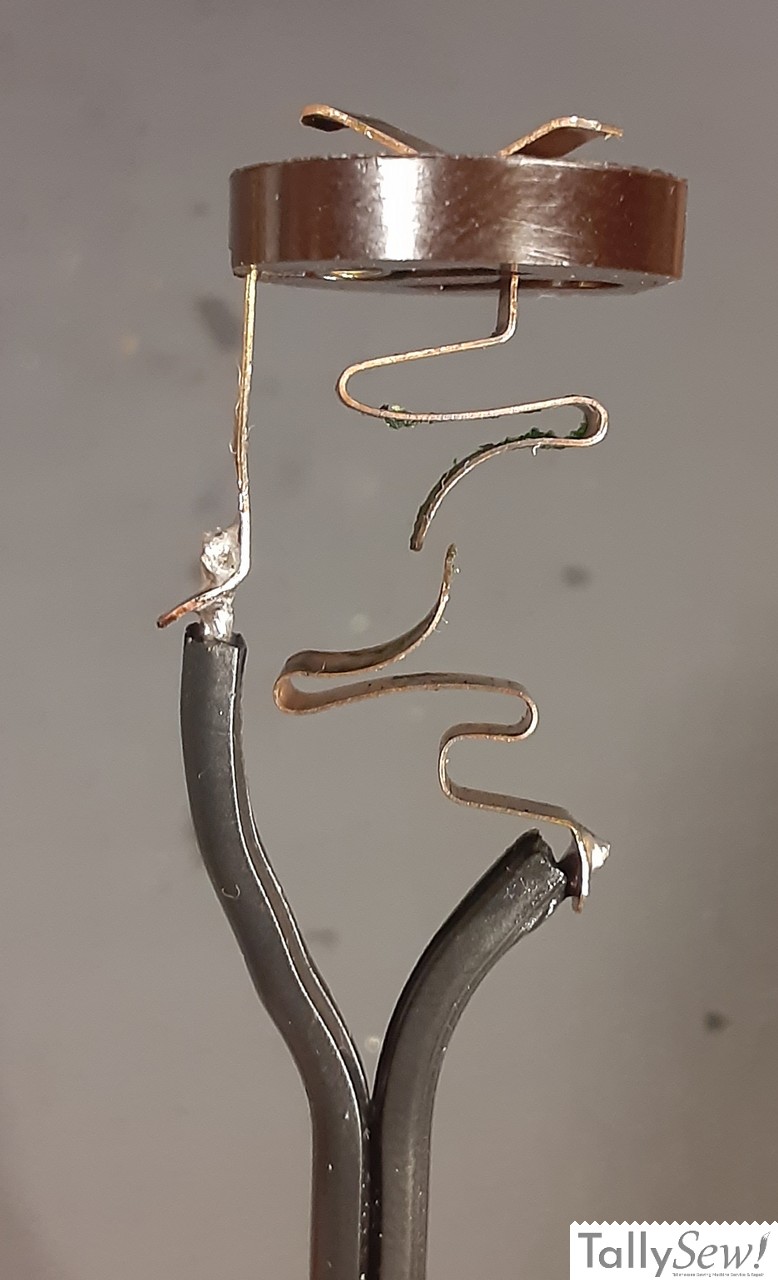

The socket and switch are simple and robust. I have encountered broken contact springs, but 99% of the time if you have to pull one of these apart it’s because the wires are bad. You have to desolder the contact springs and solder in new wire.
Putting it back together
Work the large rings back on the same way you took them off, keeping the gap lined up with the space left by the spring rail.
Related Articles
Singer 15 series needle bar box
The Singer model 15 series machines is simple and robust. I’m going to give you an overview of how to assemble the needle, and presser
Replace a broken Shuttle Driver Cushion Spring
The broken shuttle driver cushion spring on my 1932 Singer model 15-91 The first thing I should mention is that you do not need to
Singer 15 series shuttle race
Removing the shuttle race assembly is a pretty simple process

Singer 15 series bottom end
The Singer Model 15 (in this case a 1932 Singer 15-91), with the bottom end roughed in. This article is about getting the parts in

Singer 15 series feed and lift verticals
The two main assemblies found in the pillar of the machine. Crank connecting rod (top), and feed forked connection and feed regulator assembly parts.