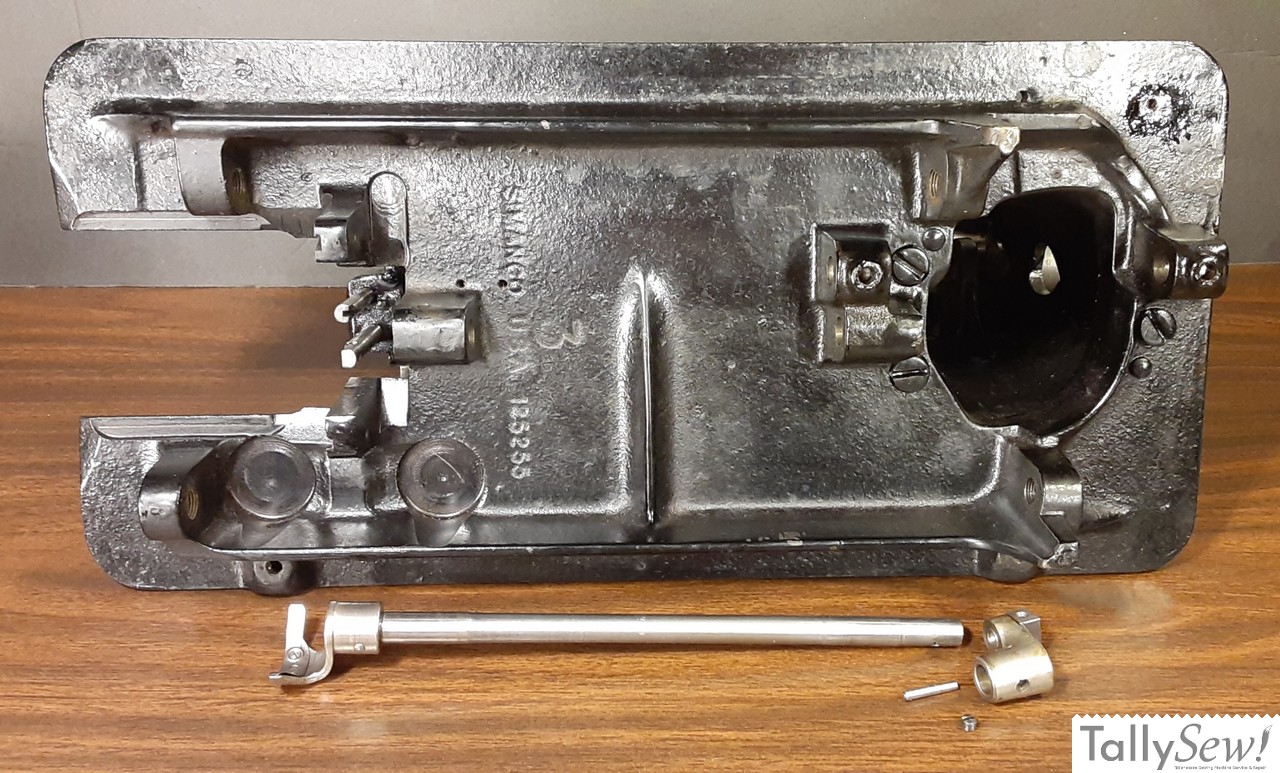
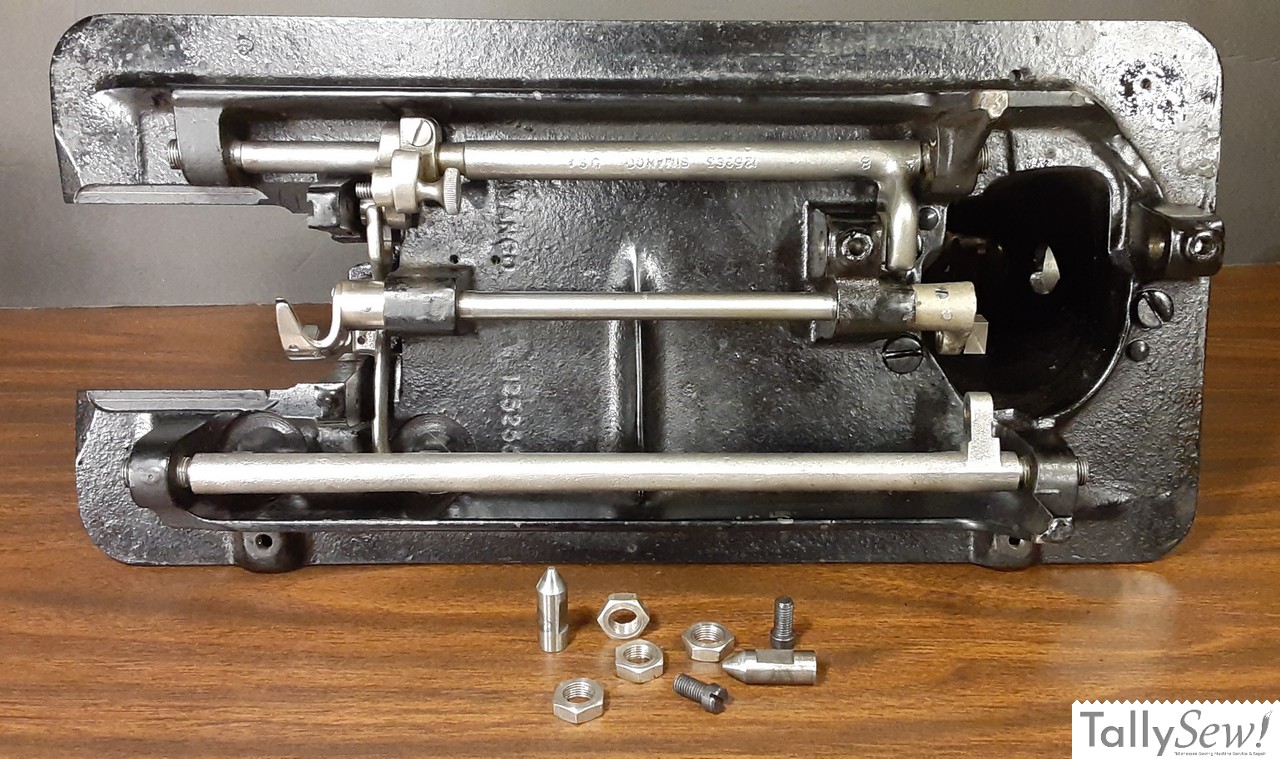
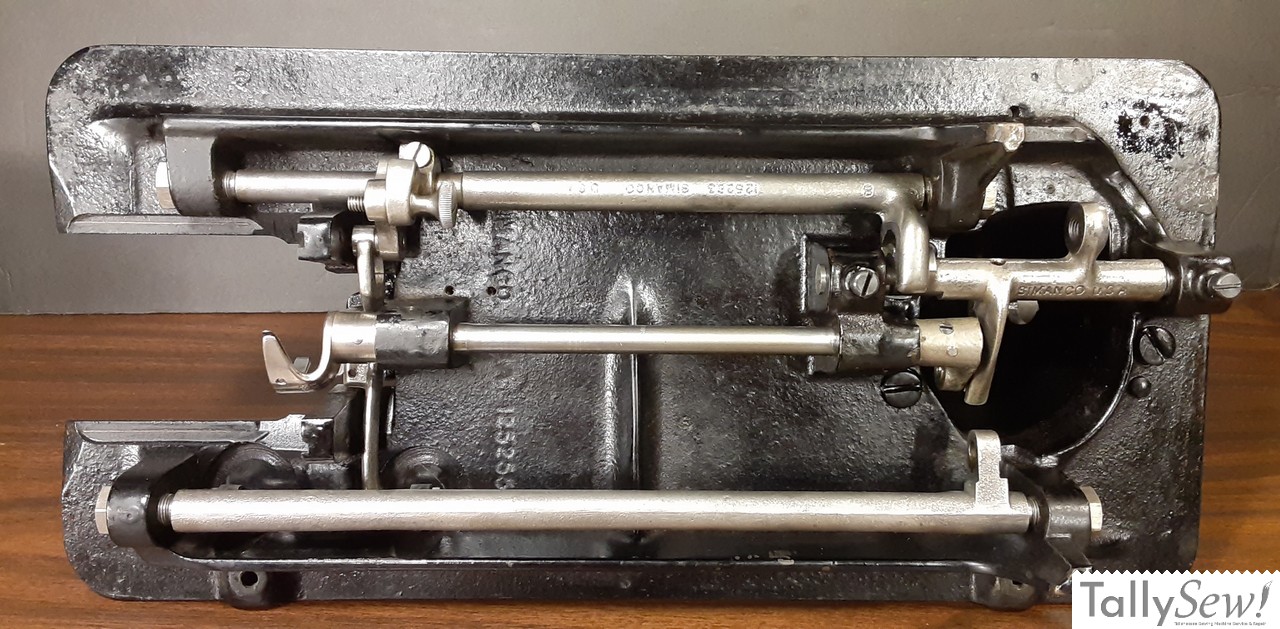
Singer 15 series bottom end

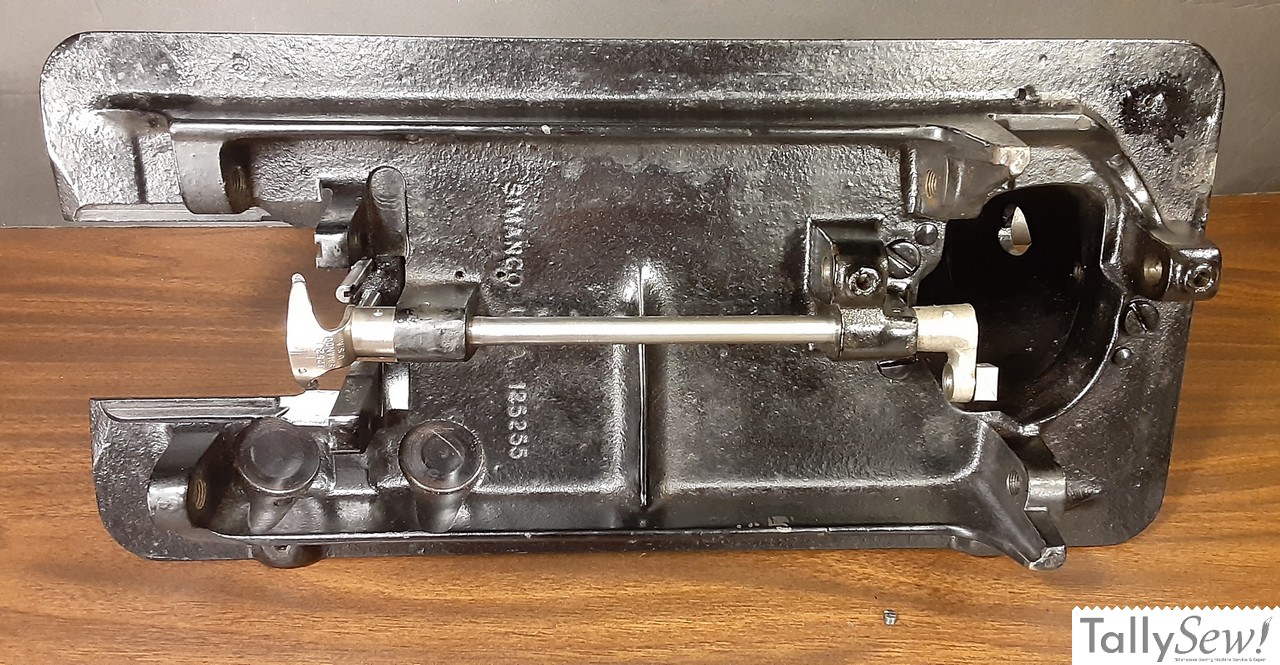
The Singer Model 15 (in this case a 1932 Singer 15-91), with the bottom end roughed in. This article is about getting the parts in place and roughly in position, final adjustments will be covered in a later article.
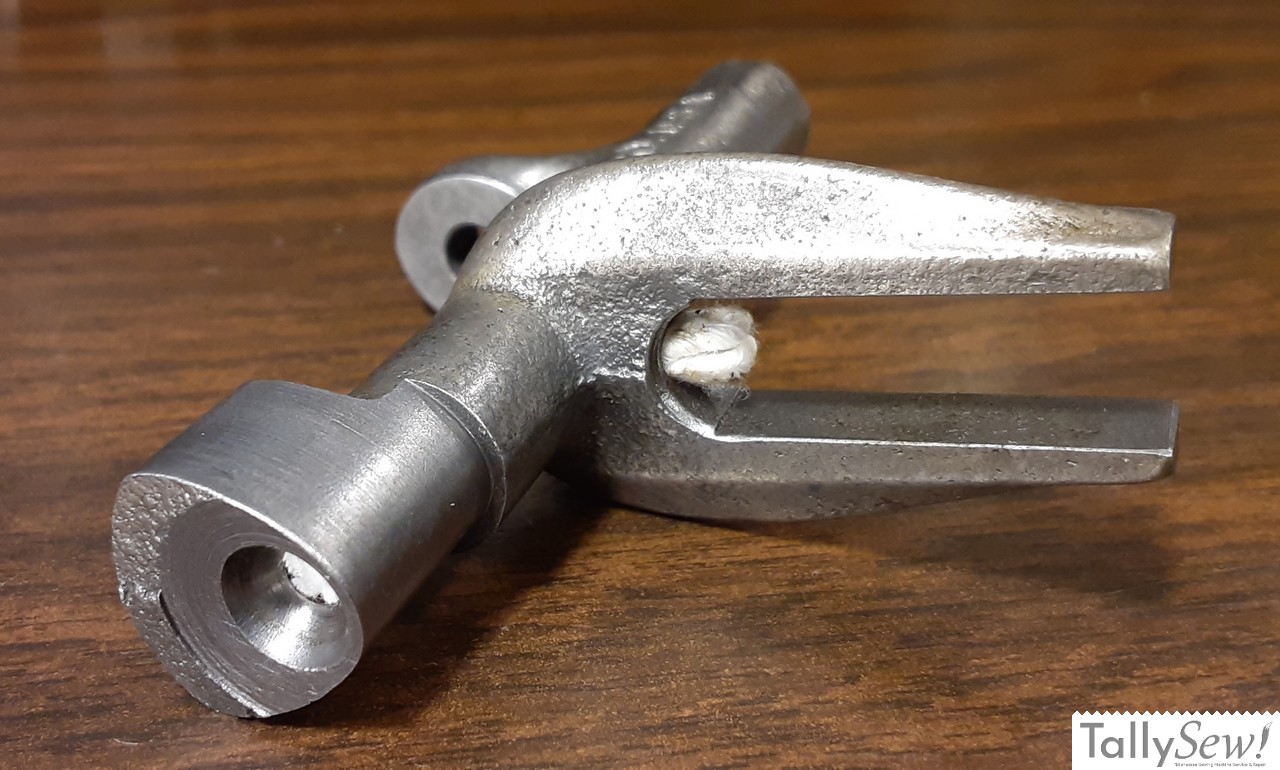
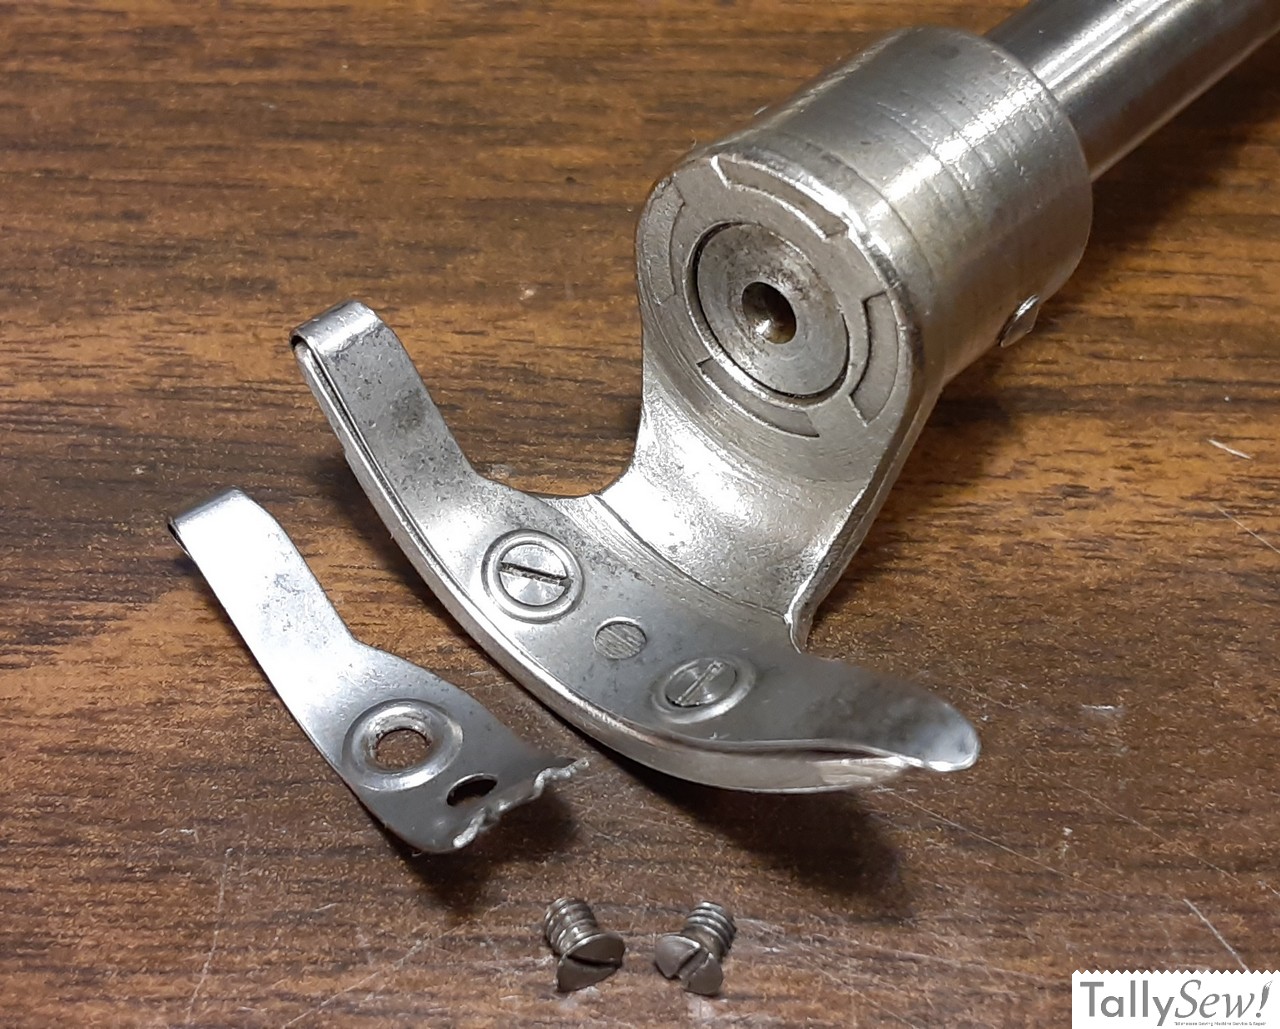
Shuttle Driver, Oscillating Shaft, Crank, Pin, and Set Screw

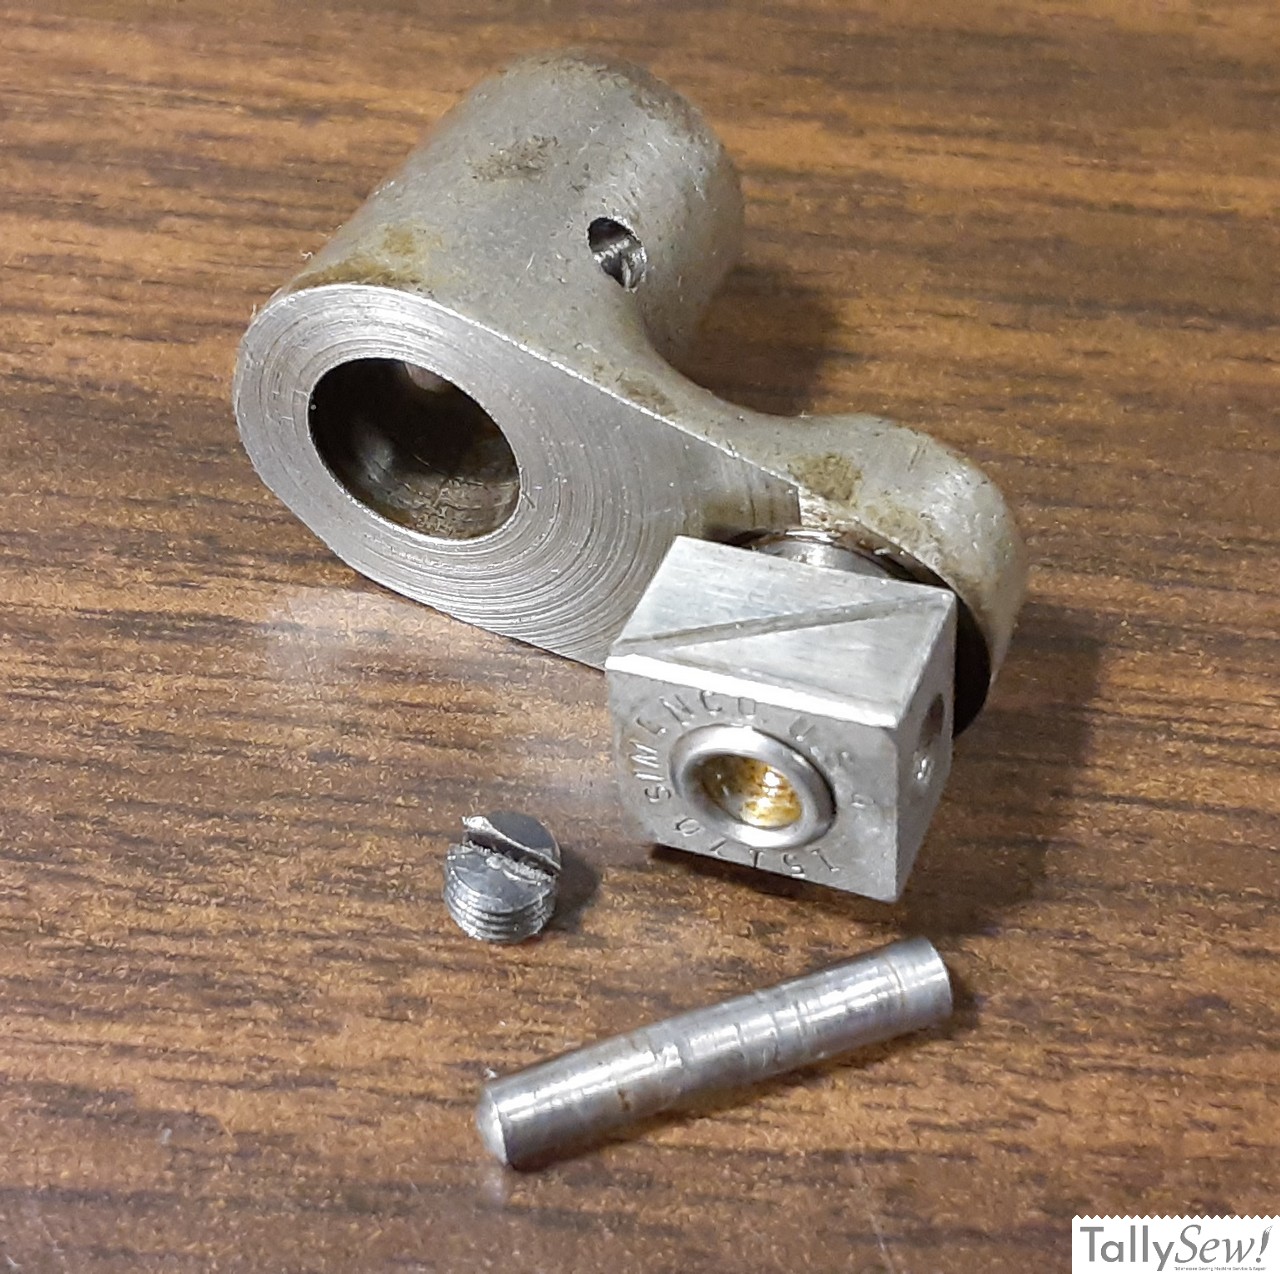

I don’t generally remove the hook shaft, even when doing a deep cleaning unless the machine requires it. I removed it in this case for demonstration purposes. While I had it removed I replaced the broken shuttle driver cushion spring, though hook shaft removal isn’t necessary for doing so.
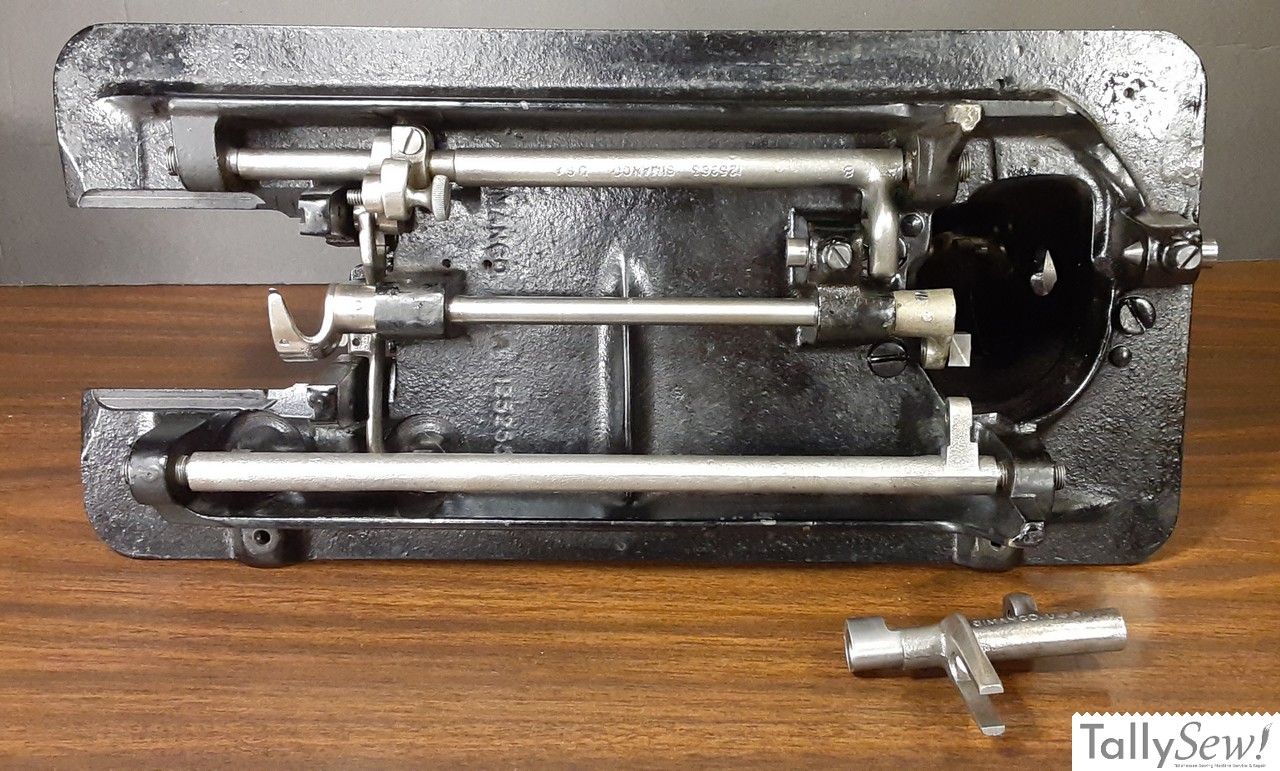
The hook shaft can only be removed from the left end of the machine, and you have to remove the oscillating shaft crank by driving out the oscillating shaft crank [tapered] pin, and oscillating shaft crank set screw. The oscillating shaft crank [tapered] pin can usually be driven out by using a punch on the end that is sticking out the most. This can be a difficult and dangerous task that I recommend against unless you know what your doing and have a real reason to remove the hook shaft.
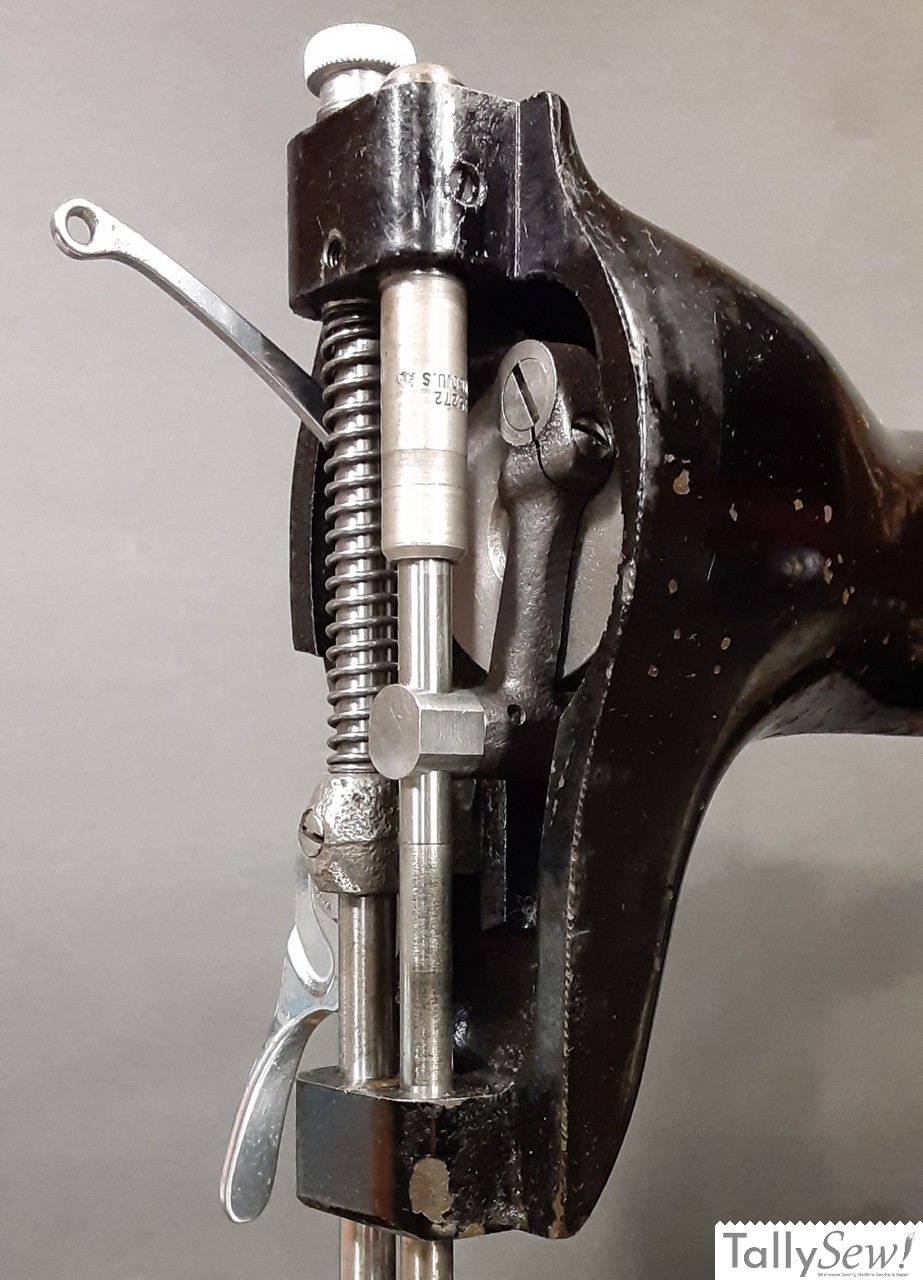
Feed and feed lifter rock shafts

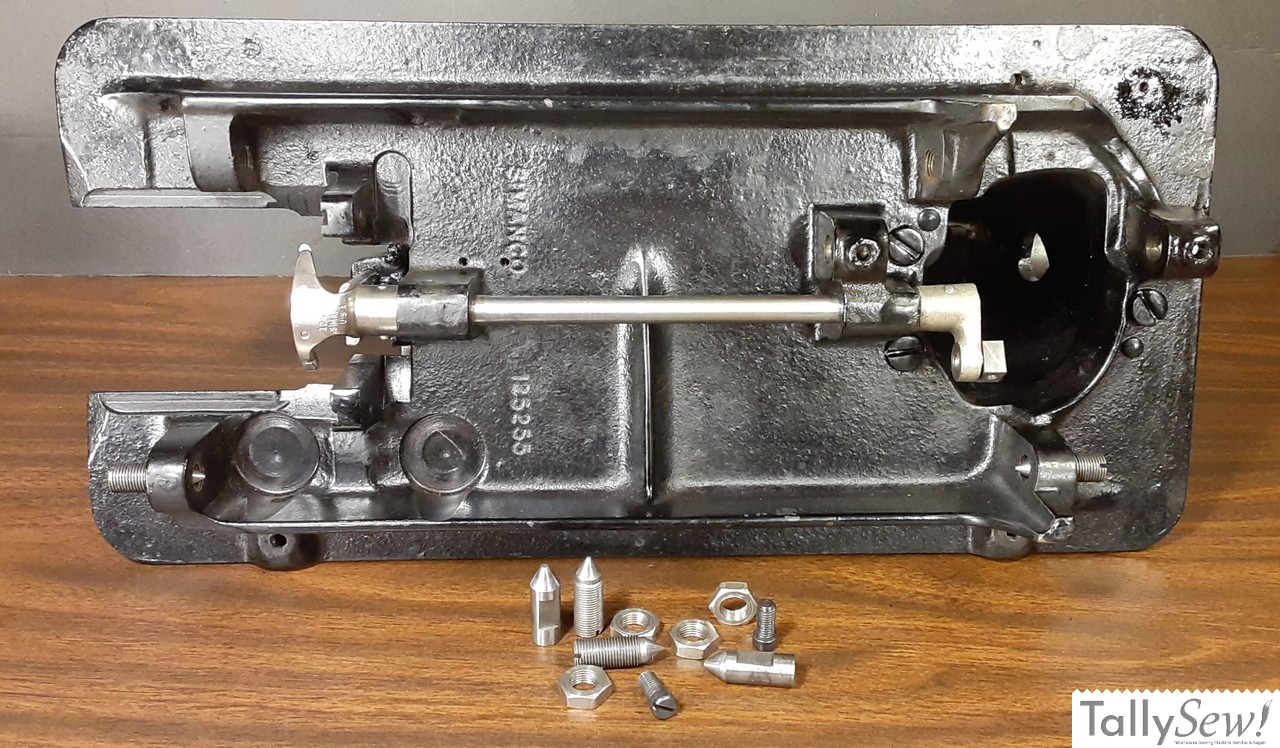
Install the right and left centers [pivots] for the feed rock shaft just deep enough that the point is showing then fish the feed rock shaft and feed bar between the machine bed and the shuttle driver. Once in place screw the centers in evenly on both sides until the feed rock shaft is held in place. You want the feed rock shaft to be able to move on its axis, but not be loose end to end. I will cover how to adjust the feed rock shaft in a later article. Right now we are just getting the parts in place.
Now install the left and right centers for the feed lifting rock shaft like you did for the feed rock shaft above. Place the feed lifting rock shaft in position with the feed bar throw-out lever roller in the fork of the feed bar. Now screw the centers in evenly on both sides until the feed lifting rock shaft is held in place. As before, you want the feed rock shaft to be able to move on its axis, but not be loose end to end.
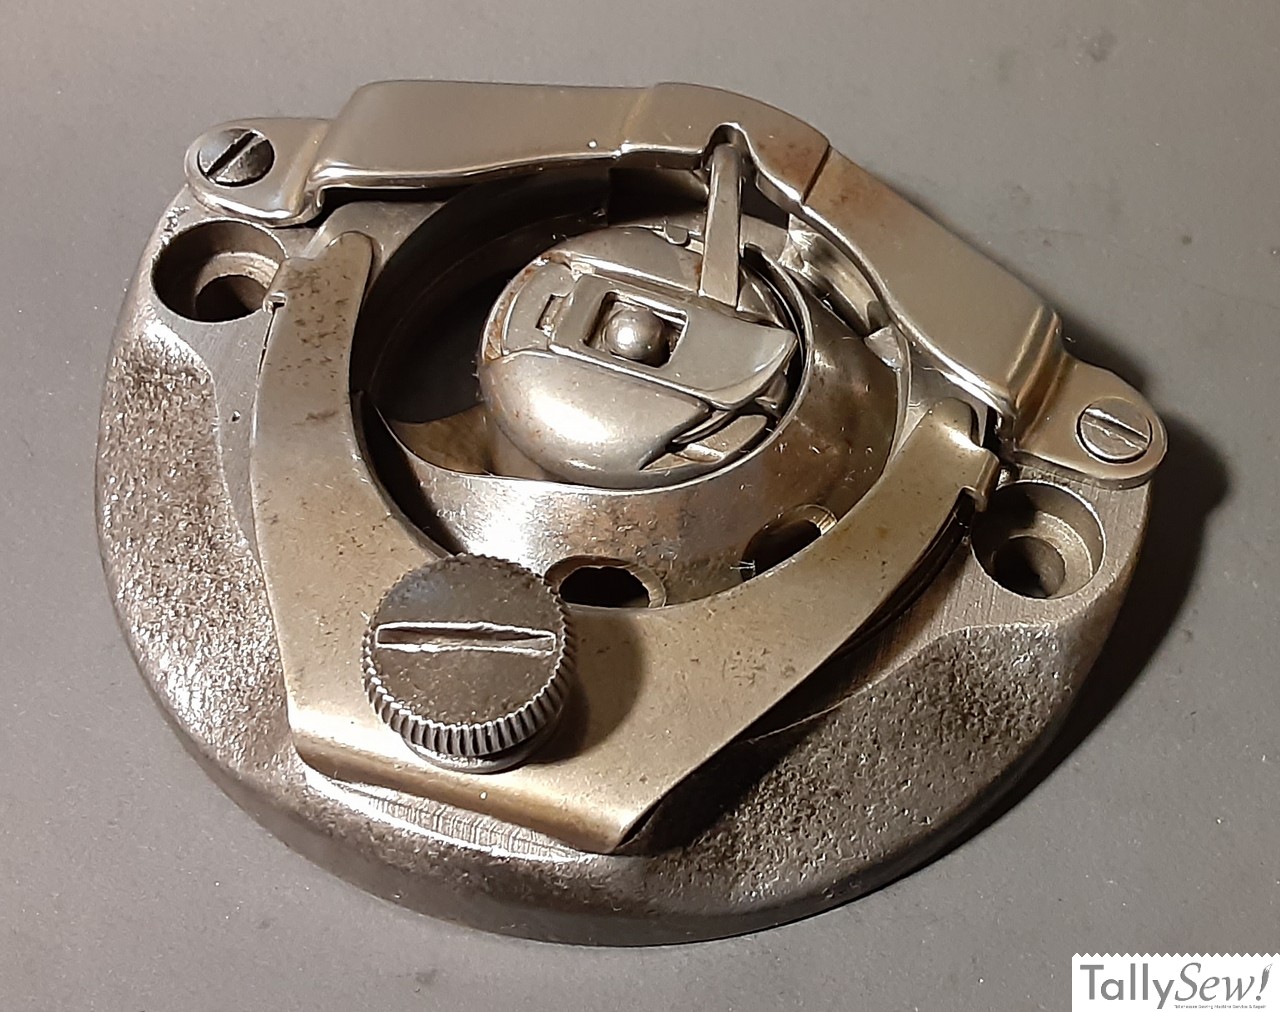
Oscillating Rock Shaft
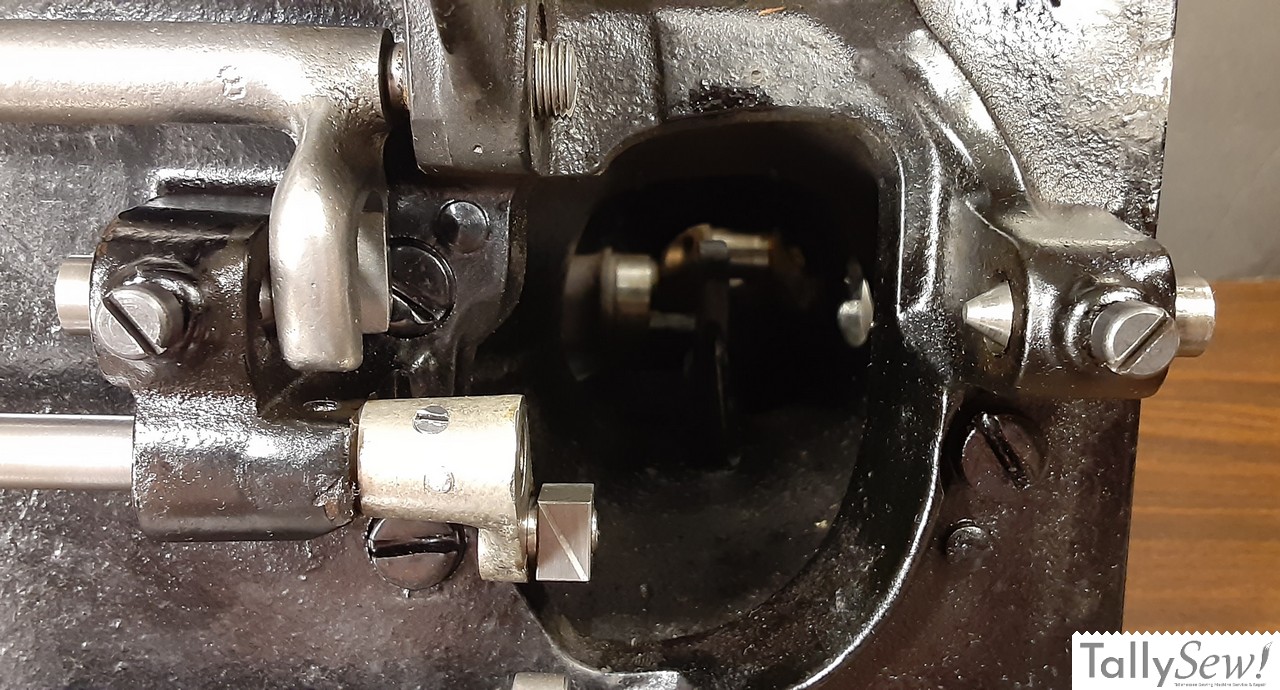

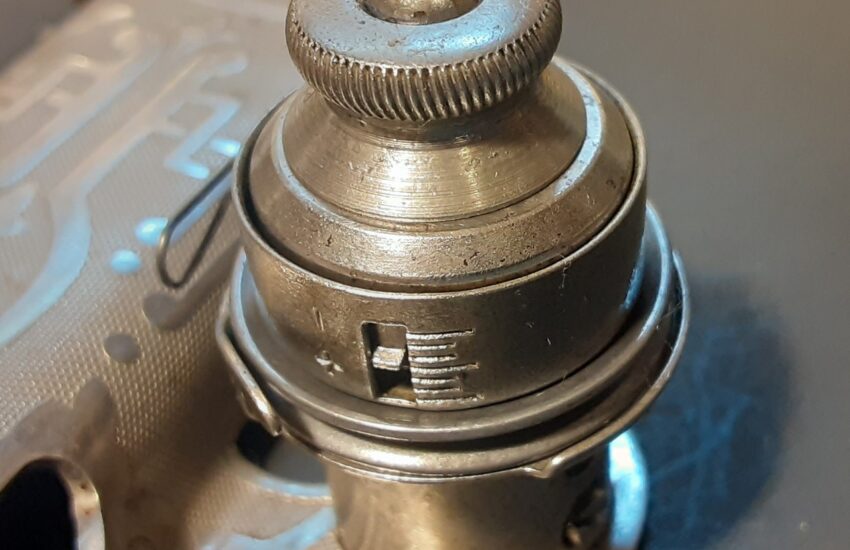
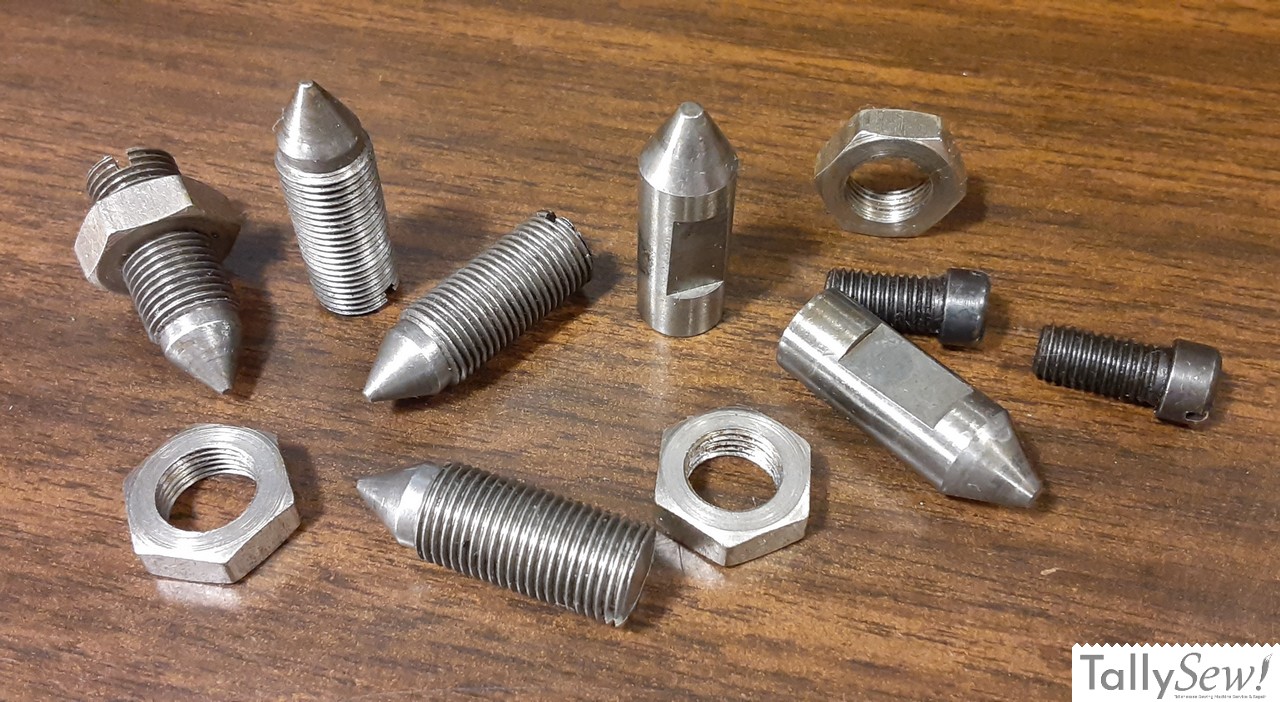
The centers for the oscillating rock shaft are not threaded like the four used on the lift and drive rockers. Instead they are smooth with a flat milled in the mid section. these two centers are not the same size, the one on the right side is a little thicker than the one on the left.
Install the centers so that you can just see the tip staking out and the flat for the set screw facing away from the machine. Install the set screws but not to the point that they contact the centers.
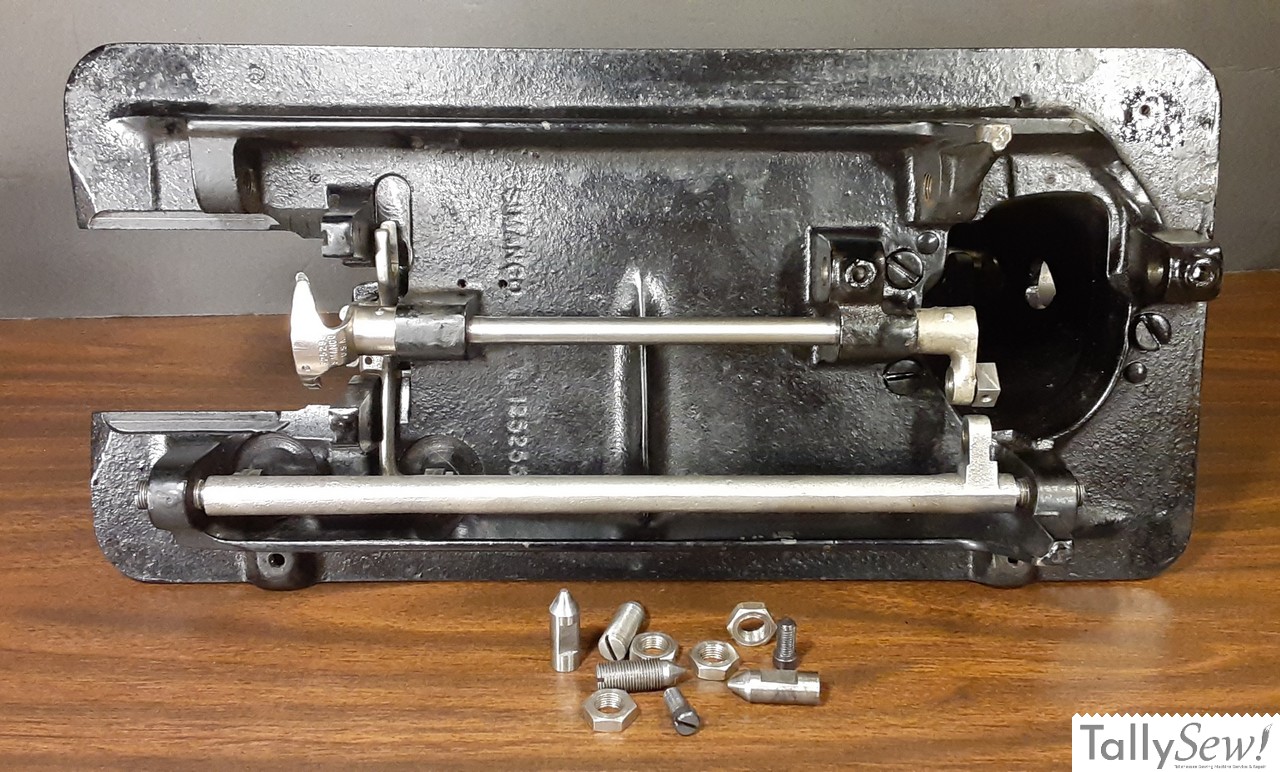
Make sure that the oil hole on the oscillating shaft crank is pointing in so that it’s facing the oil wick in the center of the fork in the oscillating rock shaft.
Insert the oscillating rock shaft so that the cam is in the fork of the feed lifting rock shaft, and the slider of the oscillating shaft crank is in the fork of the oscillating rock shaft.
Gently squeeze the two centers towards each other and center the oscillating rock shaft between them and snug down the set screws.
Install the four nuts one the rock shaft centers.
You should be able to rotate the rock shafts back and forth without any dragging or biding, but since the main shaft isn’t connected to the bottom end you can’t really test anything at this point.
Related Articles
Singer 15 series needle bar box
The Singer model 15 series machines is simple and robust. I’m going to give you an overview of how to assemble the needle, and presser
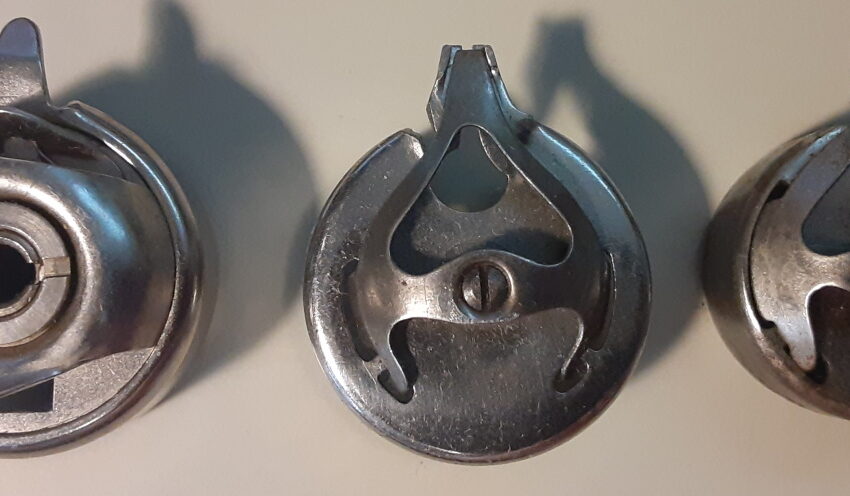
Replace a broken Shuttle Driver Cushion Spring
The broken shuttle driver cushion spring on my 1932 Singer model 15-91 The first thing I should mention is that you do not need to
Singer 15 series shuttle race
Removing the shuttle race assembly is a pretty simple process

Singer 15 series feed and lift verticals
The two main assemblies found in the pillar of the machine. Crank connecting rod (top), and feed forked connection and feed regulator assembly parts.
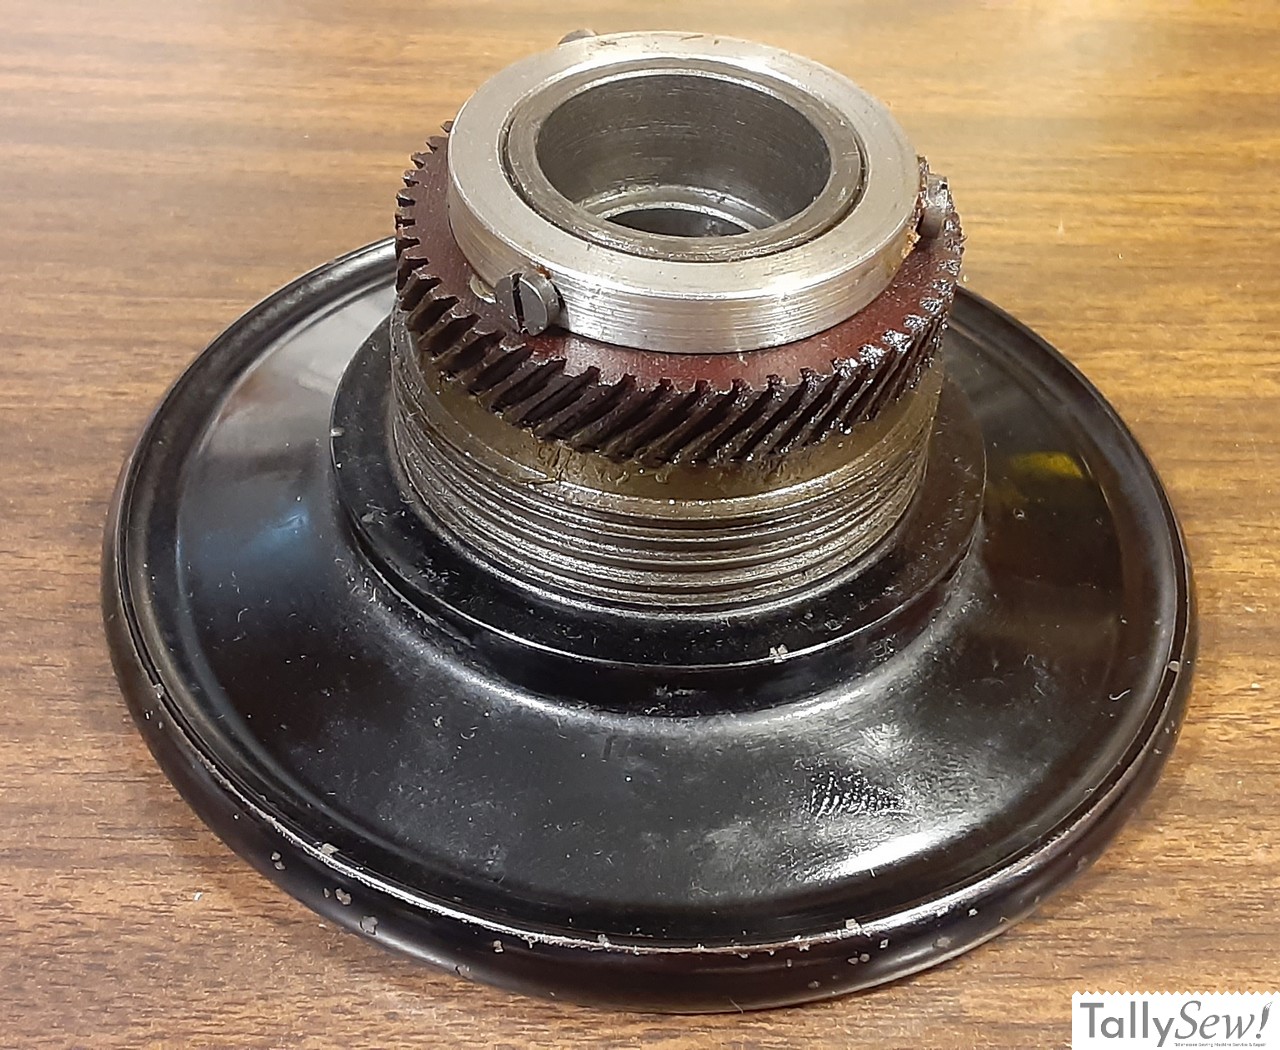
Singer 15-91 and 201-2 handwheels
The handwheels found on Singer 15-91 and 201-2 sewing machines are a little more complicated than they seem at first glance. I’m going to start

Singer CAT.-S4 lamp
The Singer lamp model CAT.S-4 was used on several Singer sewing machine models. It was usually black, but was also produced in green, and in