Singer, 1 cord, 2 wire, bakelite, female, three post plug
Today I’ll be demonstrating the process of wiring the female end of a Singer three post, one cord, two wire power plug. This is the “power only” plug that you plug into the wall at one end, and the other end you plug into the machine plug usually found at the base of the machine below the handwheel. This power wire is the one you use if the motor control is hardwired into the machine.
- This article is about a specific part and for a specific machine, If you’re working on a different part, then you should not assume what you’re working on is wired the same way.
- If done incorrectly this project can lead to electrocution, and/or fire, leading to injury and/or death.
- If you aren’t qualified or capable to do this project I advise you to simply purchase a replacement power cord from one of the many stores that carry them.
- In truth it’s probably less expensive and safer to purchase a new assembly than to rebuild the vintage parts.
- If you move forward on this project you do so at your own risk.
Wiring diagram
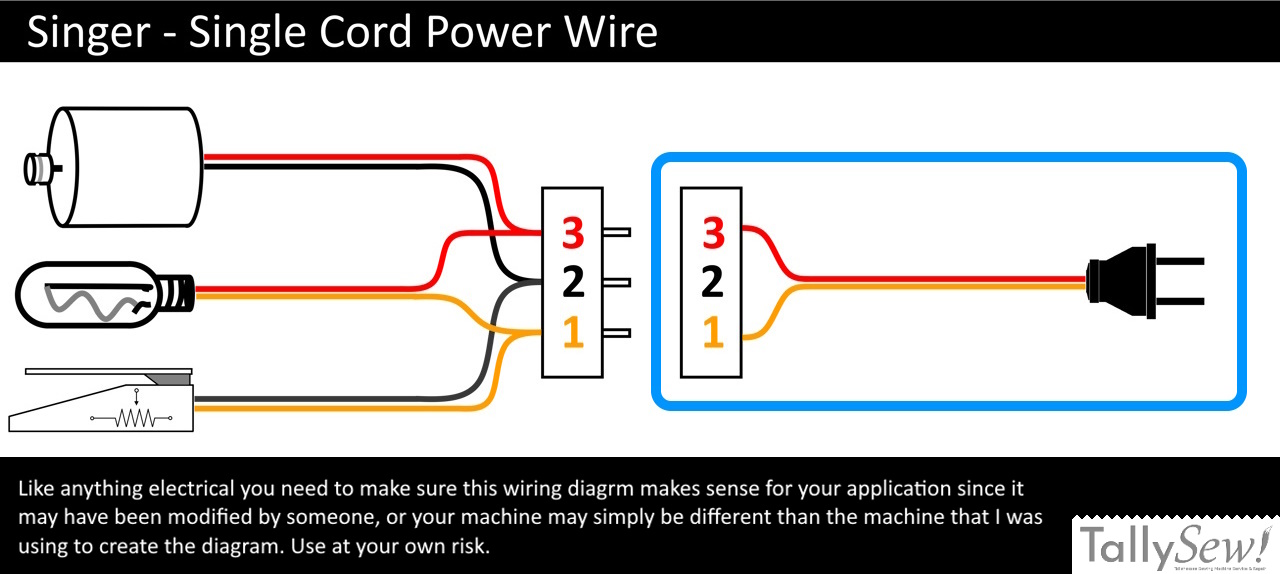
Note: There are a lot of different wiring configurations and plug designs, so make sure you’re using the information relevant to your machine. If you’re unsure in any way please take your machine to a qualified technician.
I also have a tutorial on how to wire the plug for the Singer 2 cord 4 wire bakelite female three post power and control cord plug.
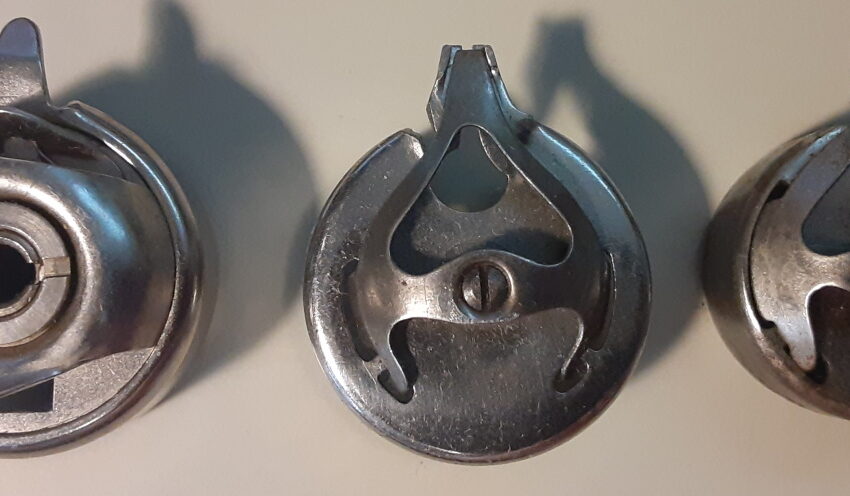
Plug parts

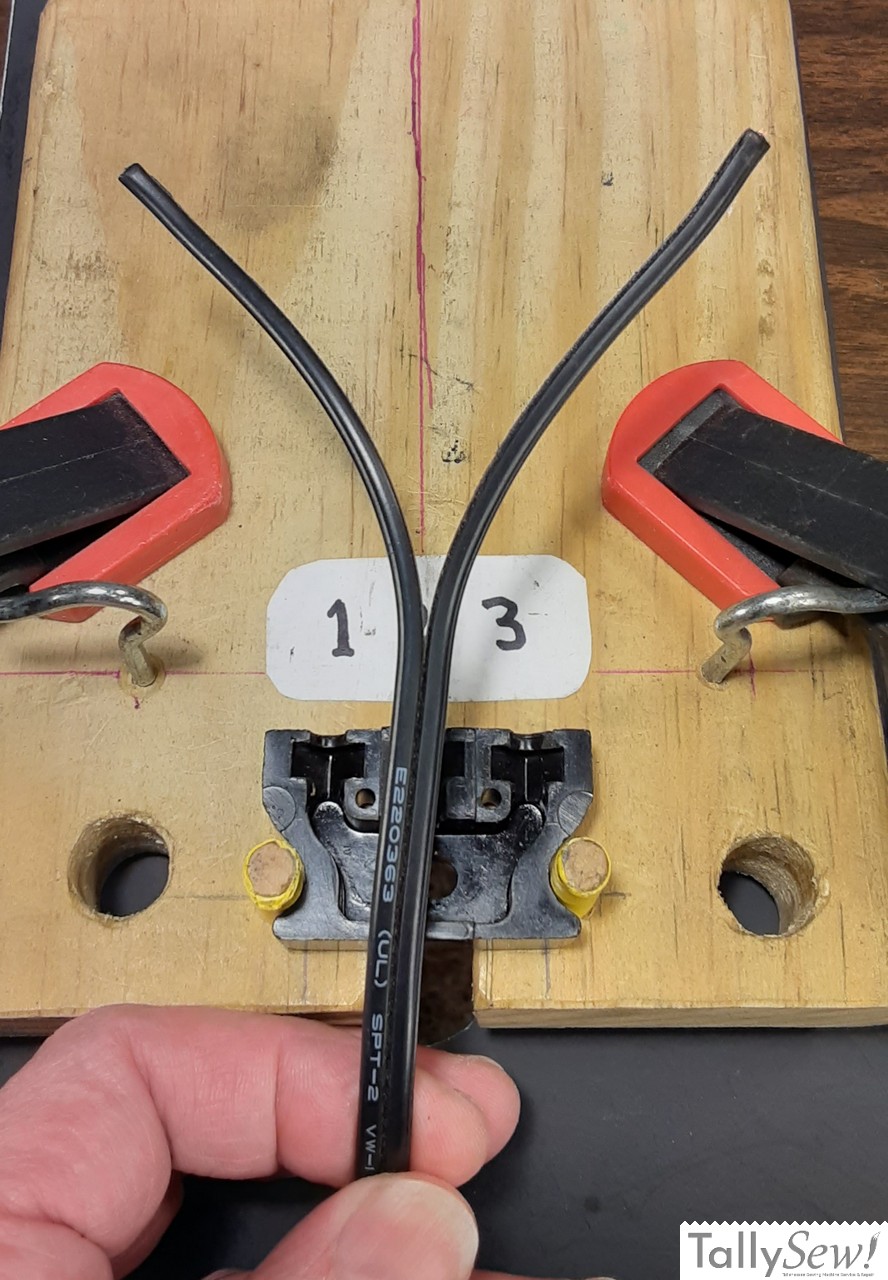
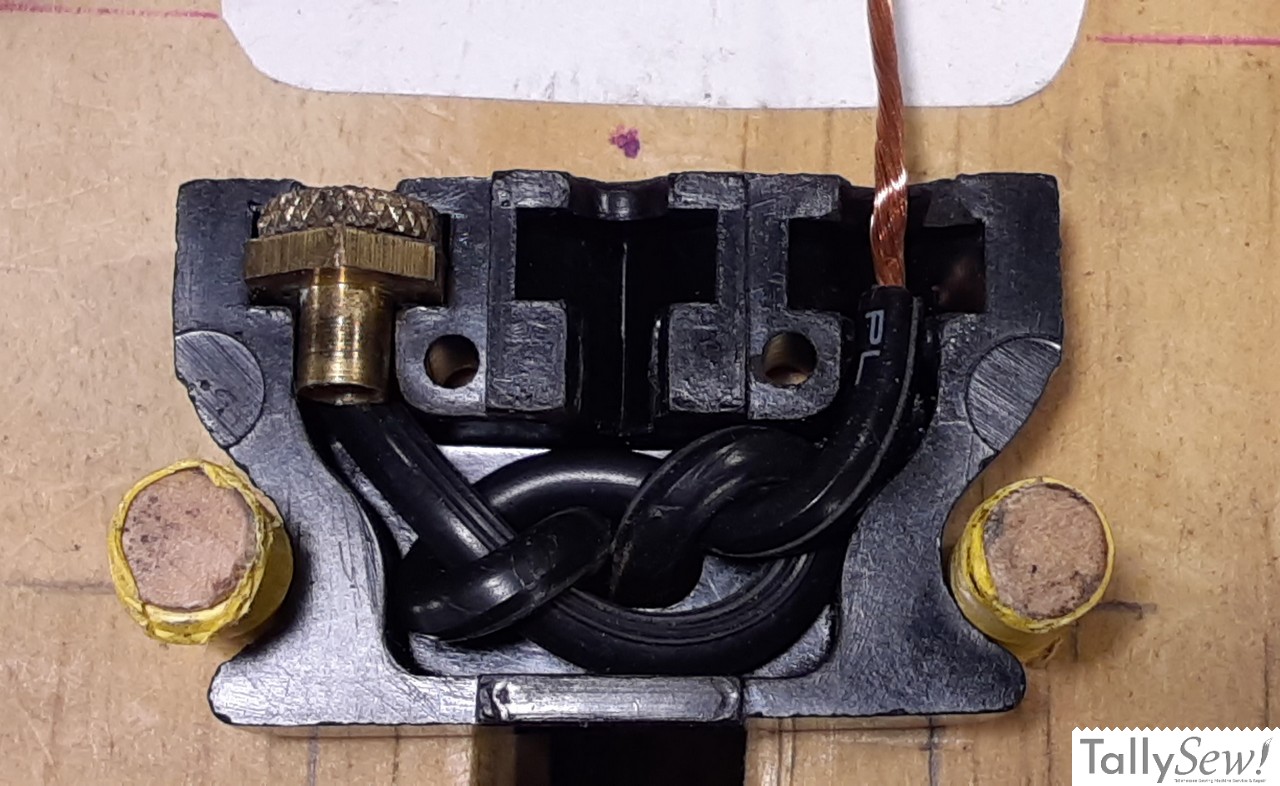
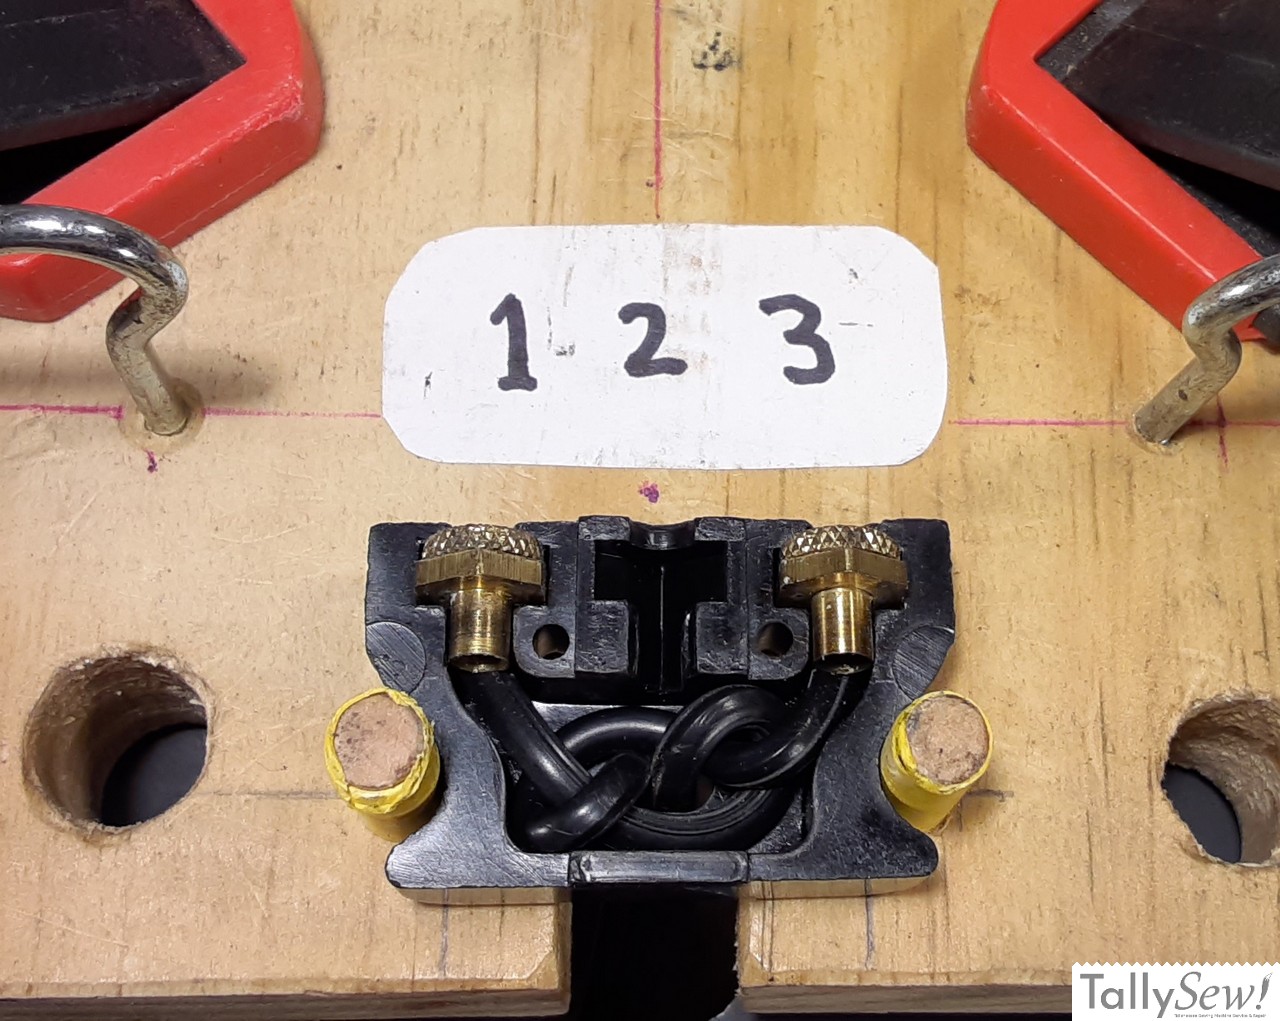
The one cord, two wire power plug has a slot rather than a round hole for the cord to go through.

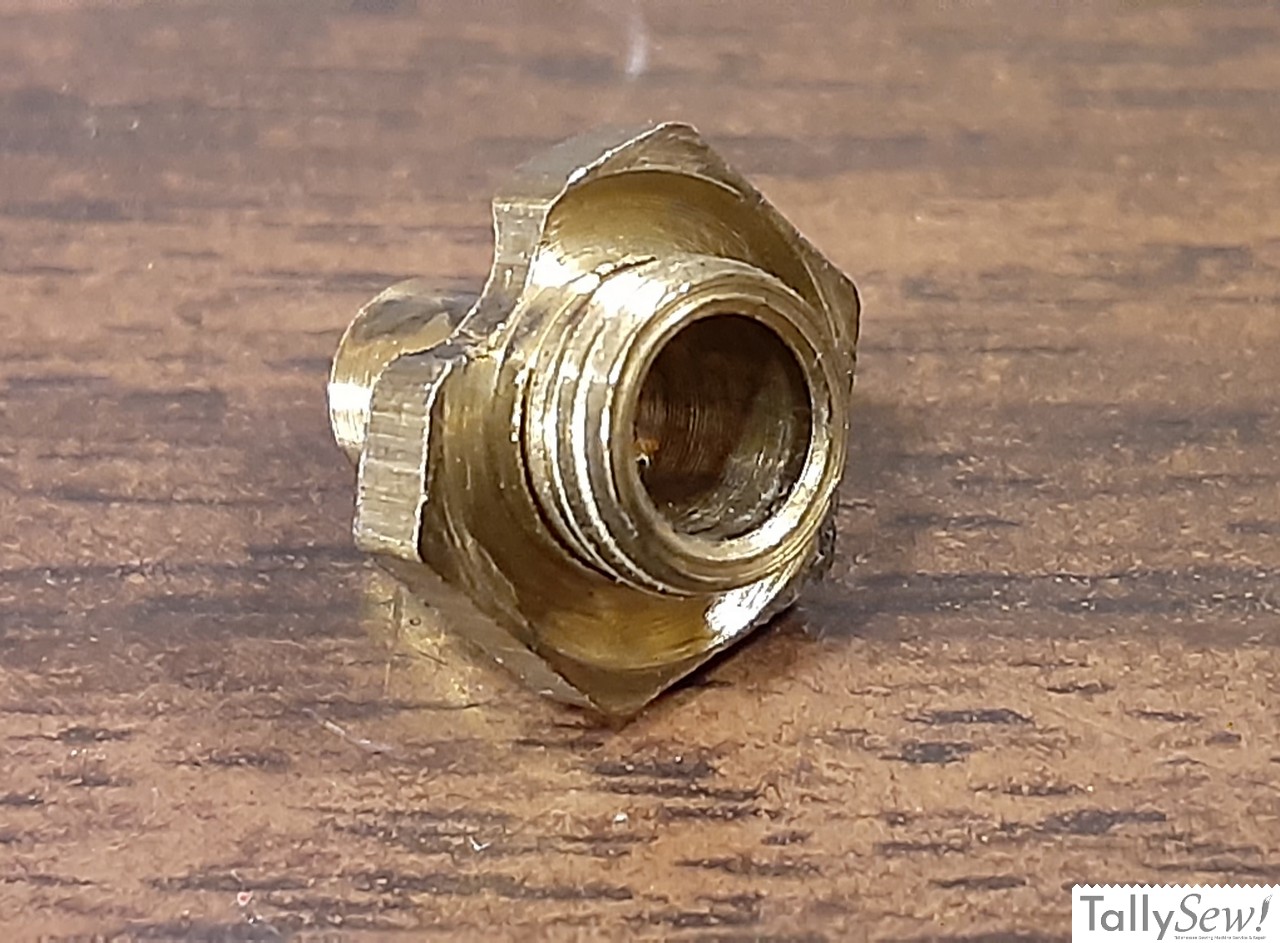
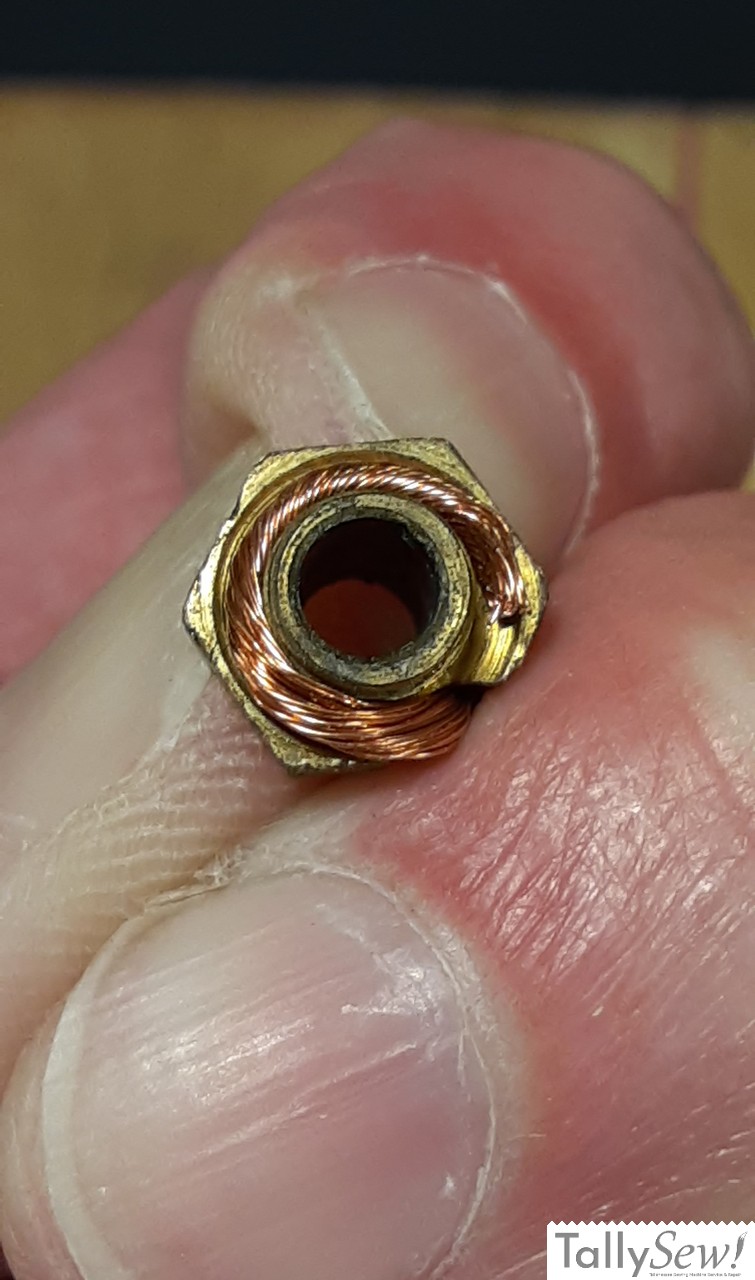
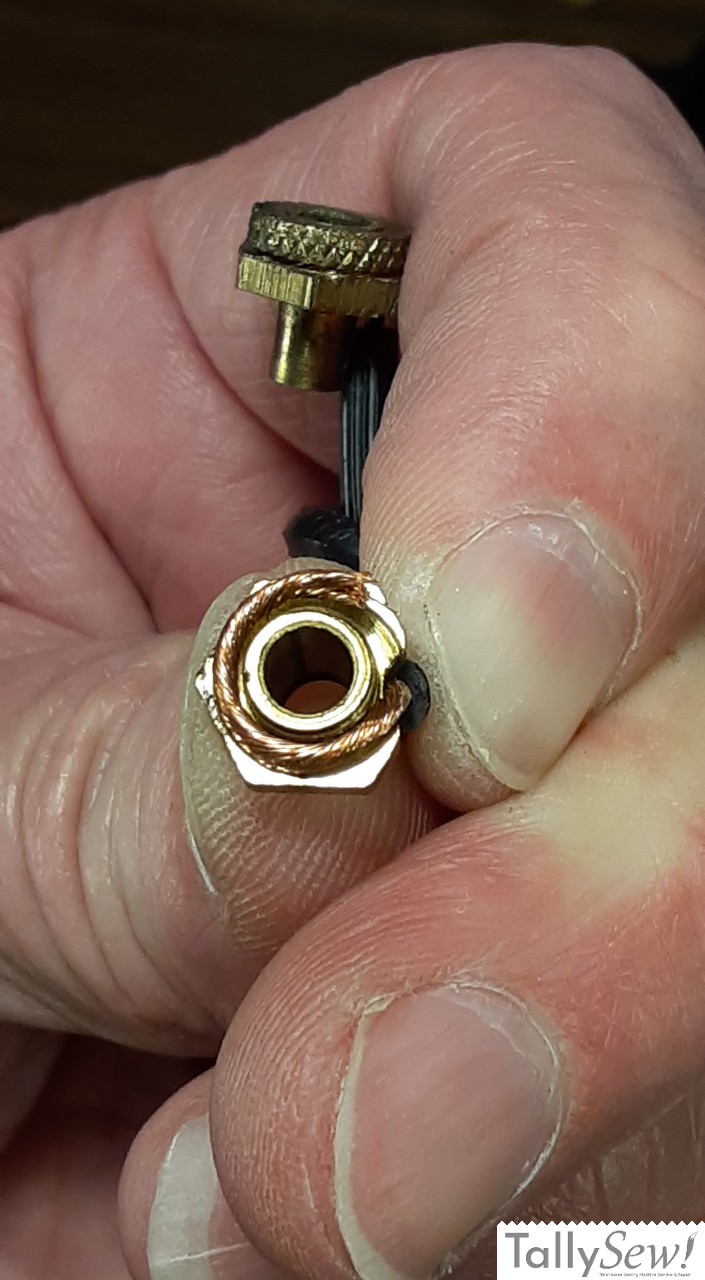
The plug should also include thee terminals, each one made of two parts. A circular nut that is flat on one side and concave on the other, and the terminal body that the nut can screw onto.
Choosing and prepping wire
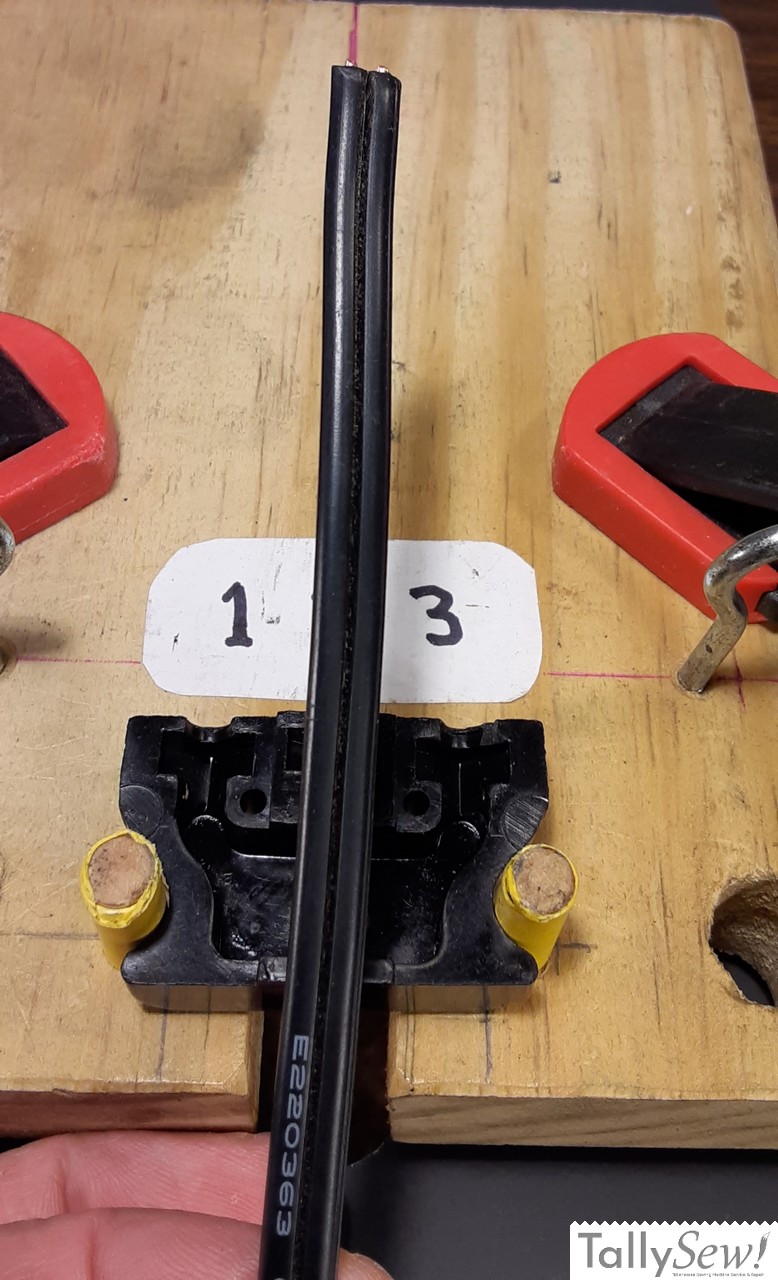

I’m using 18/2 SPT-2 lamp wire for this power cord, and that’s the wire size and type generally used for vintage sewing machine power and motor control cords. Start by deciding what length of power cord you want to end up with and add 6 to 8 inches to account for the wire that will be stripped and for the underwriters knot inside the plug we’re looking at now.
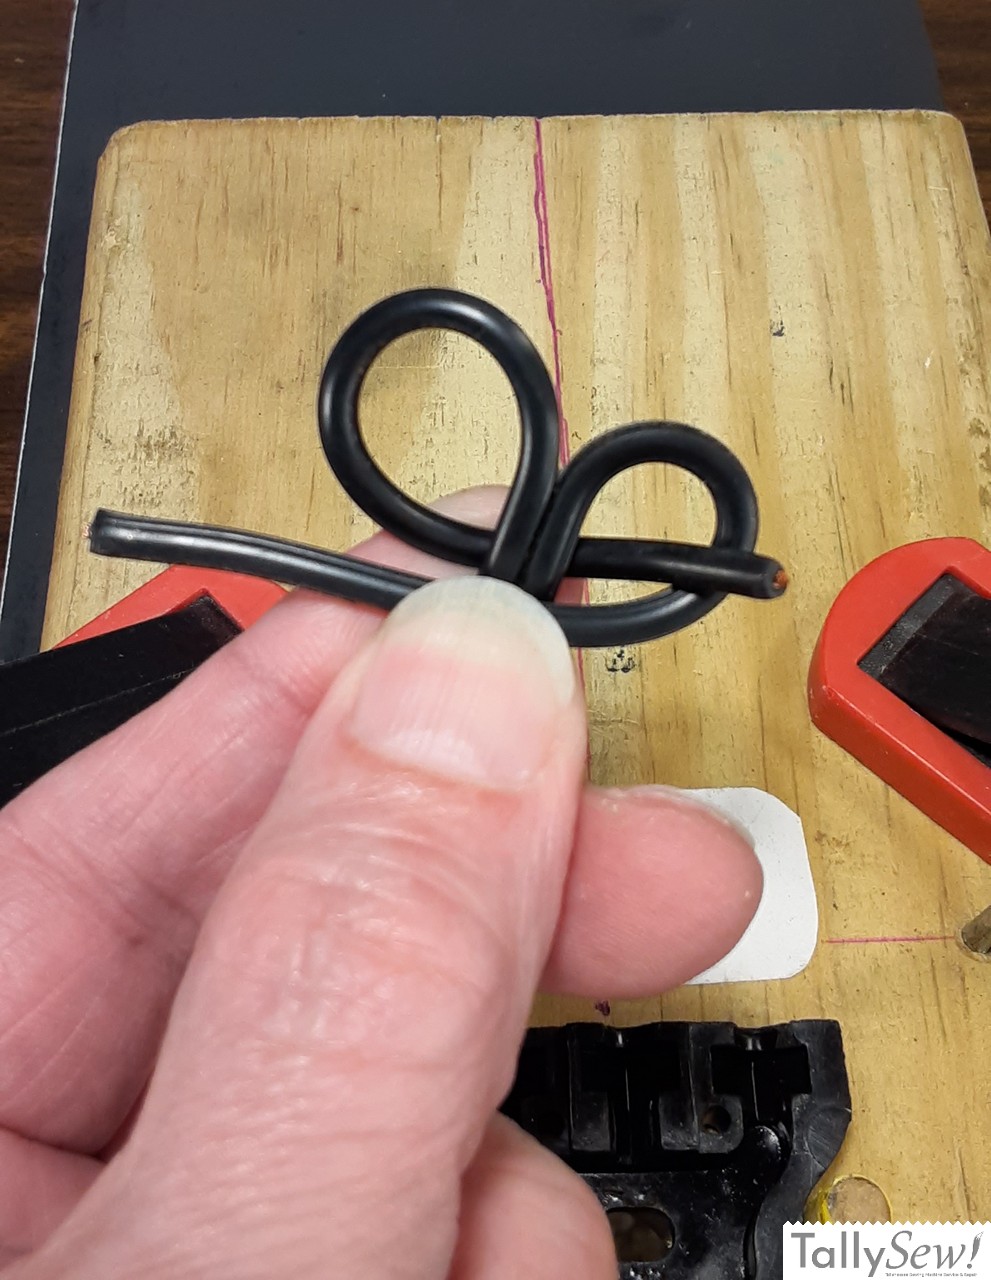
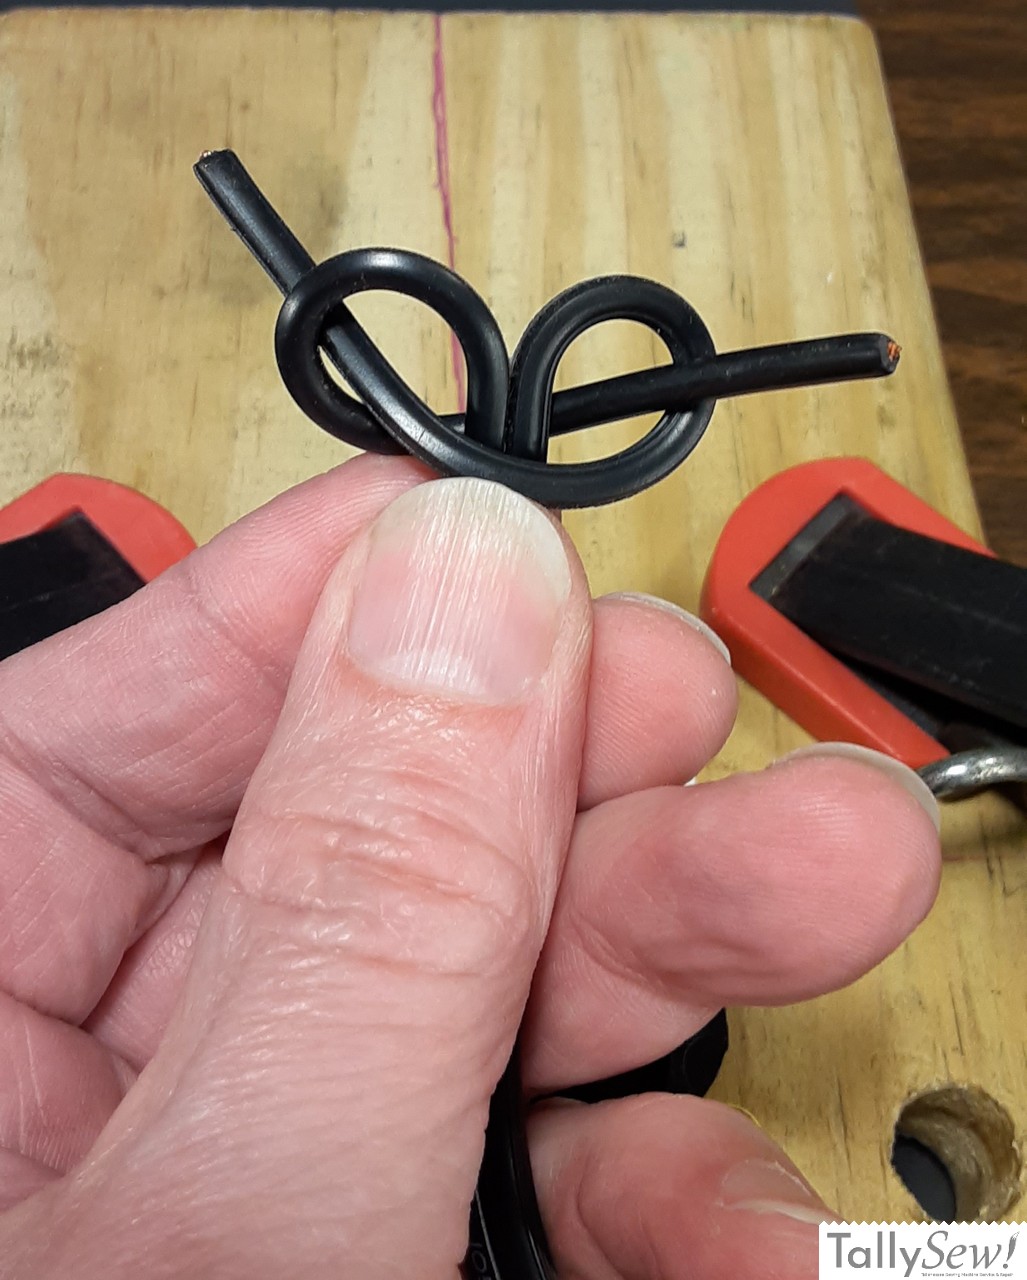
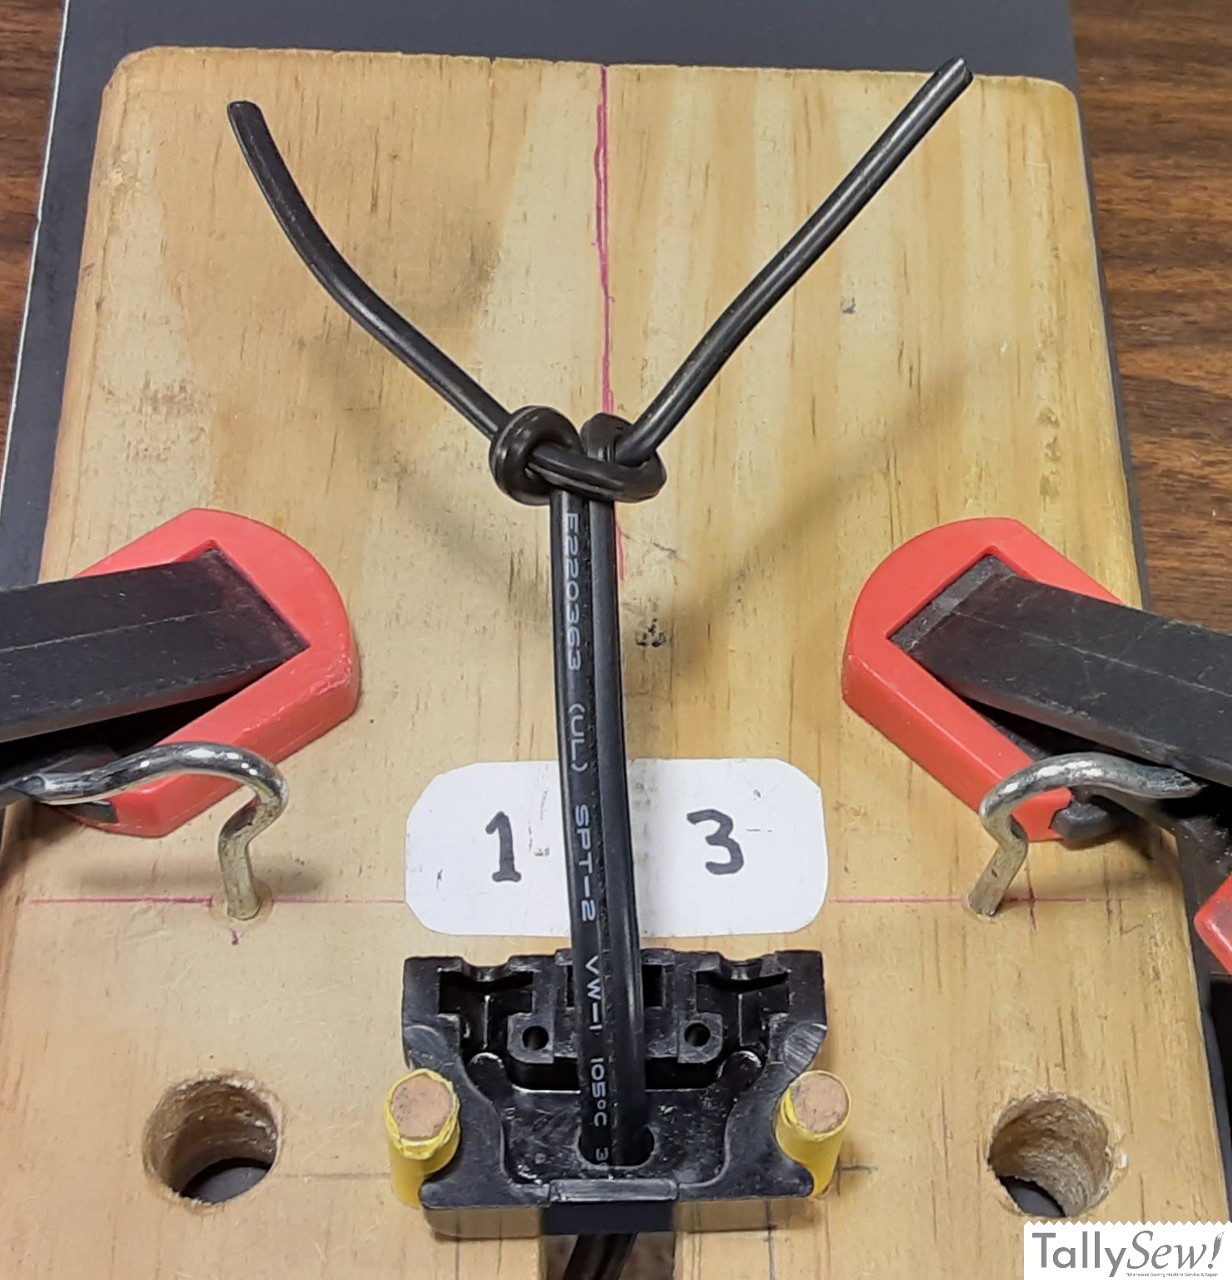
In the photo below is a closeup of an underwriters knot, and in the gallery above you can see how one is tied. This is a knot that you need to learn and will use often when working on vintage sewing machines. It’s used to keep the wires from being pulled out of their terminals when the cord gets pulled. Without an underwriters knot the cord can be pulled free of it’s connection and exposing the live wires.
Follow the steps in the gallery above to tie the underwriters knot, then feed the free end of the cord through the hole in the bottom of the plug.
Closeup of an underwriters knot, with an arrow pointing to said knot, with the words “underwriters knot”, printed inside the body of the arrow.
Wiring the plug


The gallery above shows the steps involved in connecting a wire to a terminal.
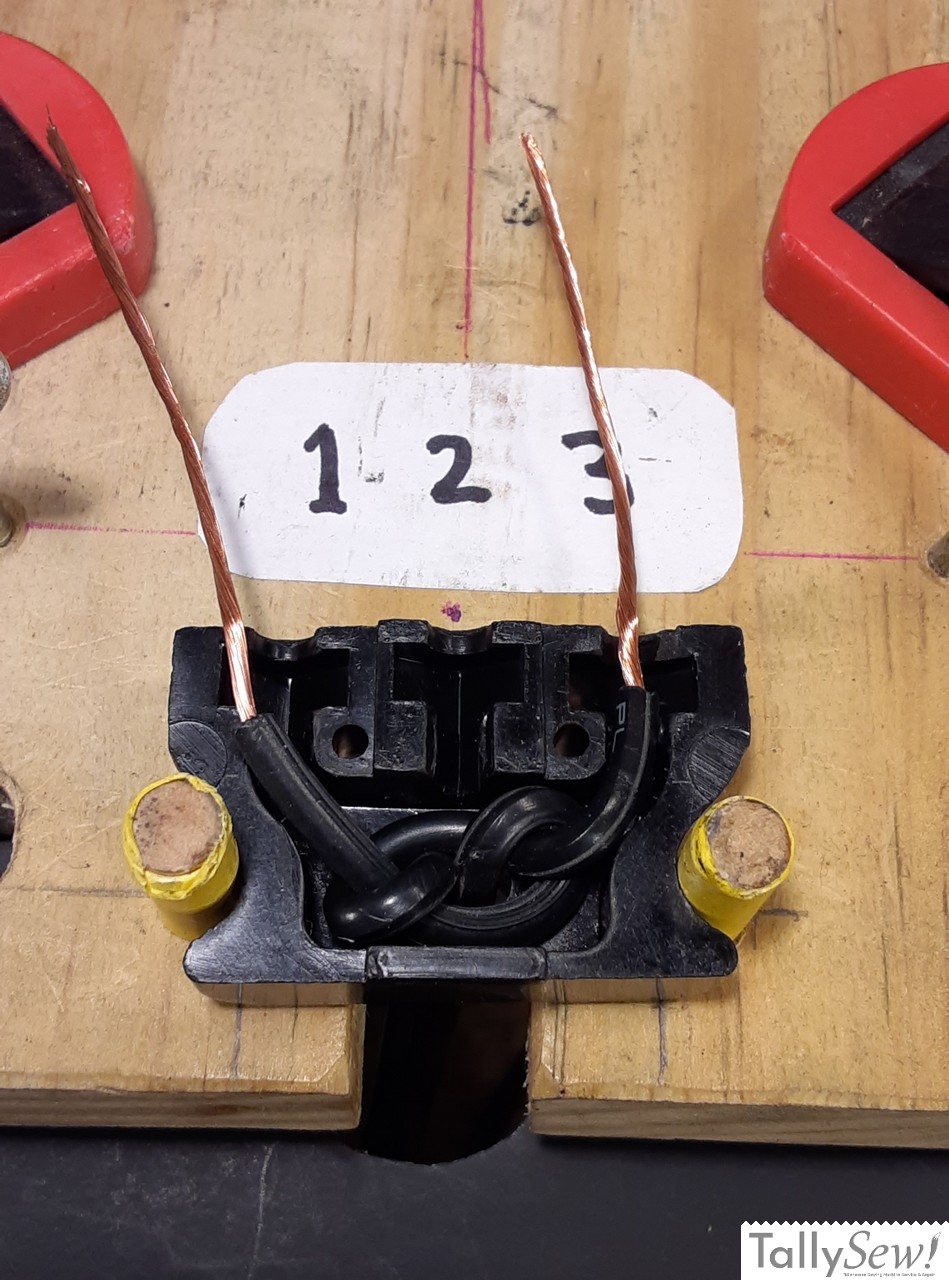
- Nest the underwriters knot into the open area of the plug and lay one wire into each of the outermost terminal slots.
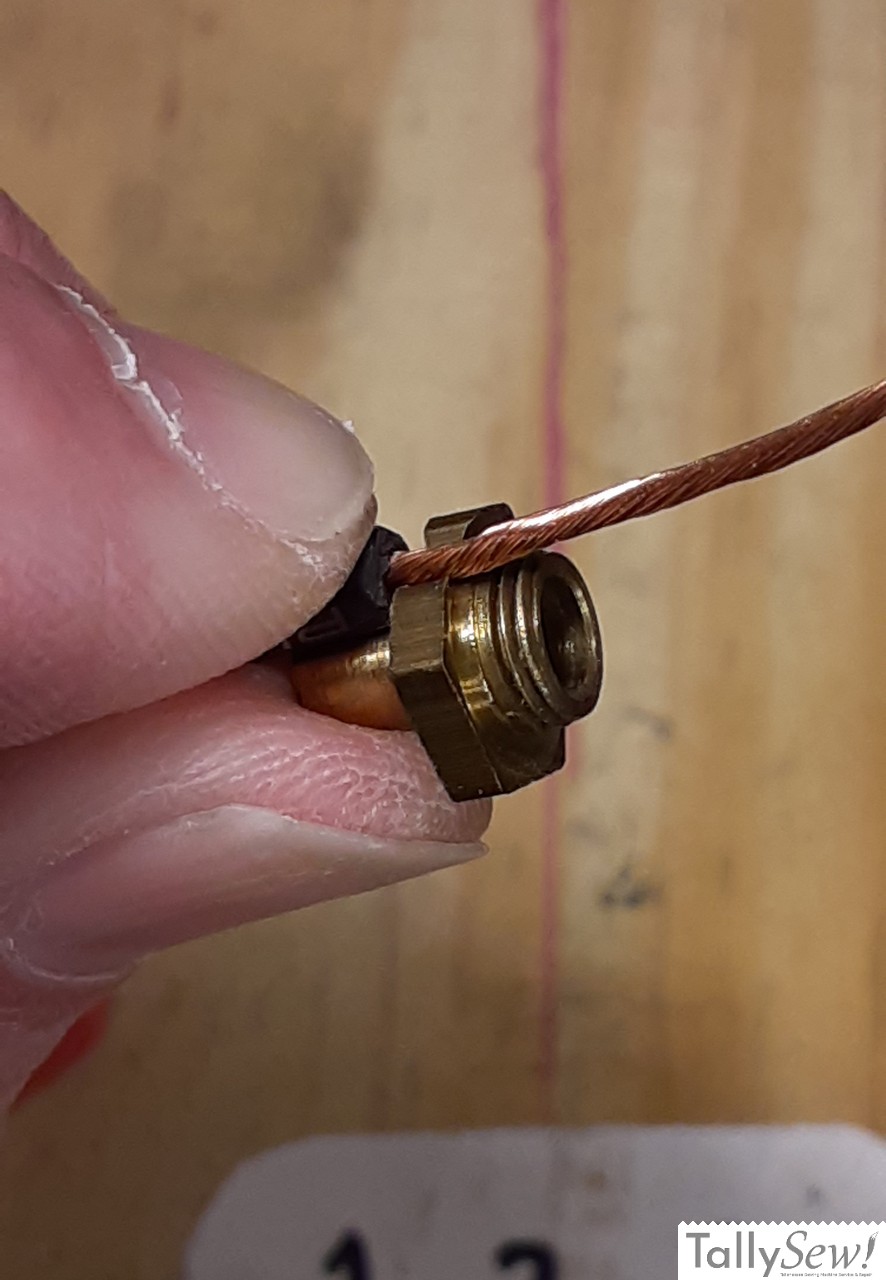
- Strip the insulation off of one of the wires so that the wire starts to be exposed just before the hex portion of the terminal will be when the terminal is in place.
Note: In my sample I have both wires stripped, but it’s probably easier to finish one wire before you start on the next. - Pull the cord up so you have some slack, and hold the insulated portion of the wire so that the stripped portion is sticking out. If the ring nut is still on the terminal, remove it. Place the terminal so that the bare wire fits in the slot in the hex portion of the terminal. The threaded end of the terminal should be pointed out, and the back of the hex should be against the end of the wire’s insulation. Gently twist the wire so that it will be easy to work with, but you aren’t trying to twist it to the point that it becomes overly stiff.
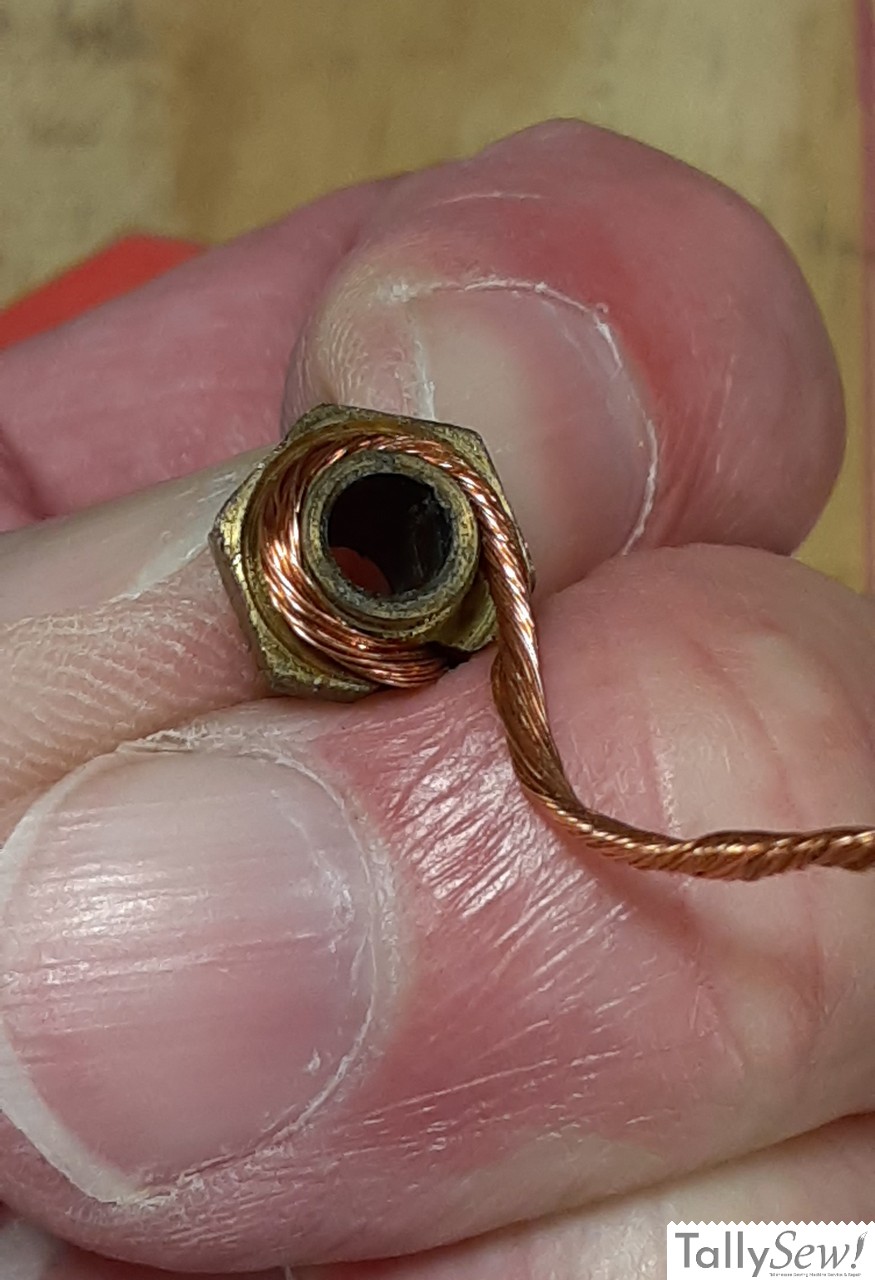
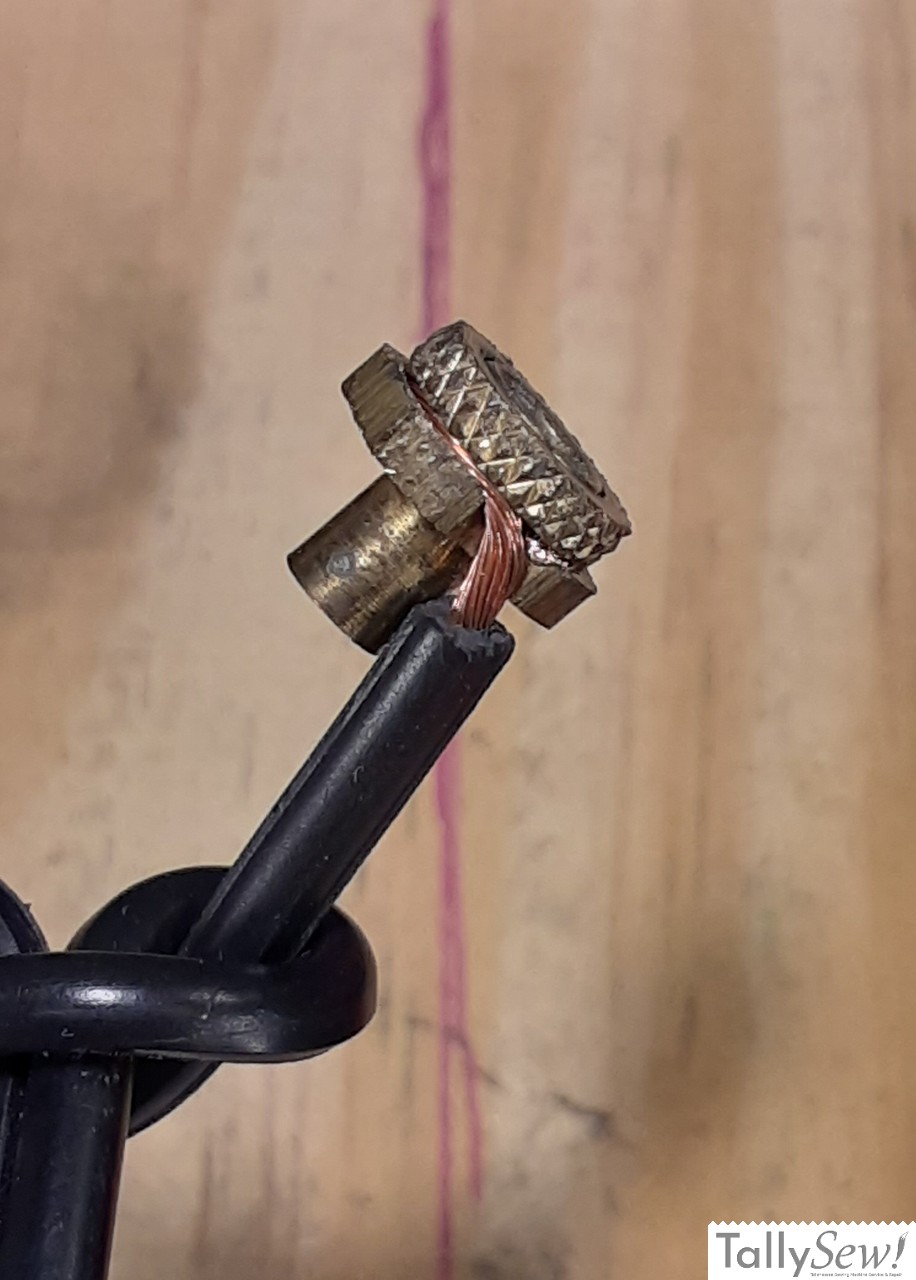
- Pull the exposed wire clockwise around the terminal close to the hex. If the twist of the wire has come loose you can twist it until it stays together.
- Clip off the extra wire just short of overlapping.
- Making sure the exposed wire is neatly in place against the terminal, screw on the ring nut making sure the concave face is towards the wire. The ring nut should be tight enough that you can’t unscrew it by hand. I like to hold the terminal in one hand a tighten the ring with needle nosed pliers. Since you’re holding the terminal in your and you can only get it so tight.
I like to check my fitment, then do the same thing for the other wire.


The slot in the hex portion of the terminal, along with the wire go towards the bottom.
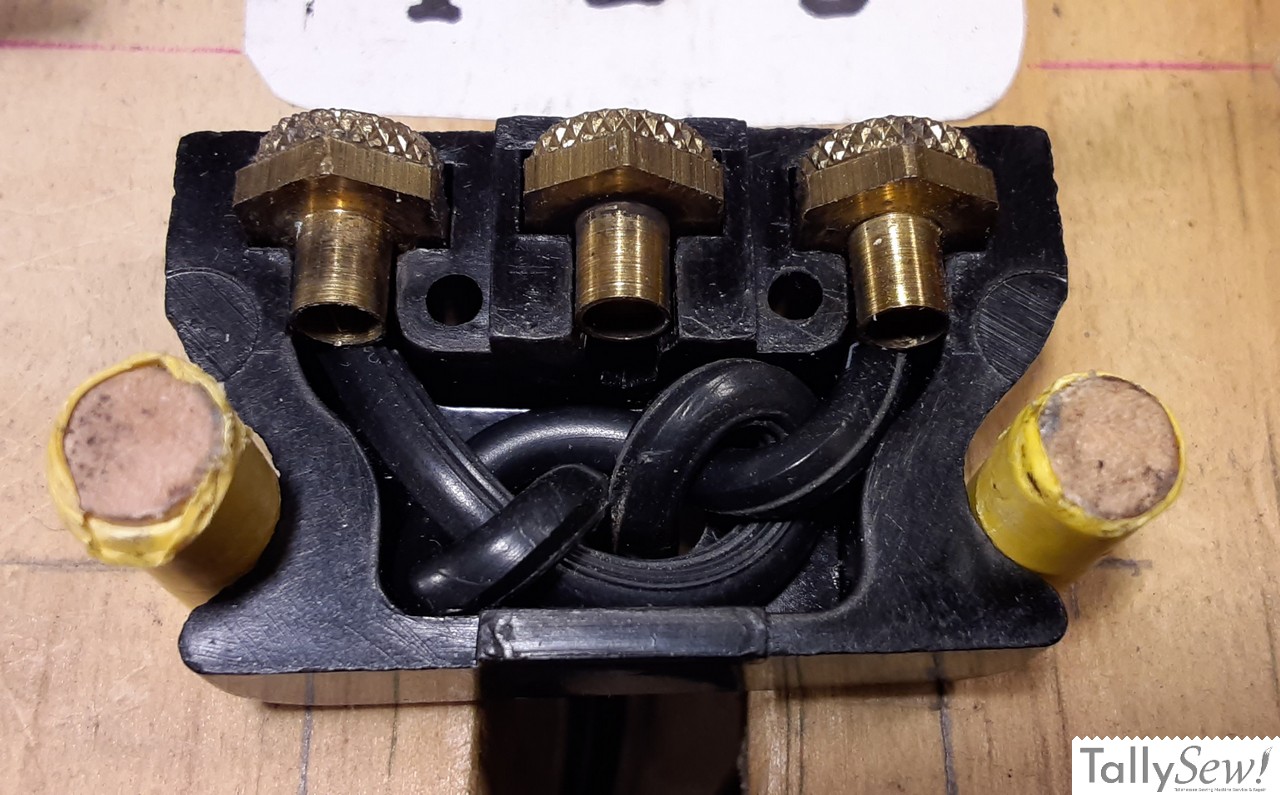
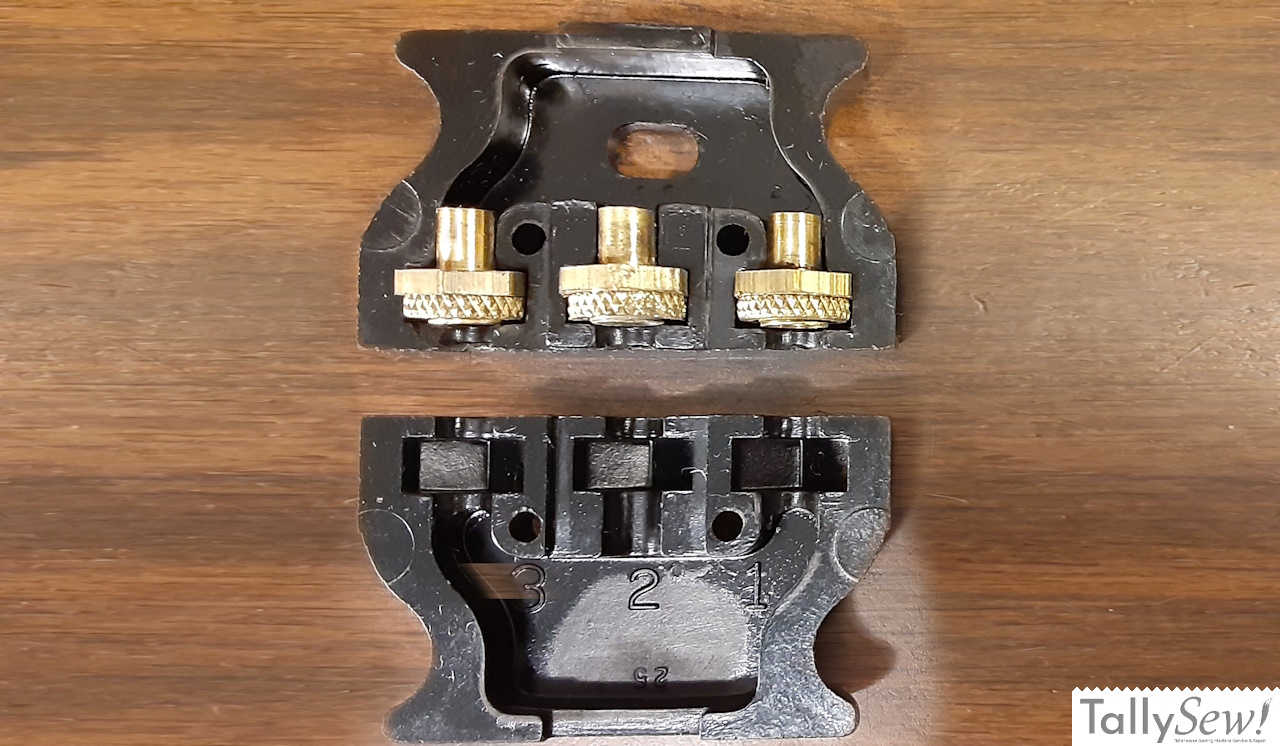
Put the unused terminal with it’s ring nut installed into the center terminal bed. It’s best to keep the unused terminal in place even though it isn’t connected, since it will help hold the plug in place when the machine is being used. If you’re missing this terminal it’s not going to cause any problems for this configuration.
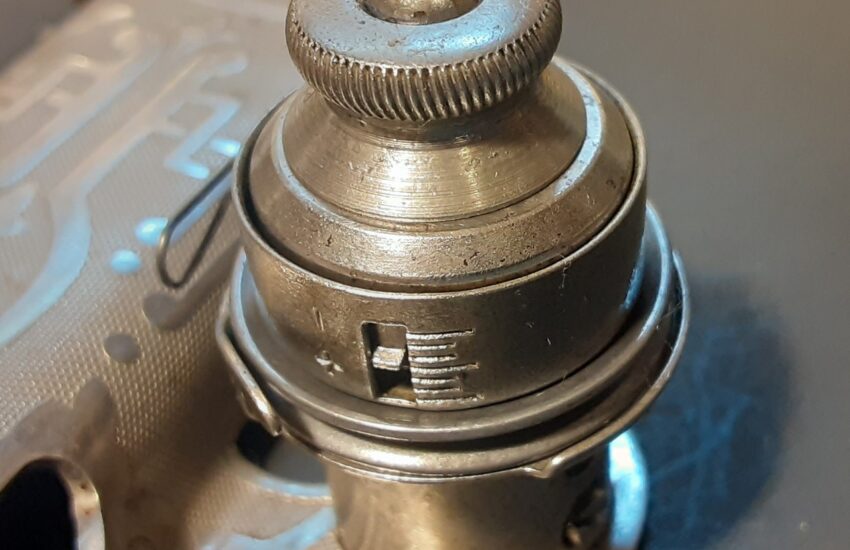
Screw it together

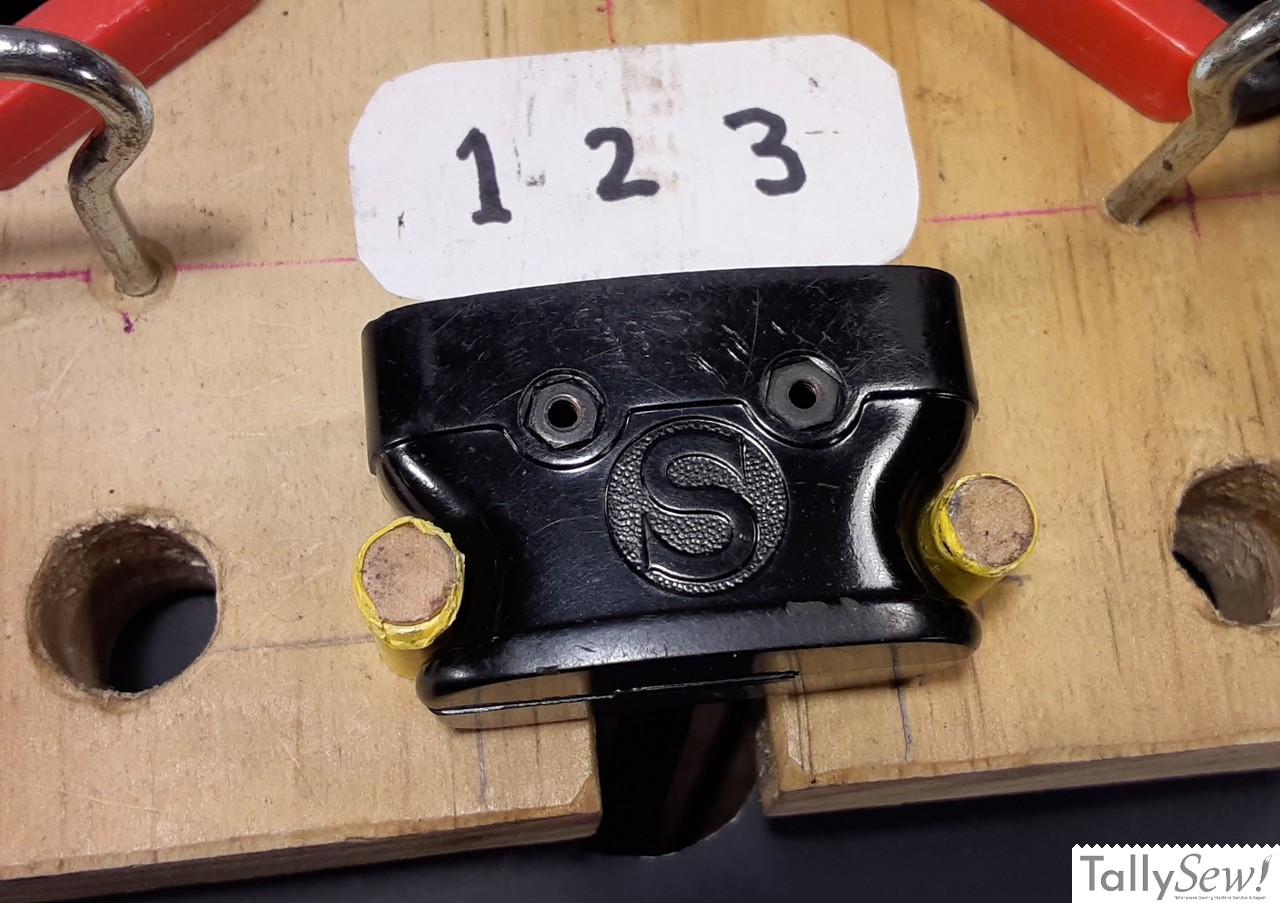
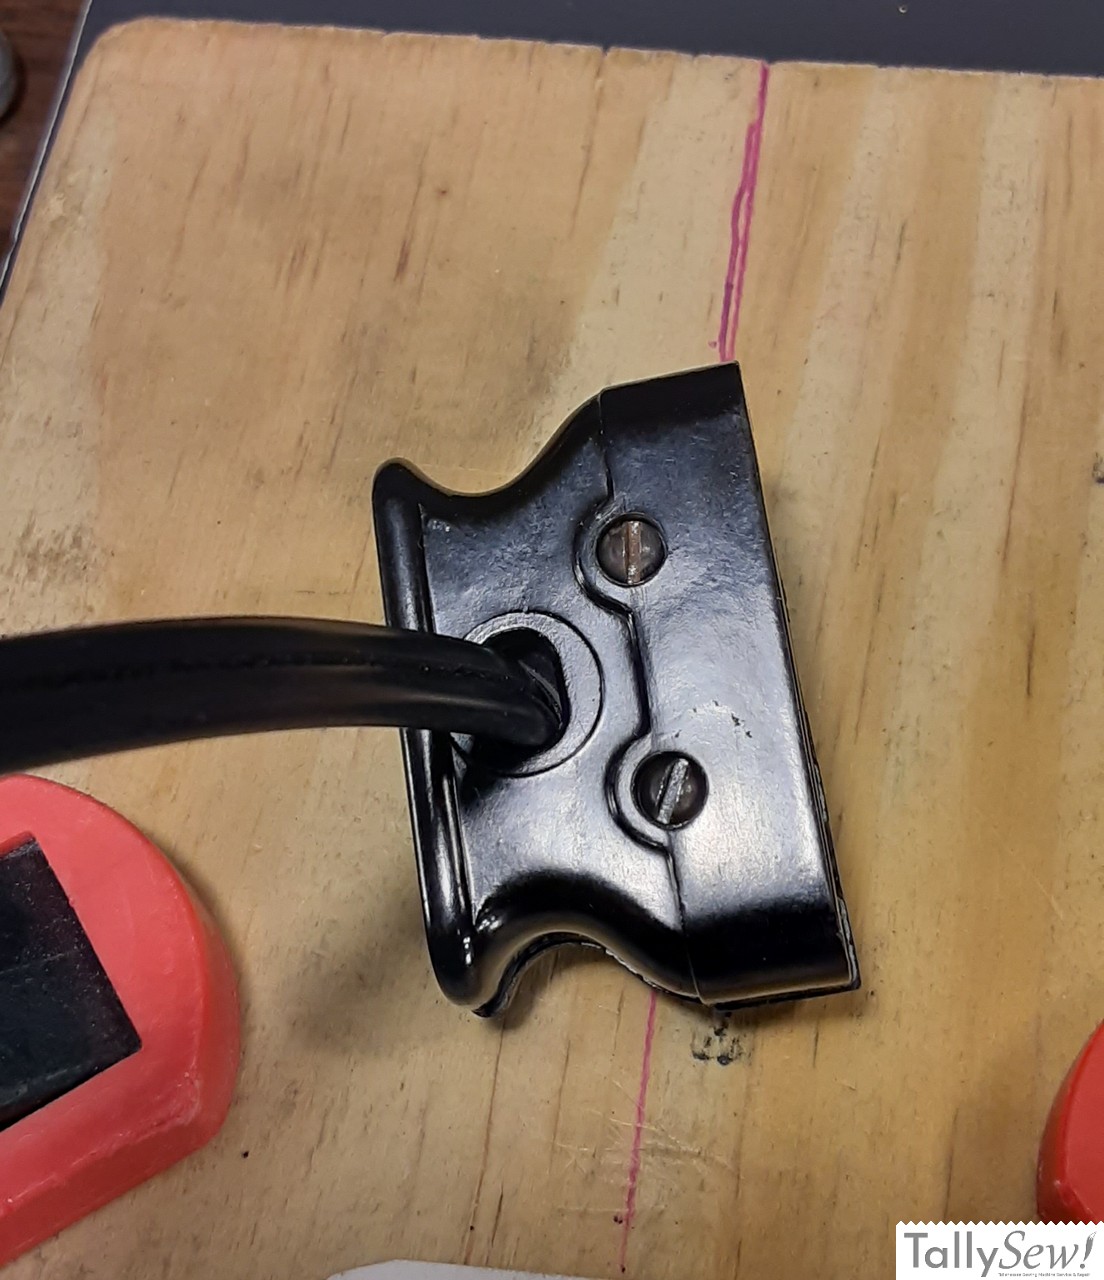

Some of these sockets have hex shaped pockets on only on the top of the plug, others on the top and the bottom. One way or the other, the hex nuts fit in those pockets, and the screw can fit in a hex pocket or round pocket.
Make these screws snug but DO NOT OVERTIGHTEN! Bakelite is very hard and kind of brittle.

This one was just for practice, and this is one of those jobs that practice will make much easier.