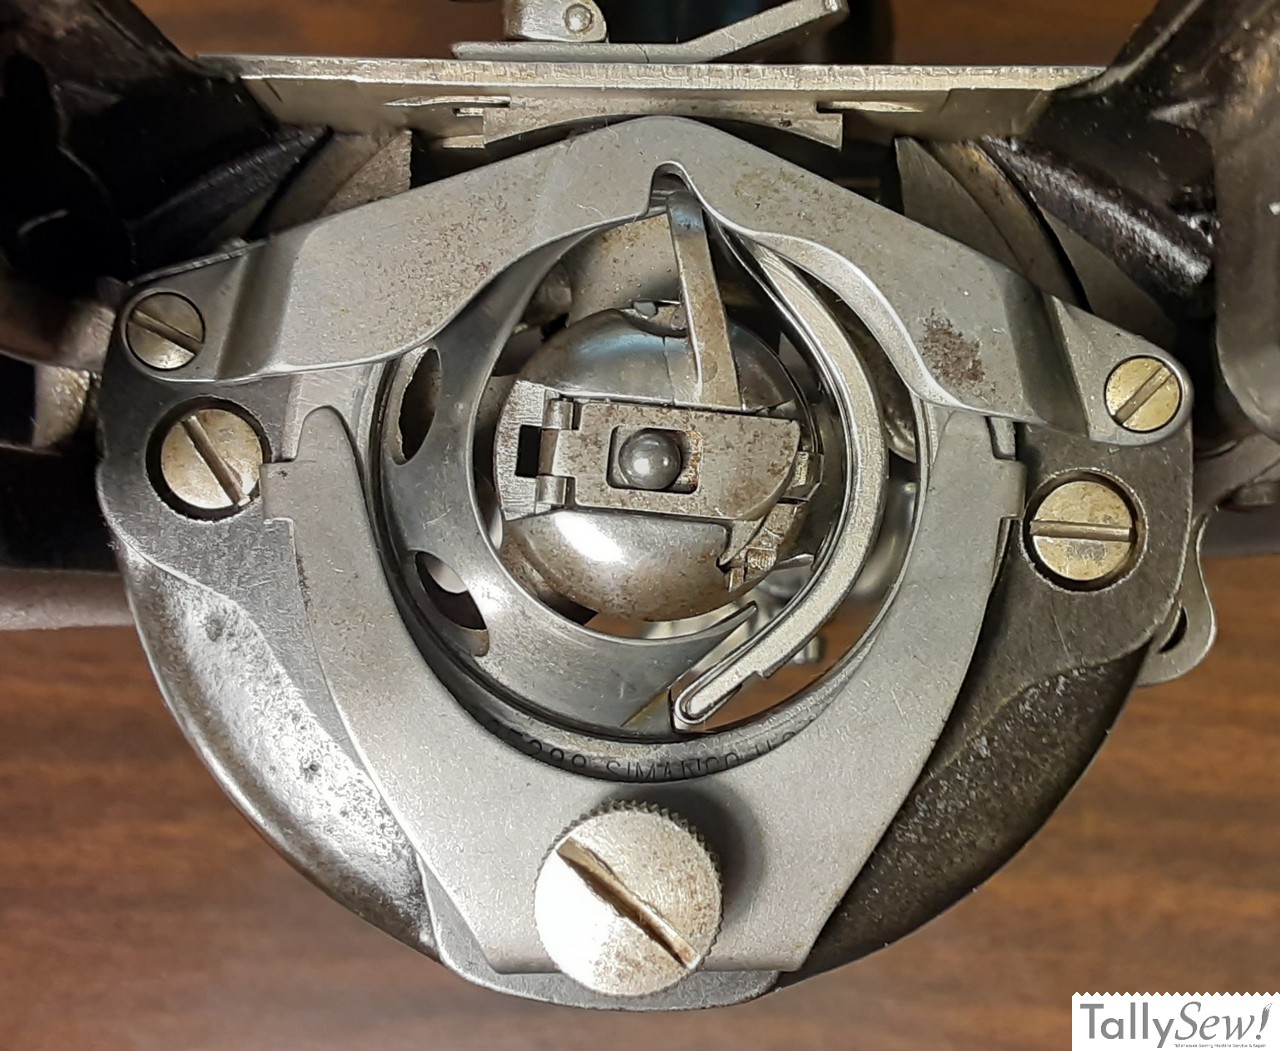
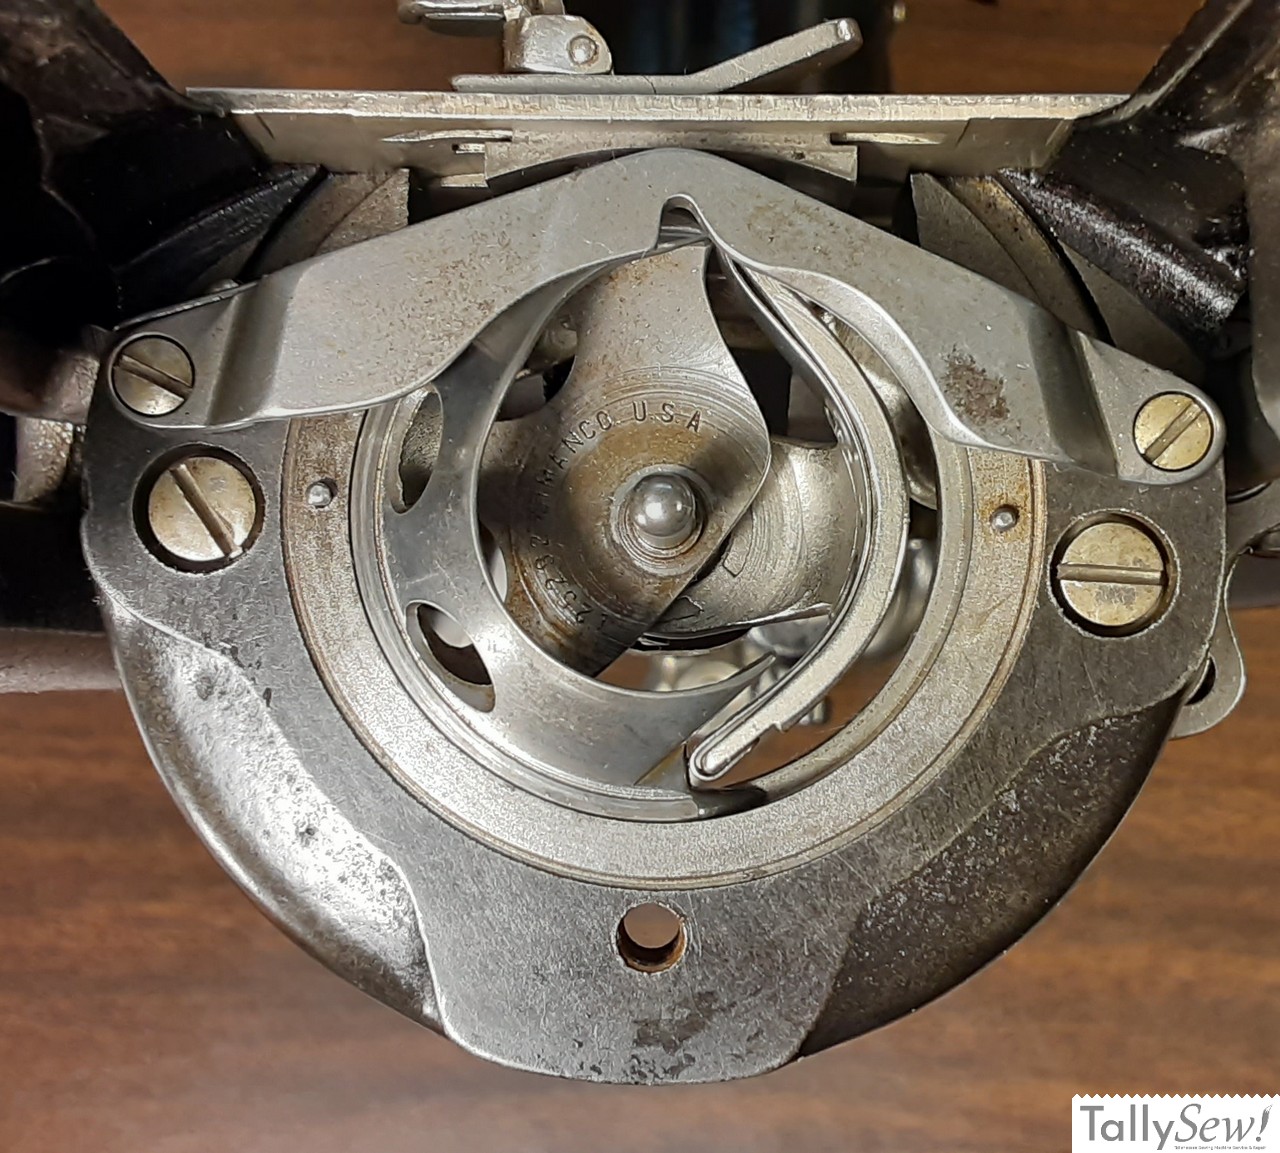
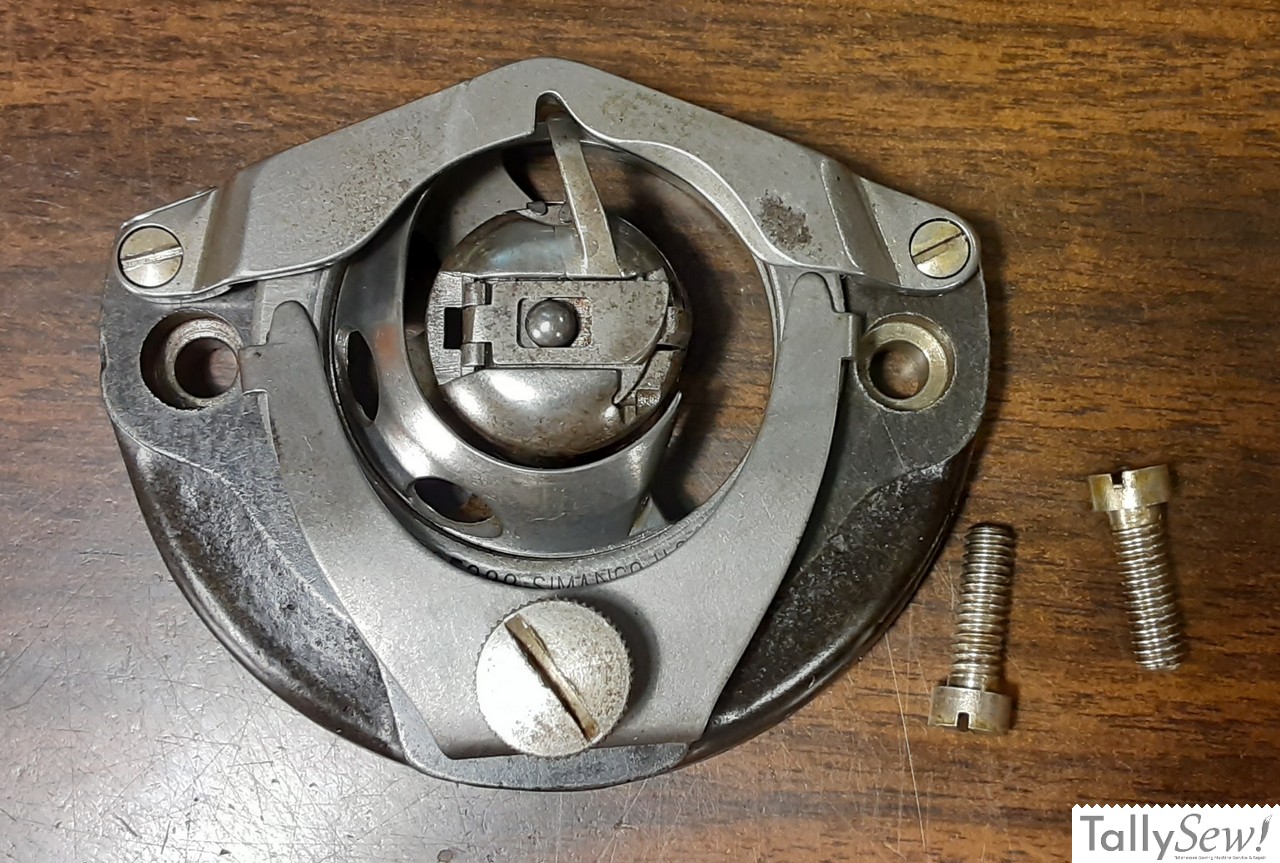
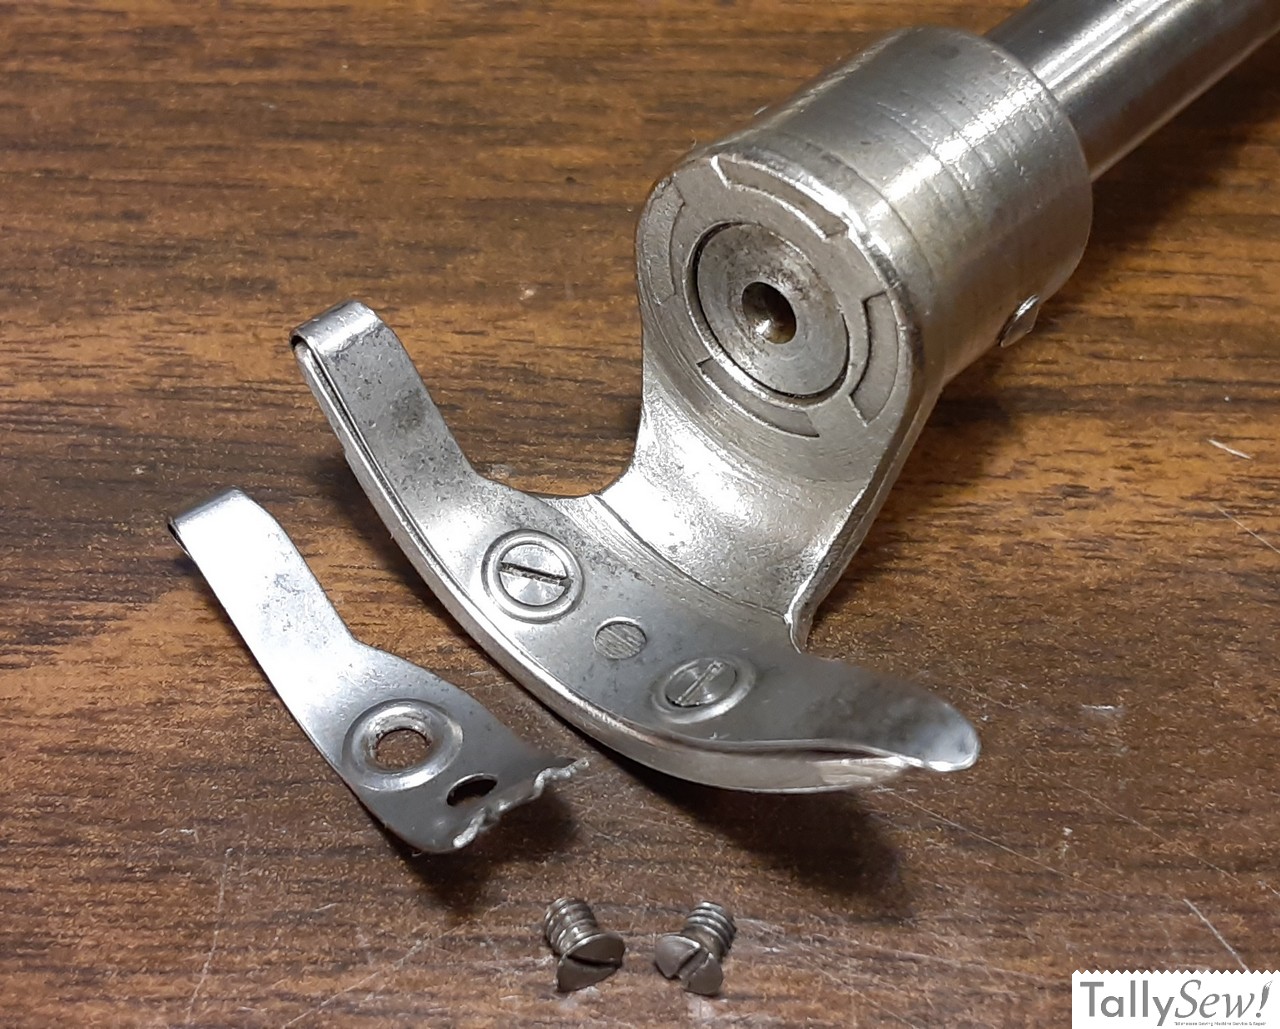
Singer 15 series shuttle race
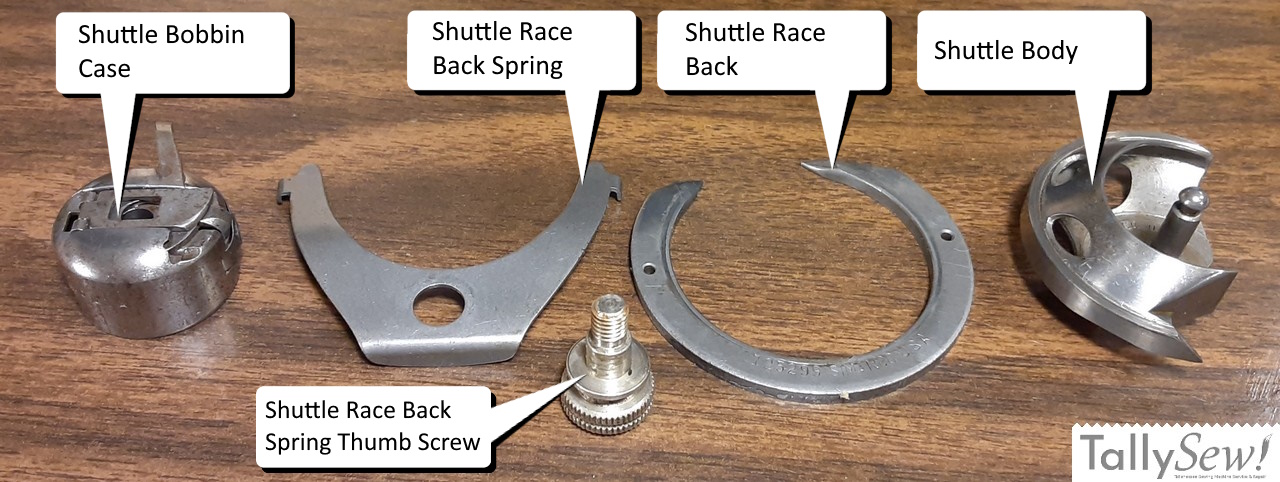
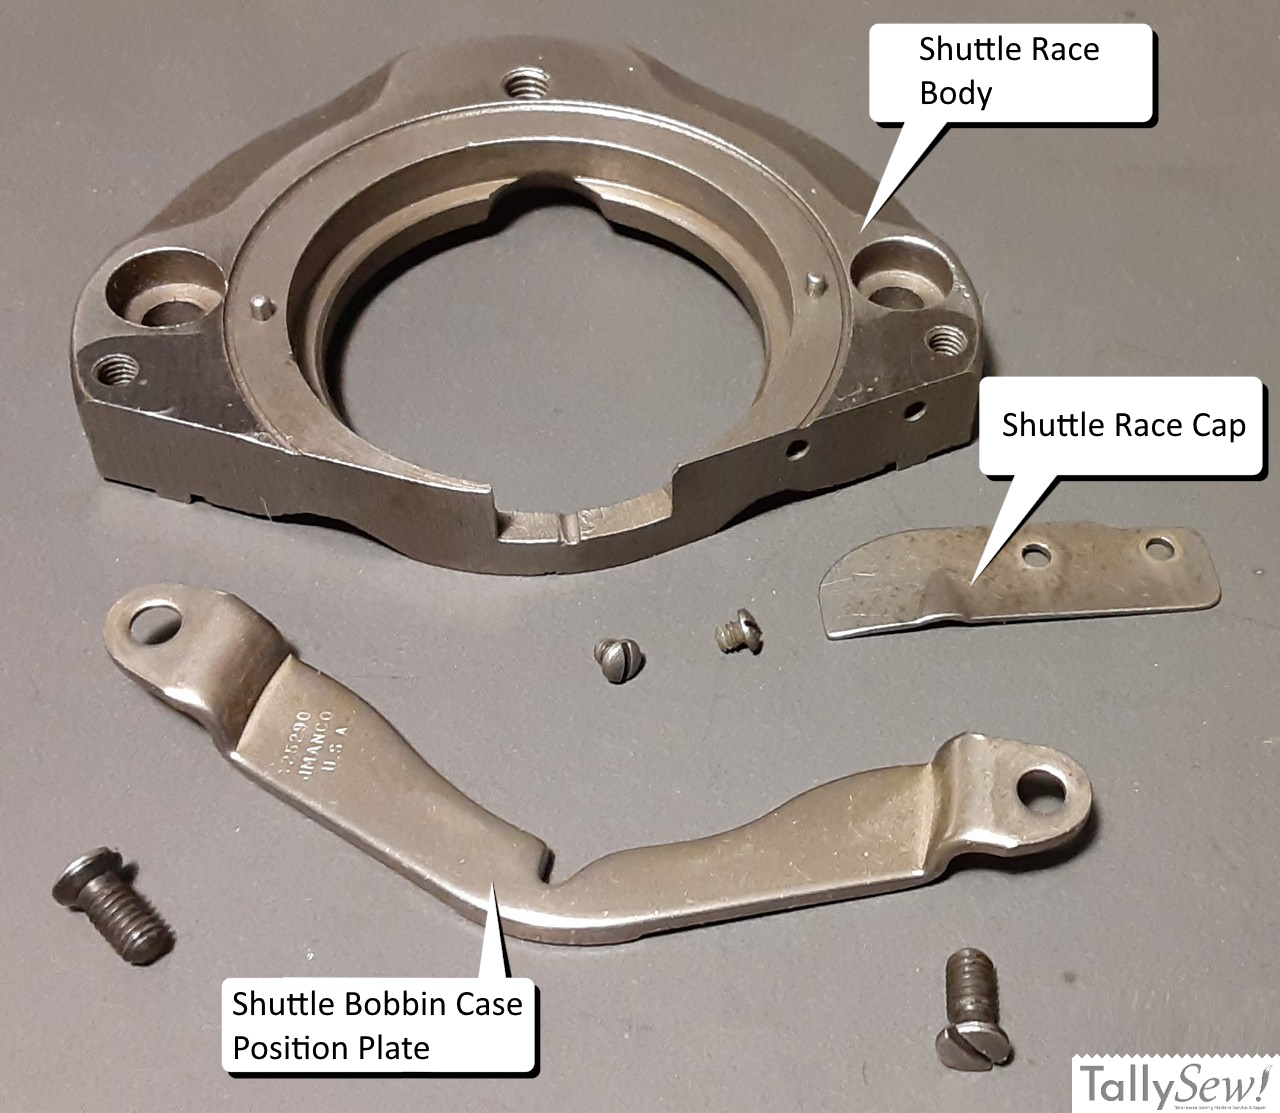
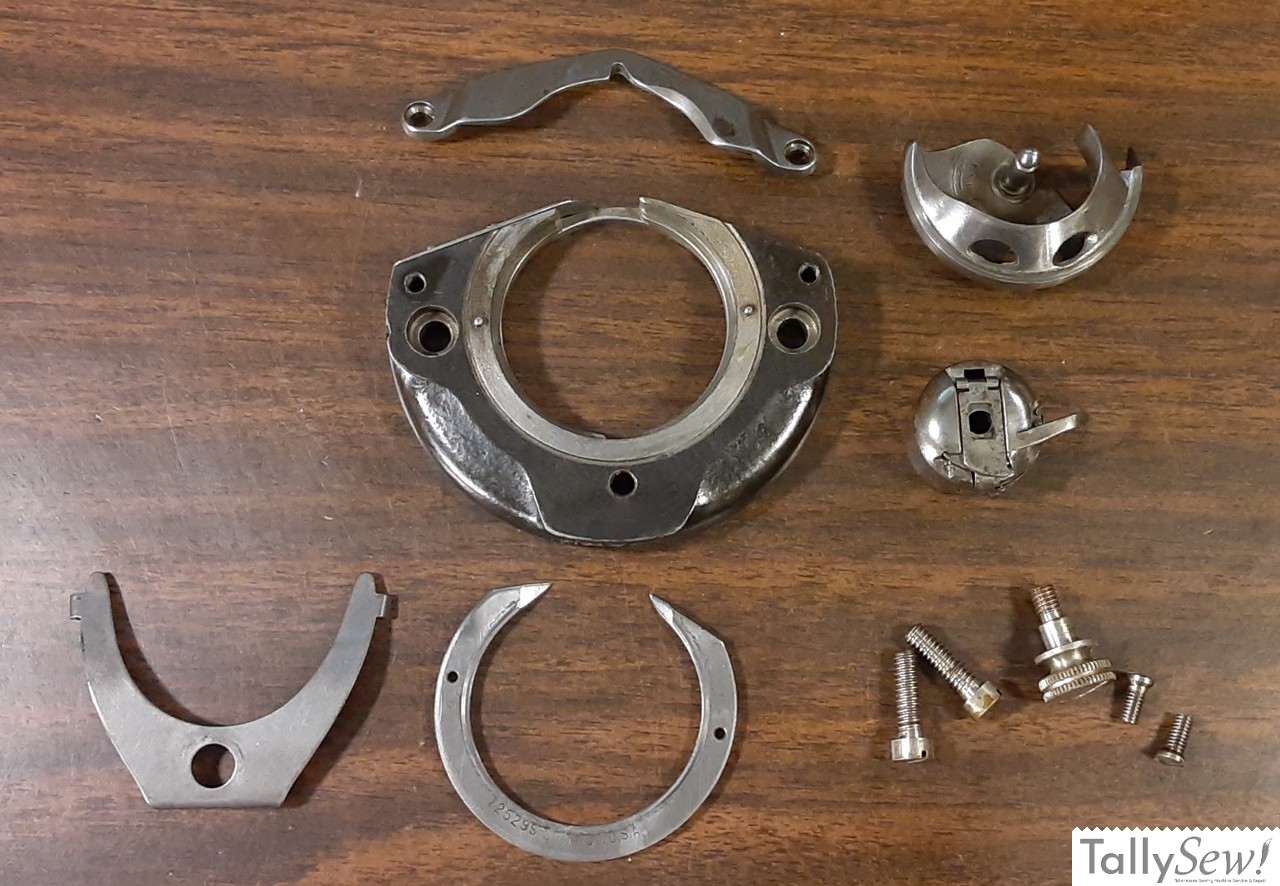
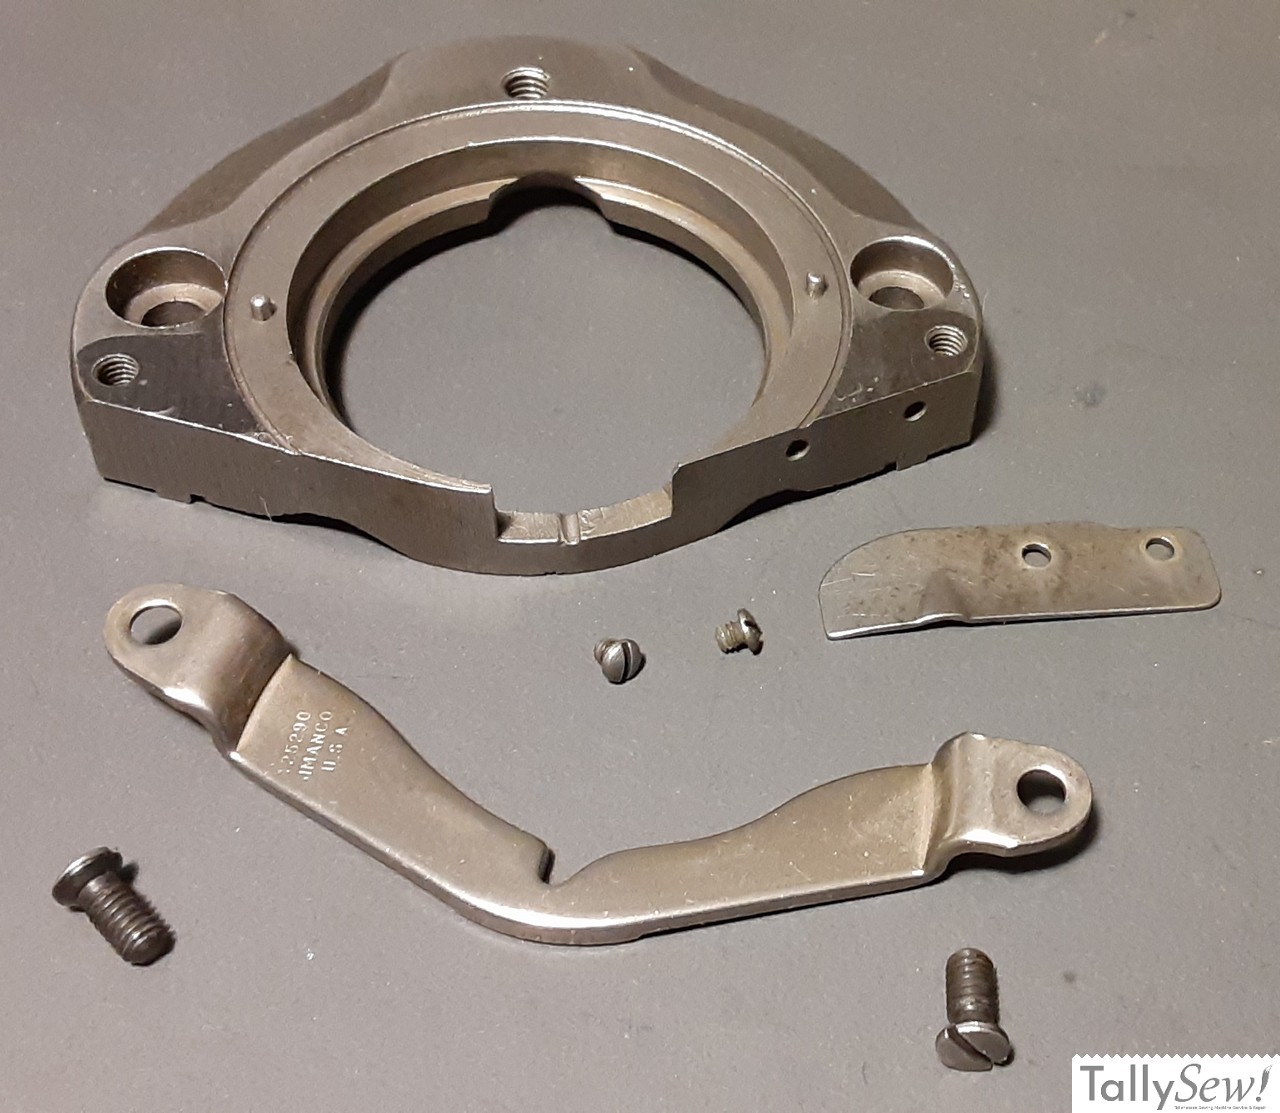
Above is a view of all the parts in the shuttle race assembly.
Removing the shuttle race assembly
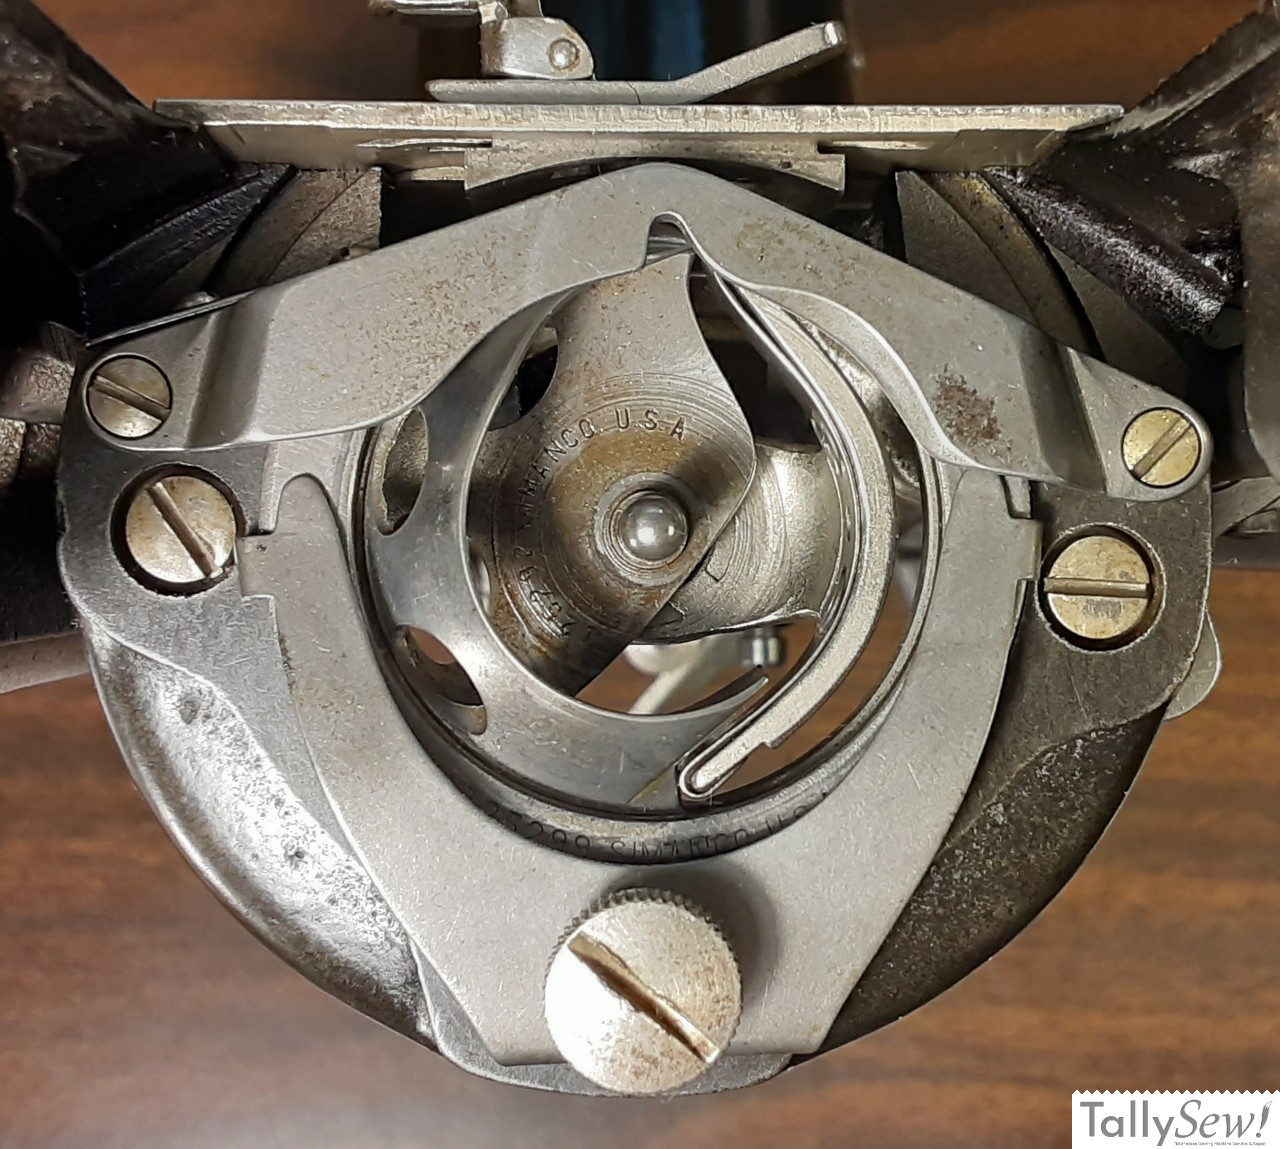
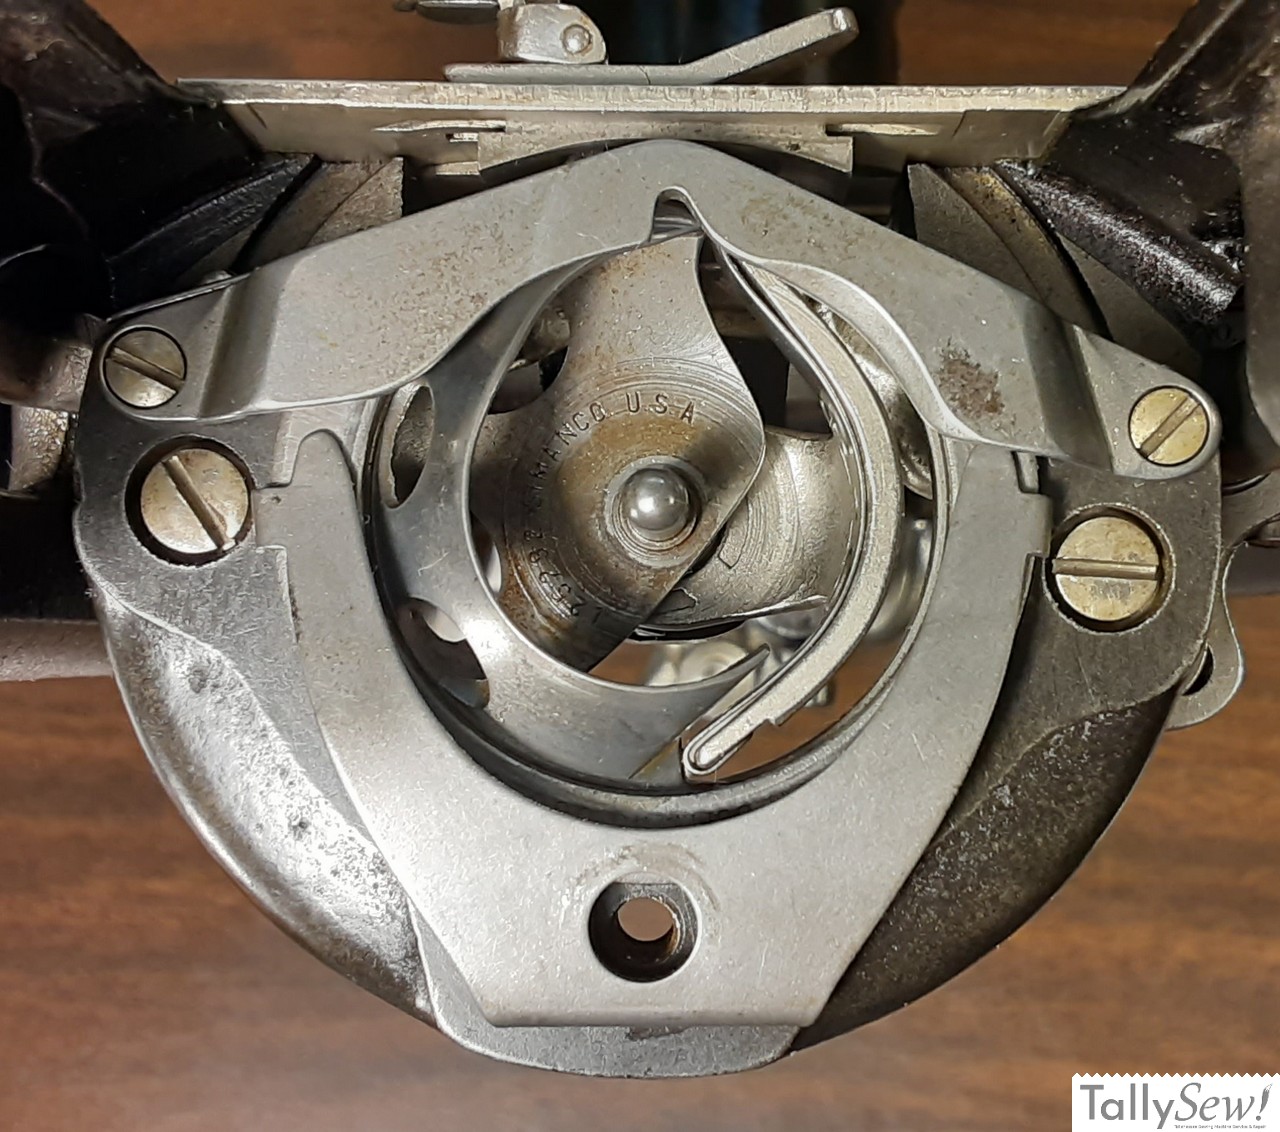
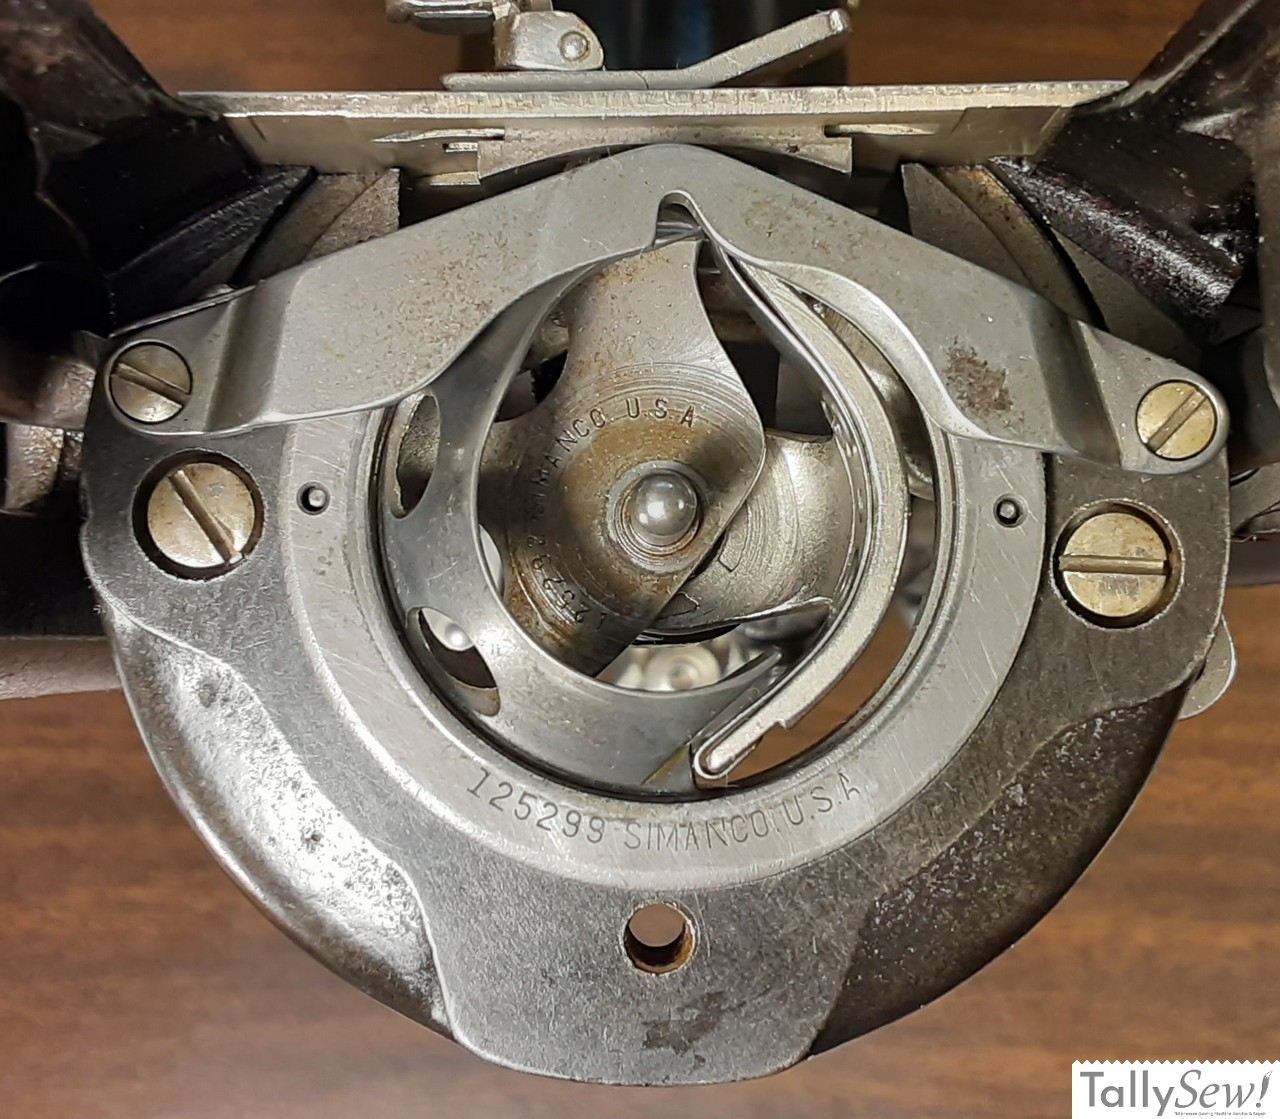
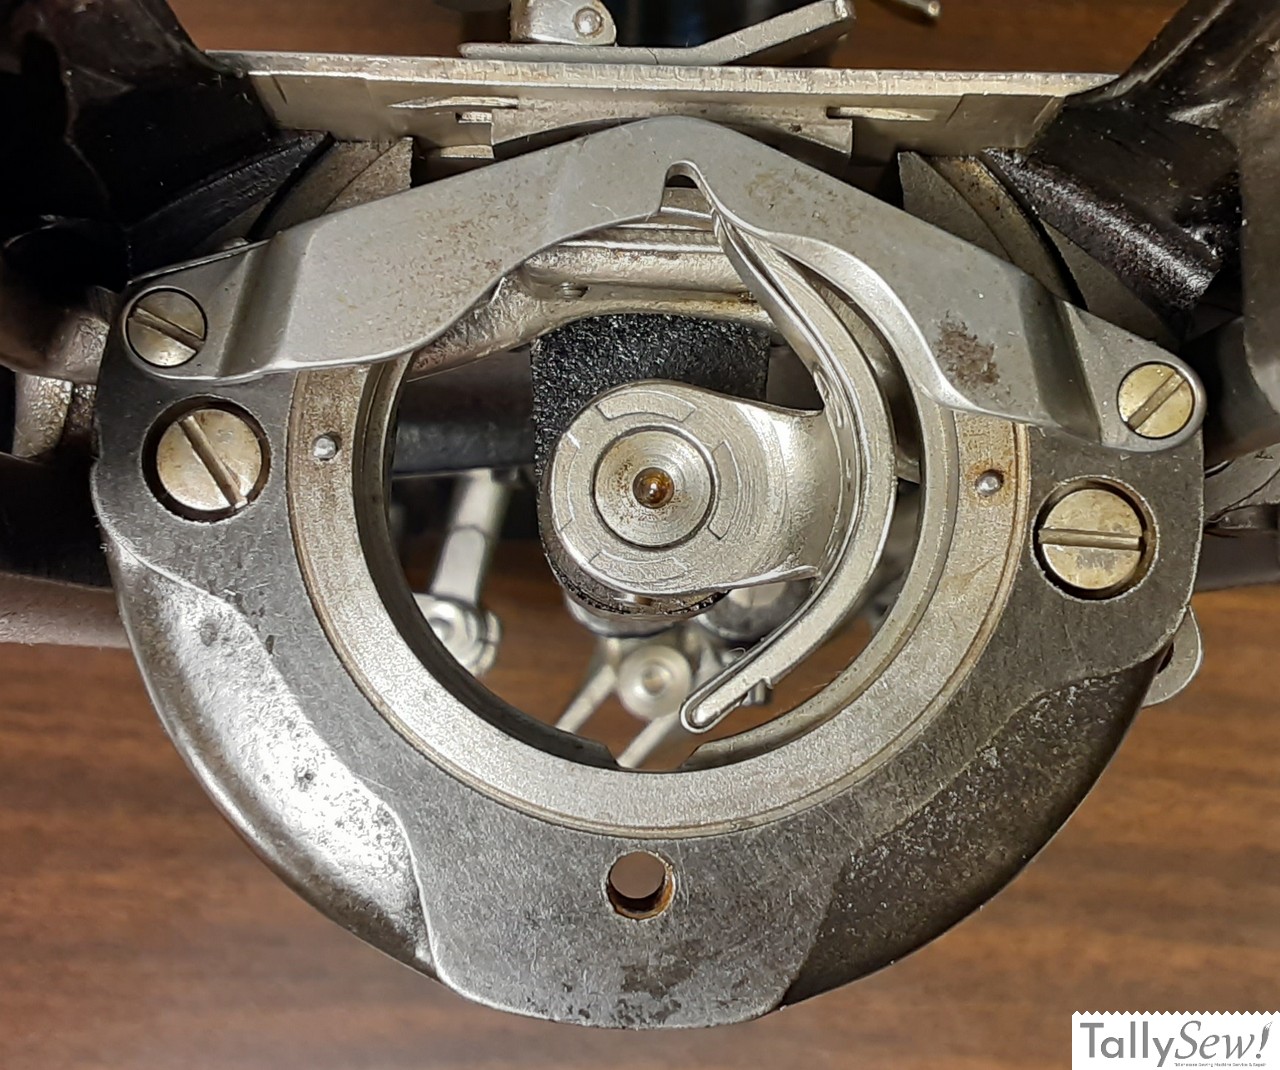
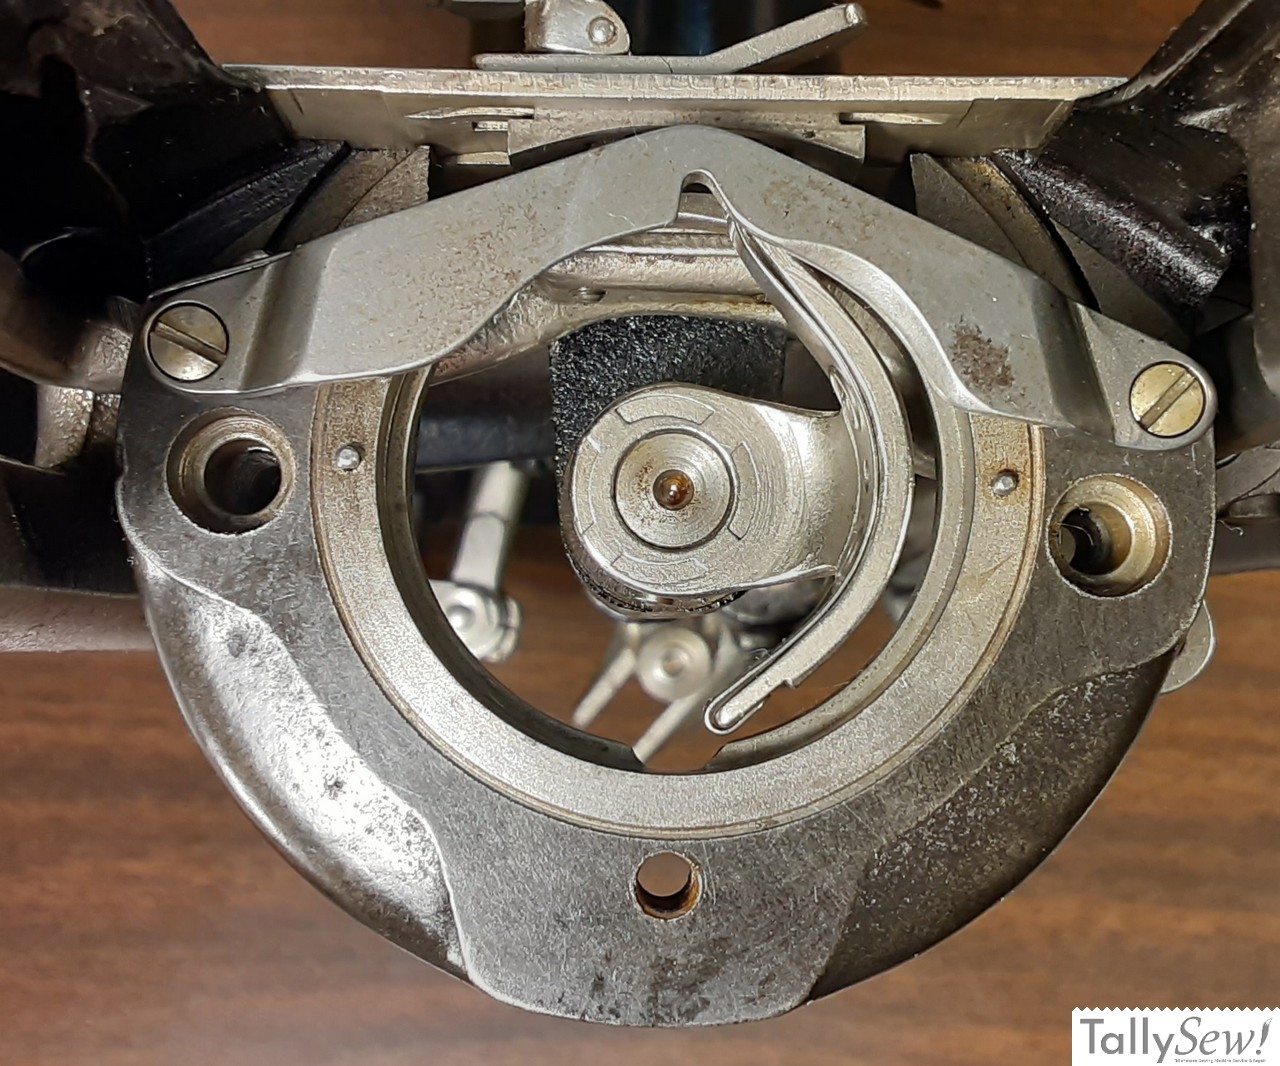
Removing the shuttle race assembly is a pretty simple process:
- Remove the needle, or put it in it’s highest position
- Remove the bobbin case
- Remove the shuttle race back spring thumb screw
- Remove the shuttle race back spring
- Remove the shuttle race back
- Remove the shuttle body
- Remove the shuttle race body screws
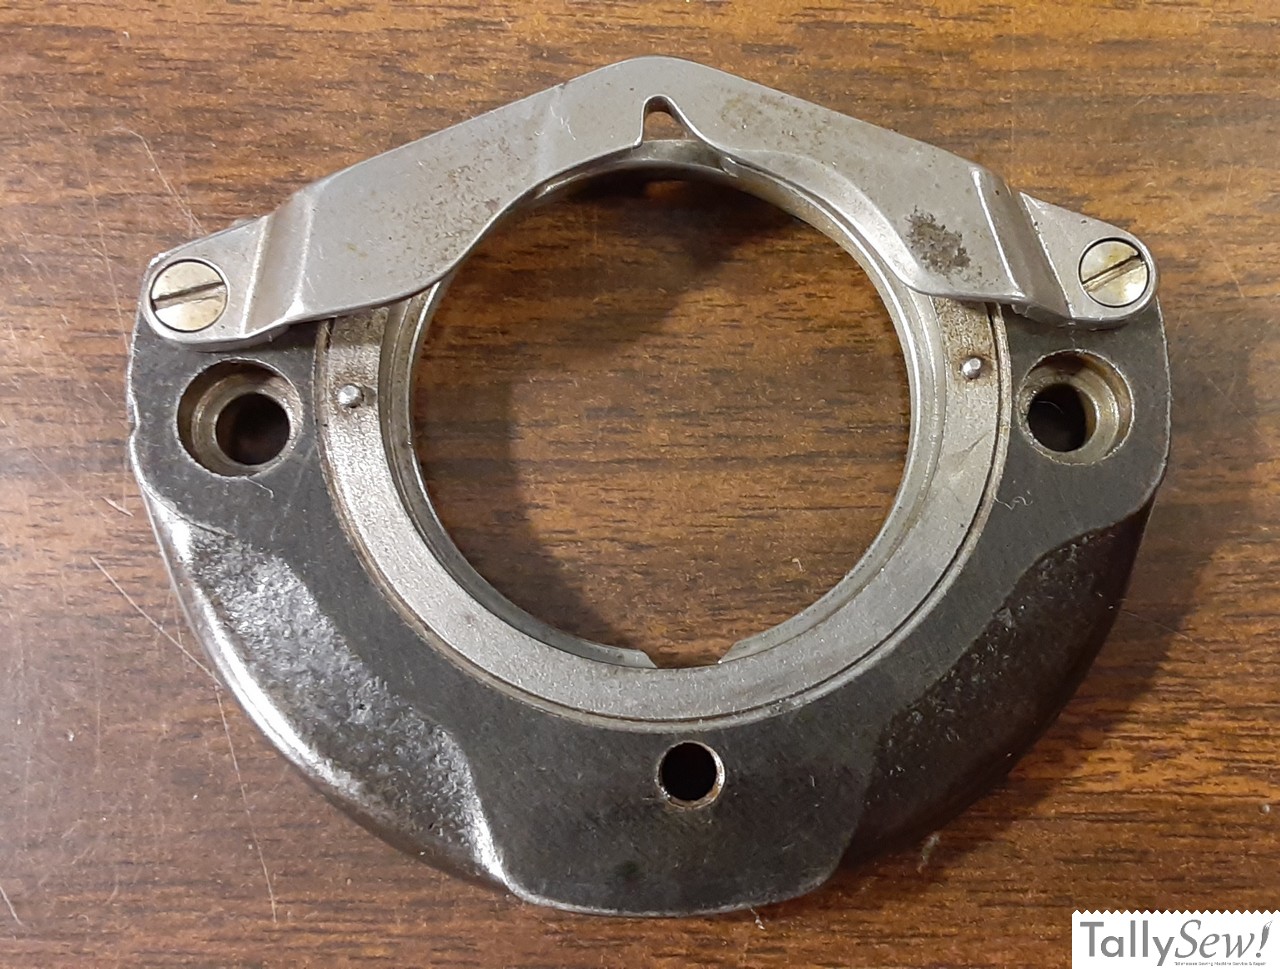
- Remove the shuttle race body
You can also remove the whole assembly at once by just removing the shuttle race body screws and then remove the shuttle race body as a unit.
After disassembly, clean the parts and reassemble in reverse order.
Related Articles
Singer 15 series needle bar box
The Singer model 15 series machines is simple and robust. I’m going to give you an overview of how to assemble the needle, and presser
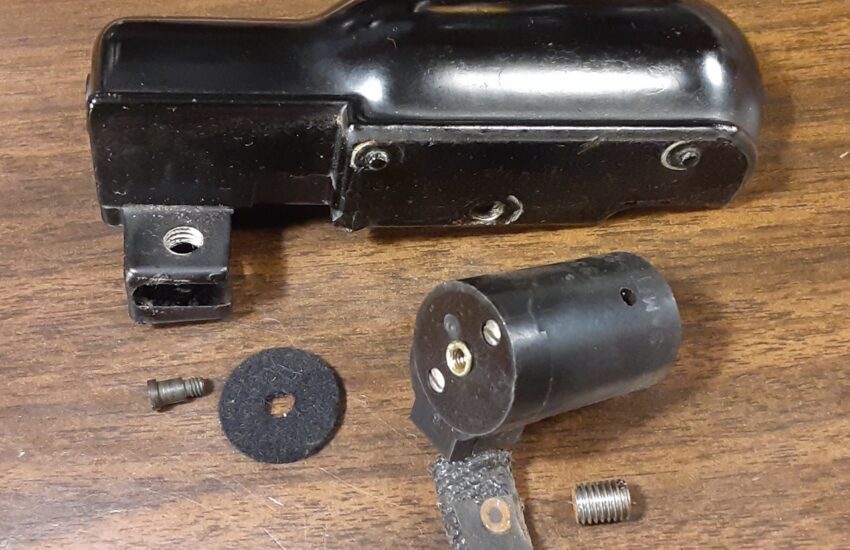
Replace a broken Shuttle Driver Cushion Spring
The broken shuttle driver cushion spring on my 1932 Singer model 15-91 The first thing I should mention is that you do not need to

Singer 15 series bottom end
The Singer Model 15 (in this case a 1932 Singer 15-91), with the bottom end roughed in. This article is about getting the parts in

Singer 15 series feed and lift verticals
The two main assemblies found in the pillar of the machine. Crank connecting rod (top), and feed forked connection and feed regulator assembly parts.
Singer 15-91 and 201-2 handwheels
The handwheels found on Singer 15-91 and 201-2 sewing machines are a little more complicated than they seem at first glance. I’m going to start

Singer CAT.-S4 lamp
The Singer lamp model CAT.S-4 was used on several Singer sewing machine models. It was usually black, but was also produced in green, and in