Adjusting the needle position of a Kenmore 117 series rotary
The needle bar of a traditional straight stitch, cast iron sewing machine is positioned by bushings that have been installed into a precision milled hole, and is, for the most part, factory set and non-adjustable.
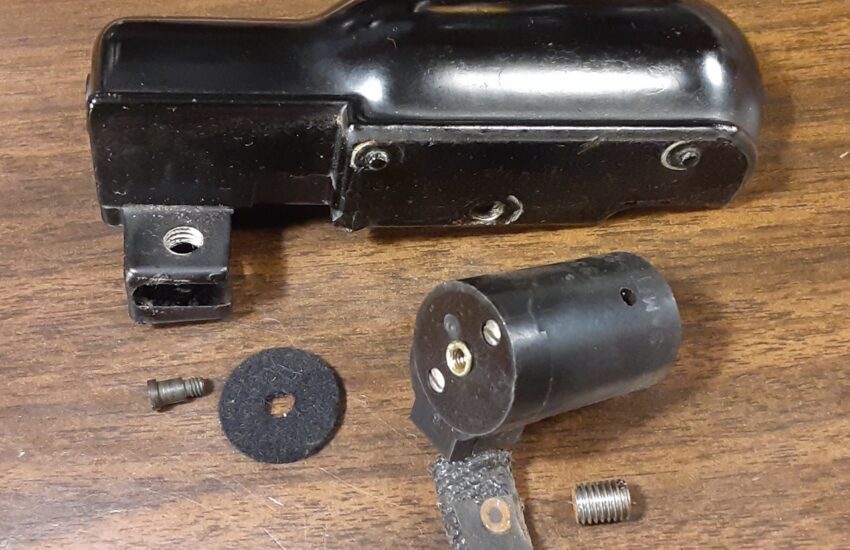
The needle bar on a Kenmore 117 series rotary (and many others), is also positioned by bushings, but those bushings have been installed into a separate box that is then attached to the machine.
As you can imagine, the separate needle bar box on the Kenmore 117 series rotary (and many others), not being in a fixed position, can easily become misaligned, leading to broken needles and skipped stitches.
Attachment points and misalignments
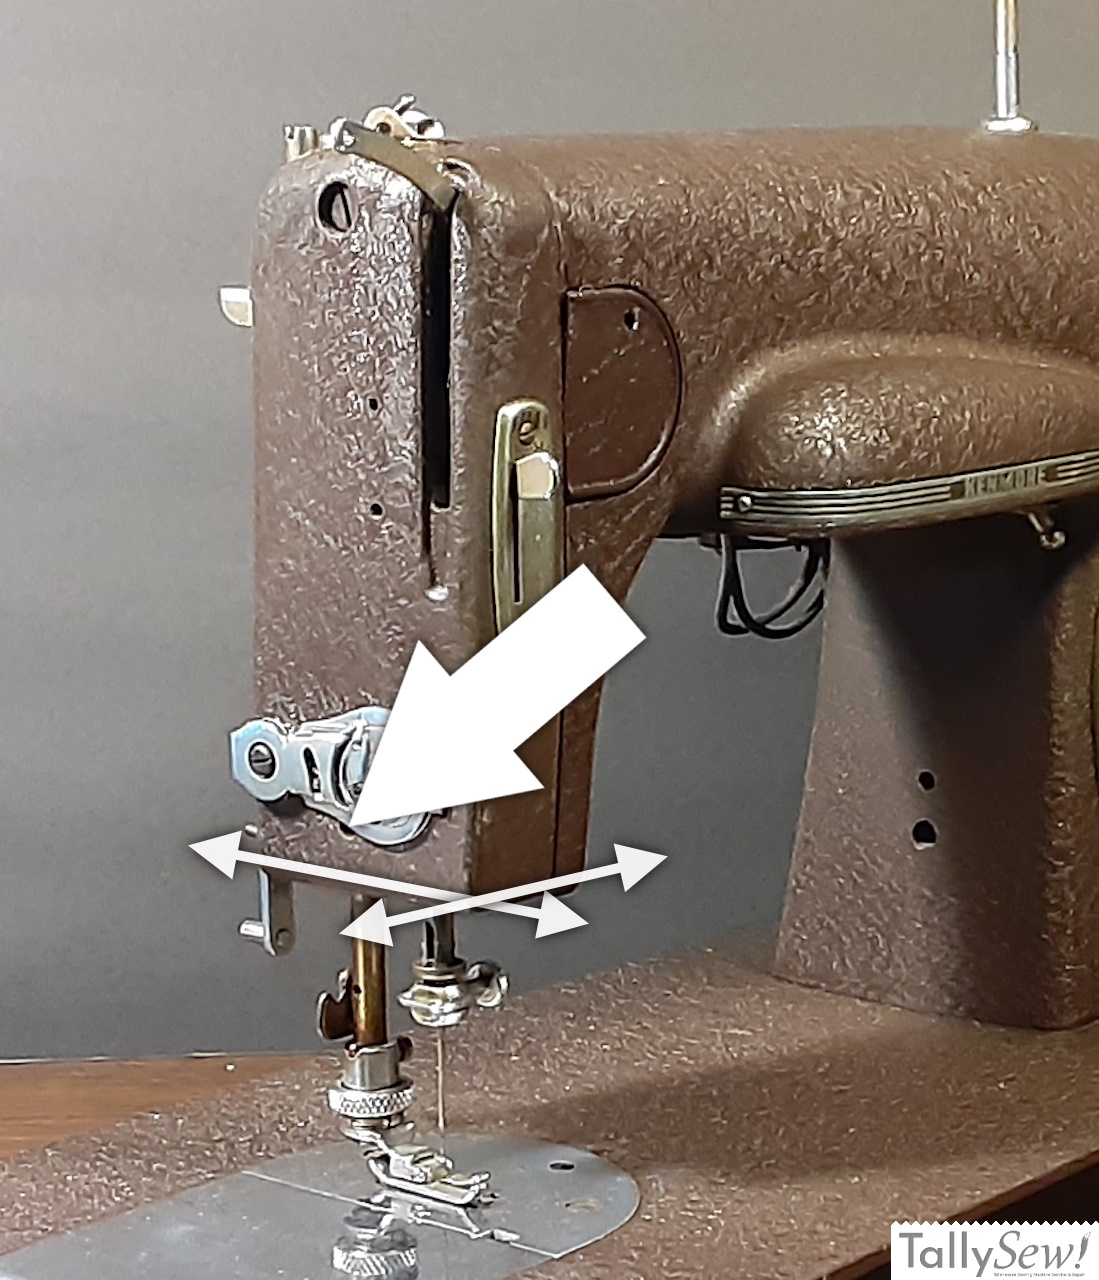
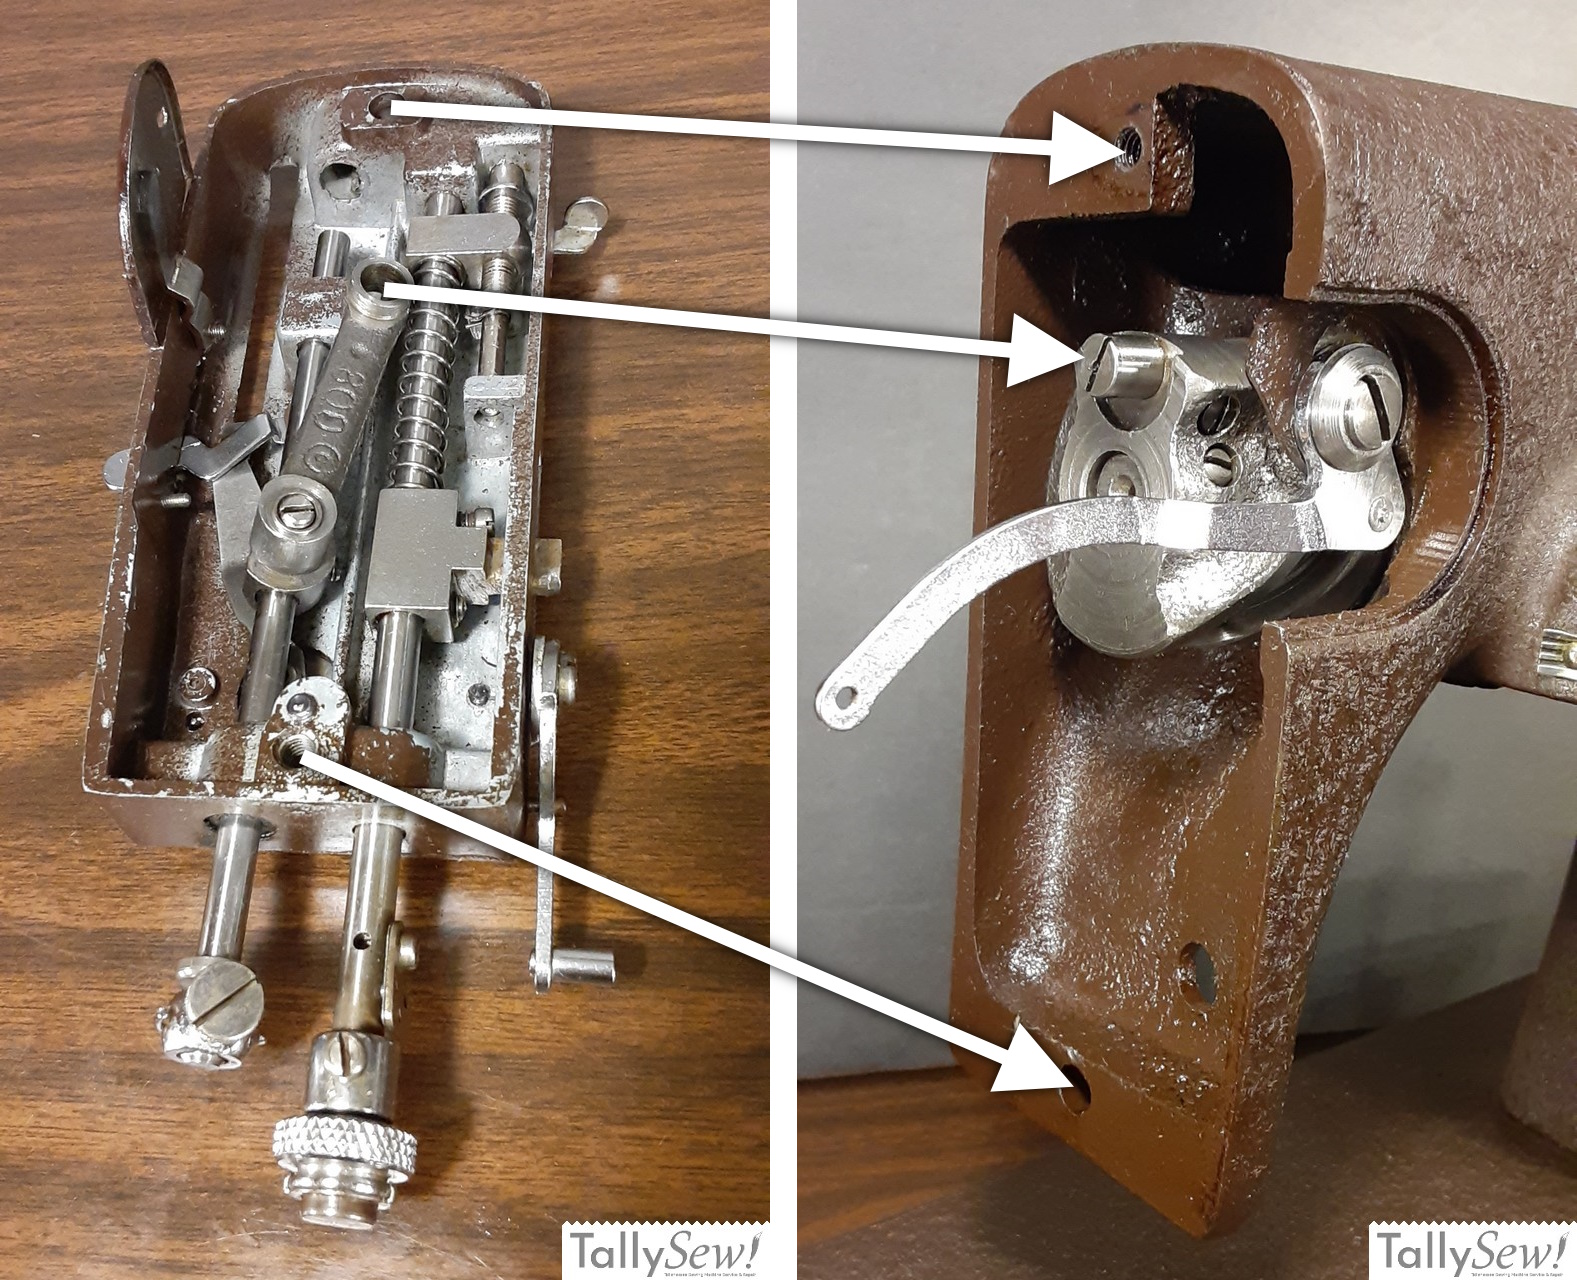
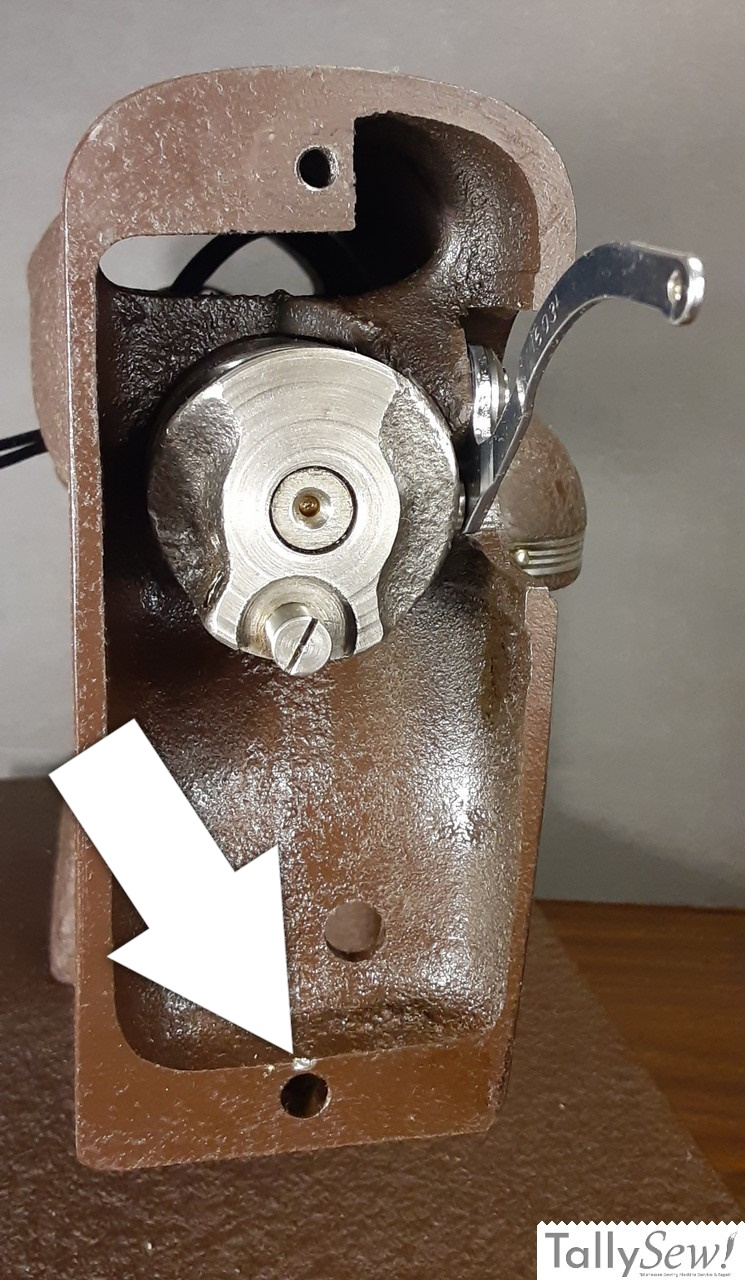
The main attachment points for the needle bar box are the top screw in the left end face of the machine, and at the opposite side of the needle bar box at the bottom. There’s also grub screw just below the tensioner that allows for some right to left adjustment when looking at the machine from the front. These attachment points are not high precision, so it’s easy to attach the needle bar box and have it misaligned.
If you need more information, please see “Kenmore 117 Series Rotary Needle Bar Box“… it’s an article covering the basics of removing and reattaching the needle bar box.
Gross alignment
Just making sure the needle bar box feels like it’s lined up with the machine once it’s attached should have you pretty close.
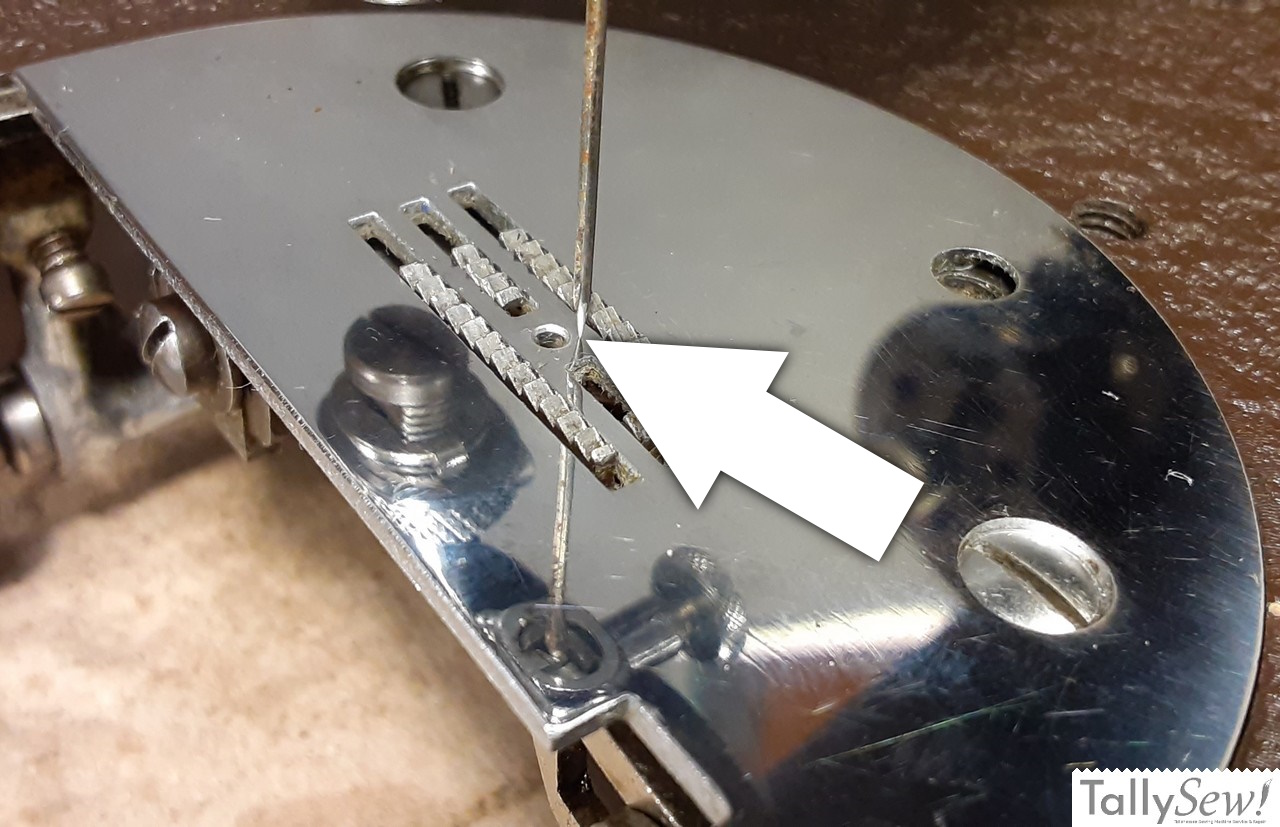
With the side plate, hook and hook race cover removed from the machine, you can check alignment by putting the throat plate in place and installing a needle. Slowly turn the hand wheel and see if the needle goes into the needle hole in the throat plate. If the needle hits the throat plate, take note of where it hits in relation to the needle hole.
Getting the needle lined up with the needle hole in the throat plate
Note: Make sure you aren’t dragging the needle on the throat plate as you make adjustments.
Y axis adjustments
If the needle hit the throat plate in front of, or behind the needle hole, but it’s aligned correctly left to right, then loosen the upper and lower attachment screws a little and see if you can gently swing the bottom of the needle bar box in line with the needle hole. Once you have the needle lined up with the needle hole retighten the upper and lower attachment screws. Double check that the needle is still lined up with the hole in the throat plate.

X axis adjustments
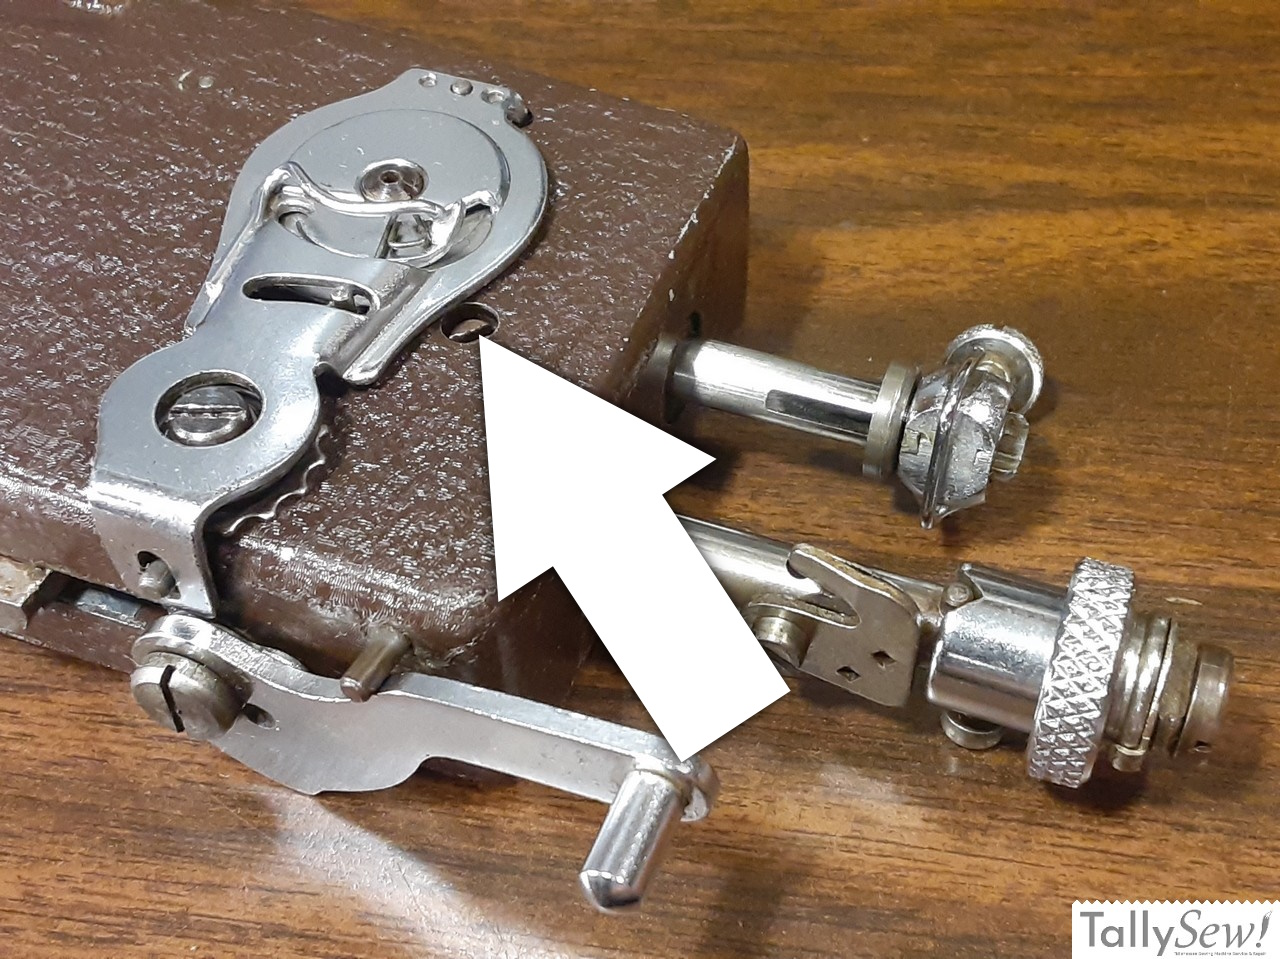
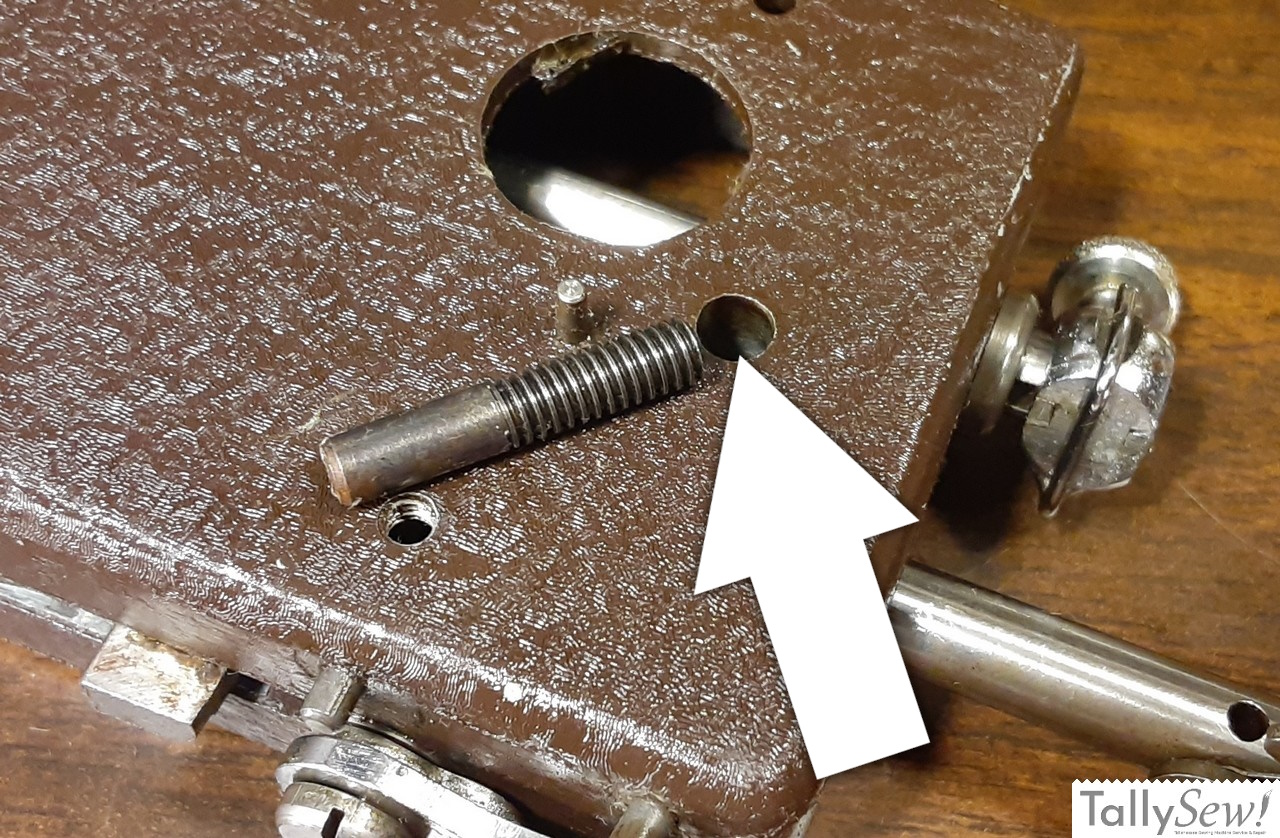
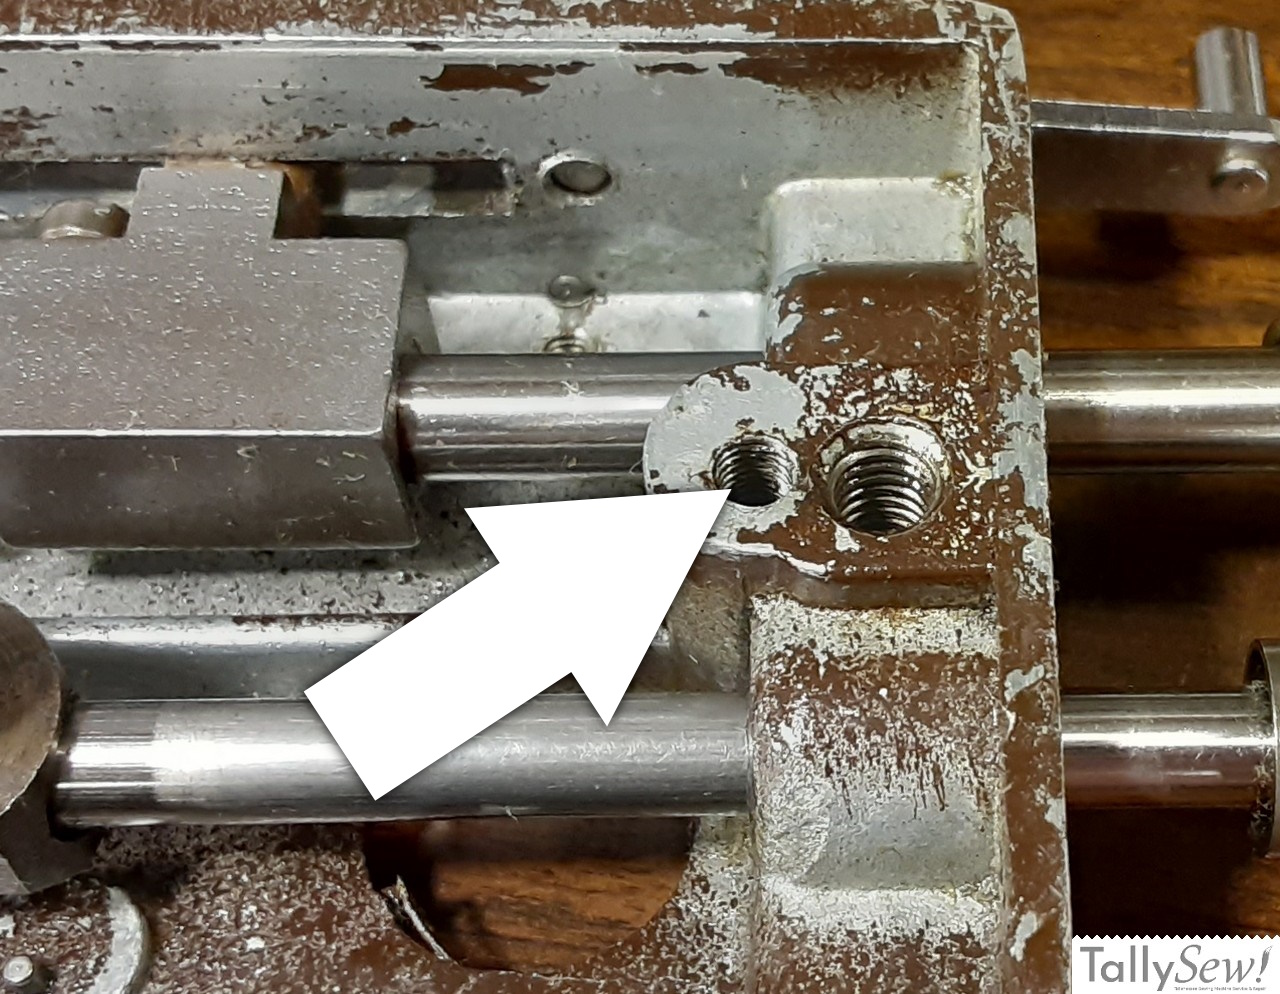
If the needle hit the throat plate to the left or right of the needle hole, but is aligned correctly back to front, you’ll need to make adjustments to the grub screw below the tensioner. This grub screw pushes against the left face of the machine, between the machine and the needle bar box just above the hole the lower attachment screw goes through. This means that when the needle bar box is installed, the lower attachment screw and the grub screw are working against each other.
To make left or right adjustments you will need to loosen the top attachment screw a little, and the lower attachment screw several turns. You’ll need to hold the bottom of the needle bar box against the machine as you make your adjustments so you can see where the needle is. To move the needle left, turn the grub screw counter clockwise. To move the needle to the right turn the grub screw clockwise. Once you have the needle lined up, tighten the upper and lower attachment screws, then check to make sure the needle is still inline with the hole.
We will circle back to this, but the grub screw will also allow you to adjust the distance between the needle and the hook. This is why we’re making our first adjustments with the hook and hook race cover removed.
Z axis adjustments
You won’t know if you need to adjust the position of the needle bar box up or down until you’ve reinstalled the hook, but since there’s quite a bit of slop built into the attachment interface, it’s possible to unintentionally alter needle timing by installing the needle bar box higher or lower in relation to it’s original factory installed position.
If you removed the needle and presser bar, then as long as the needle bar box is lined up top to bottom with the left face of the machine, you’ll make your up/down adjustments to the needle and presser bars themselves.
Needle to hook clearance
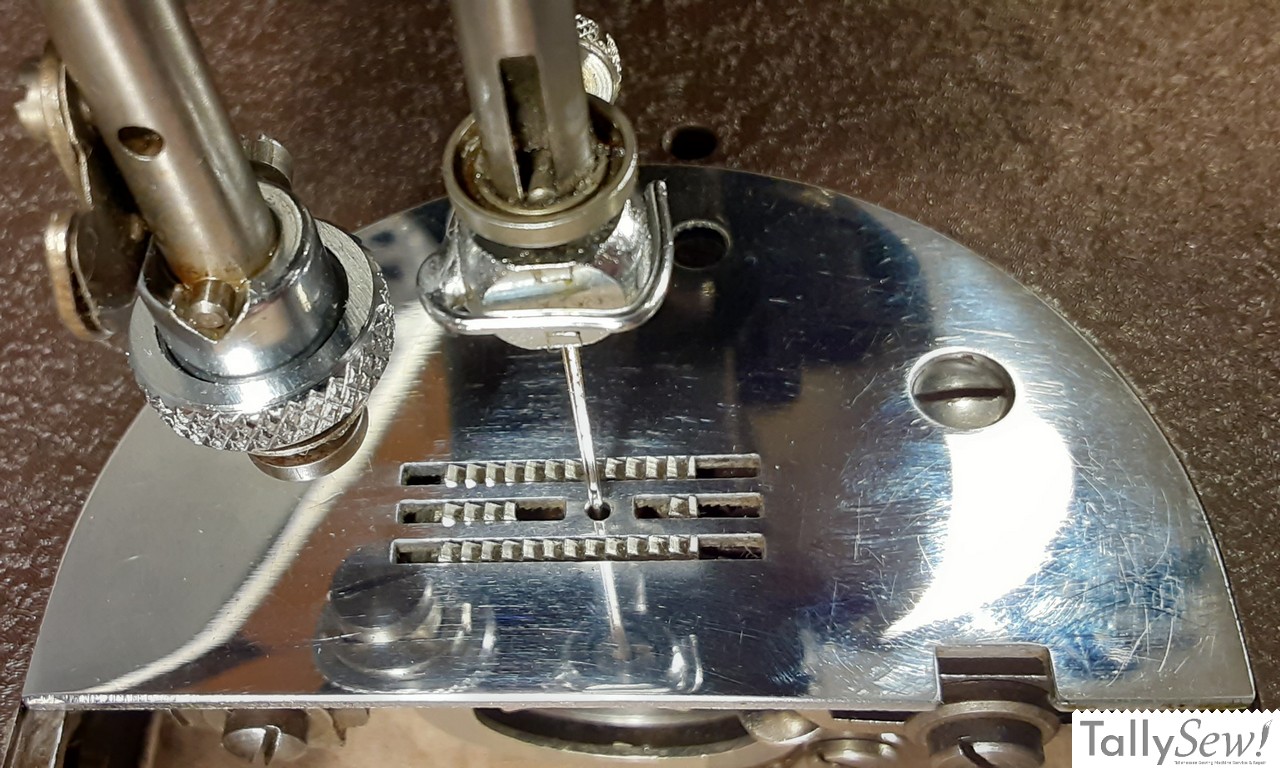
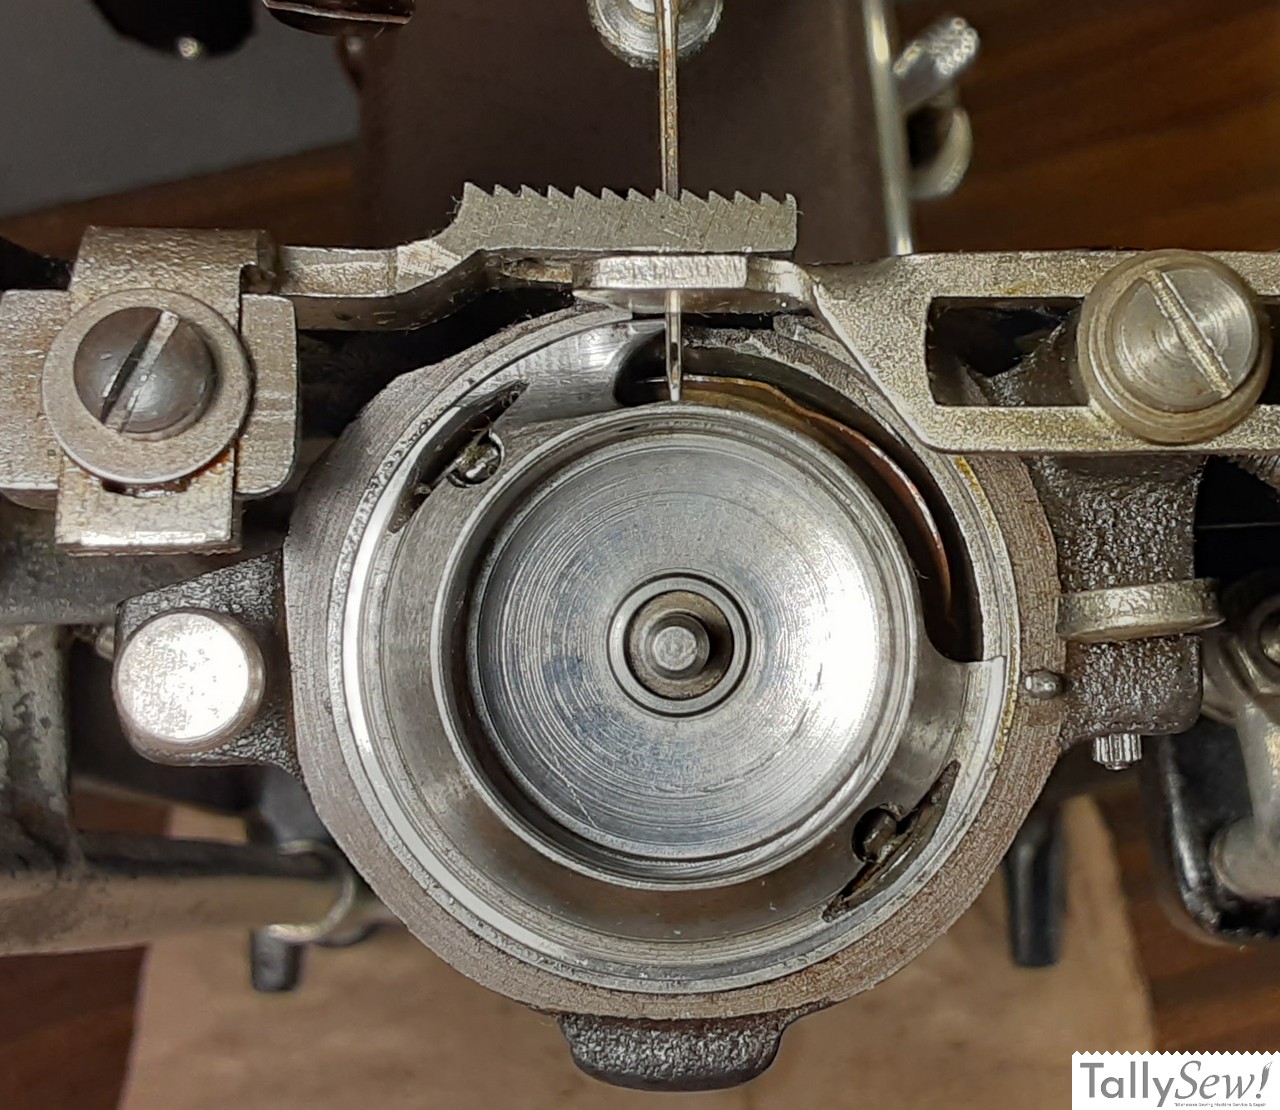
At this point you should have the needle going through the needle hole in the throat plate.
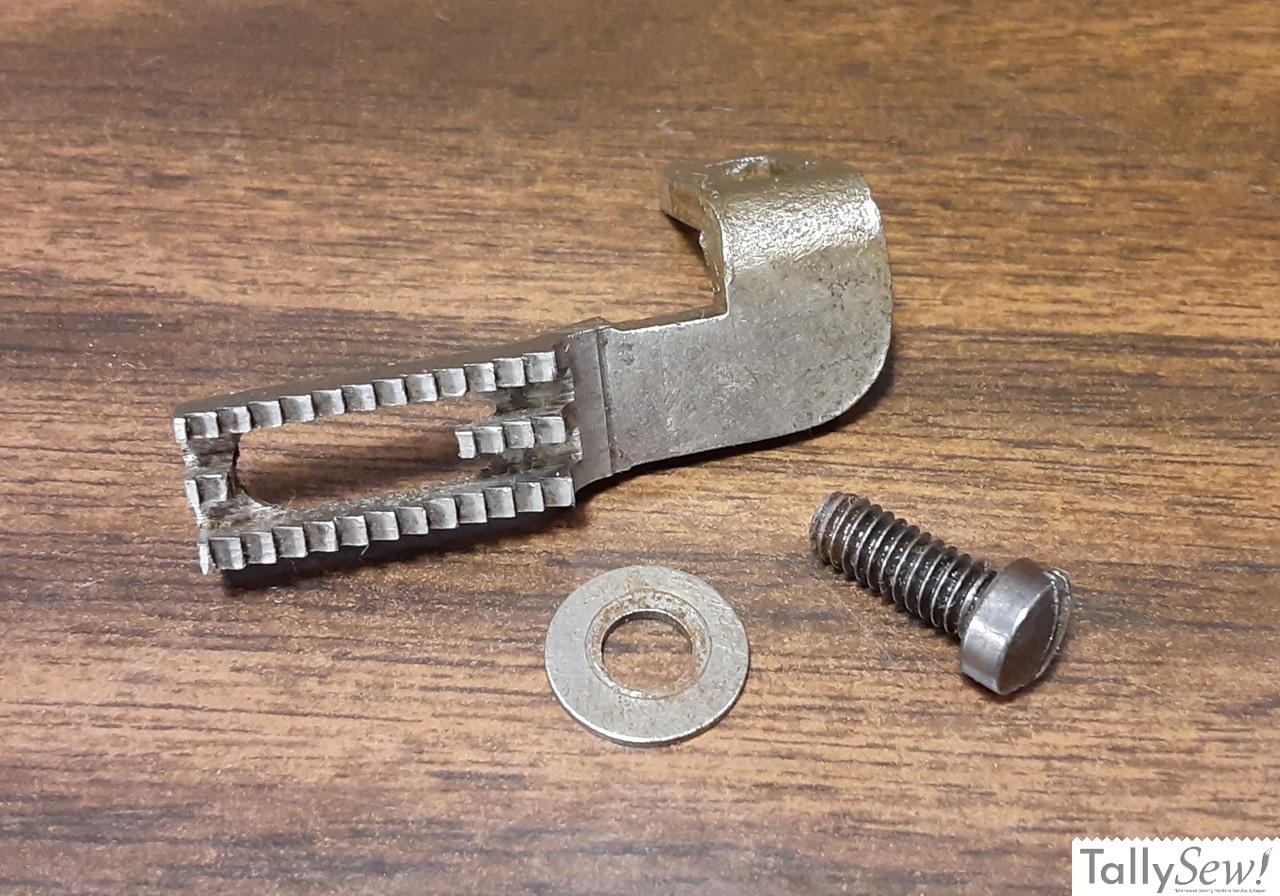
I’ve removed the feed dogs so I could get photos, but you probably don’t need to remove them. You will need to remove the throat plate though.
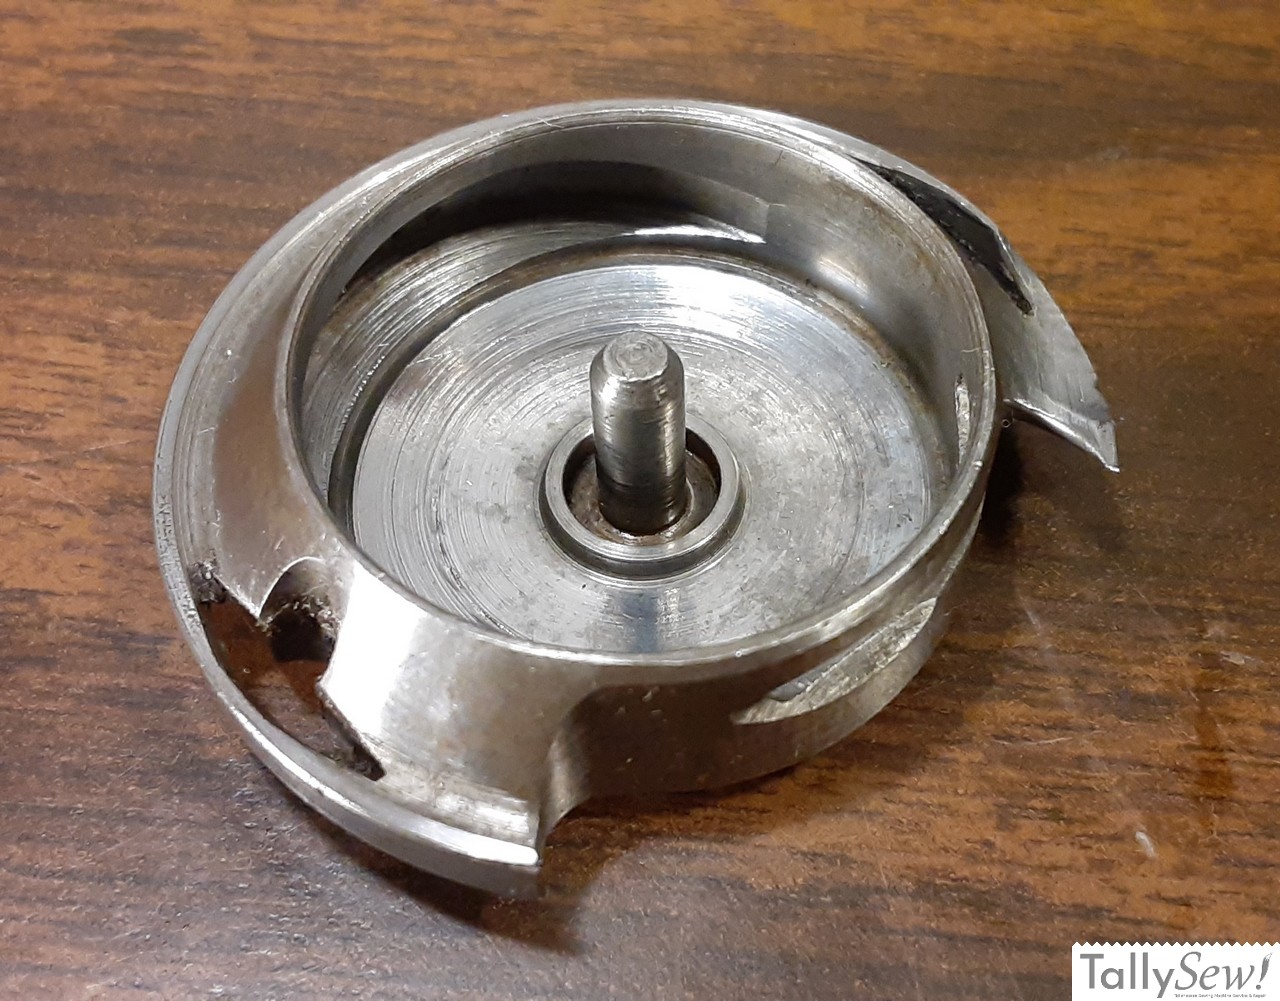
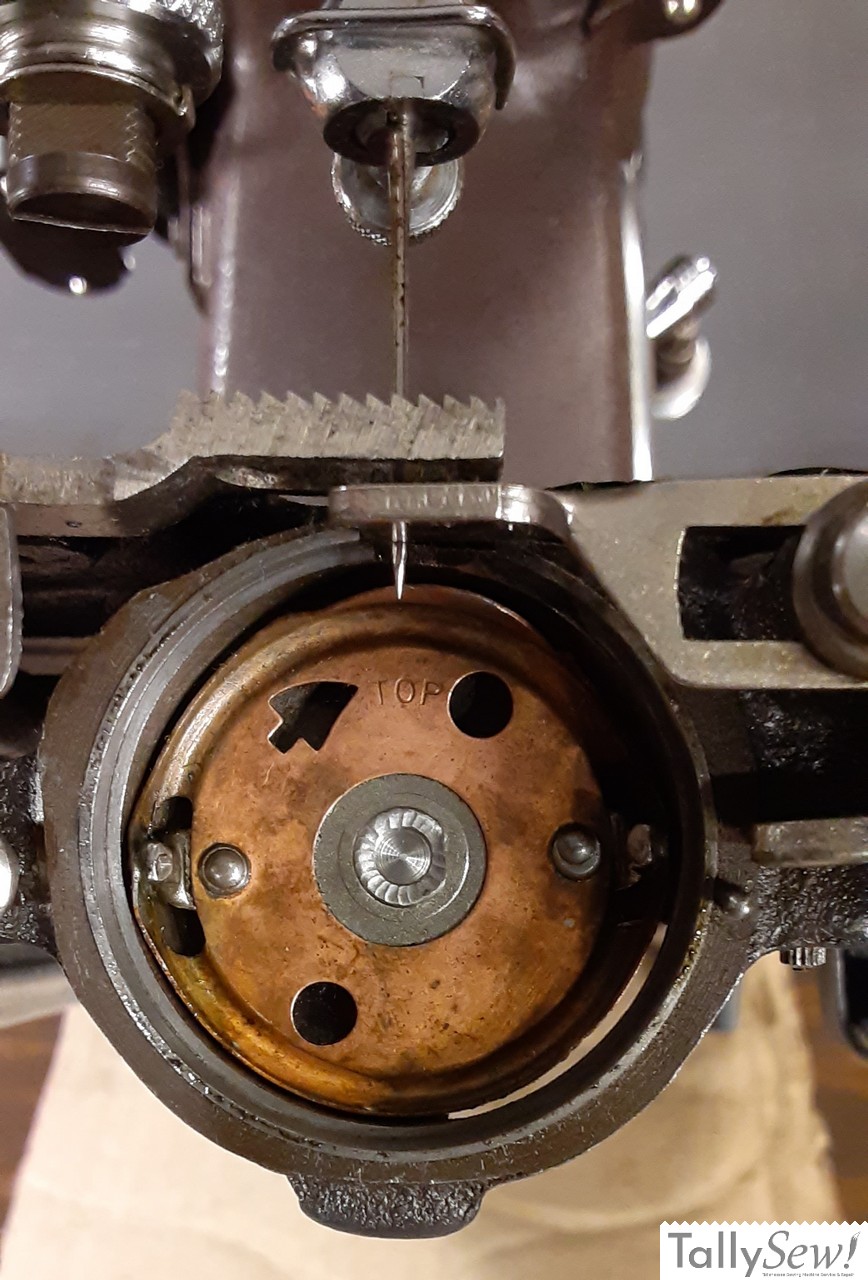
Install the hook into the hook race, but don’t install the hook race cover. Don’t turn the handwheel until you’ve read the next step.

You may need to hold the hook carrier in the machine by gently pressing the center post of the hook carrier. You’re just keeping it from falling out…
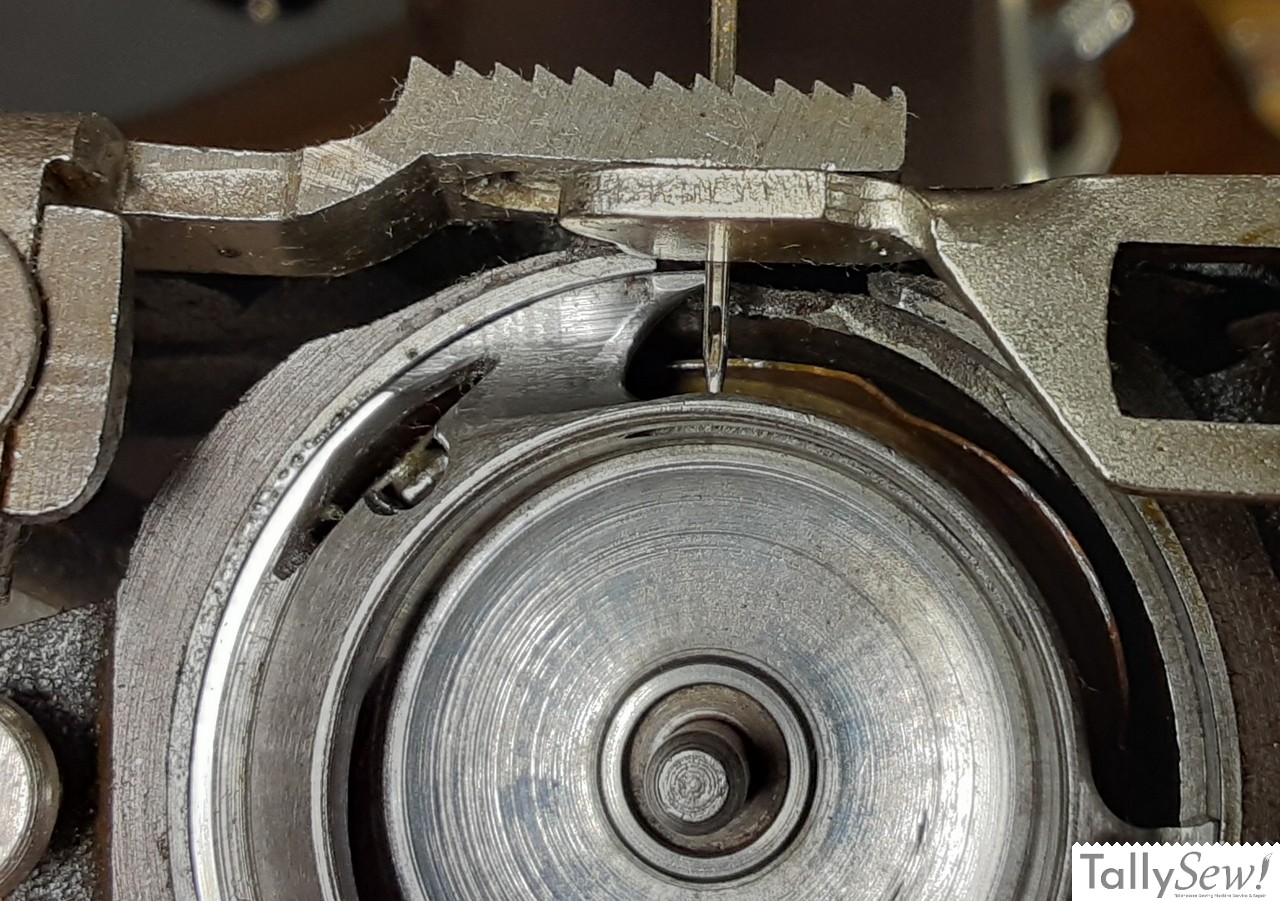
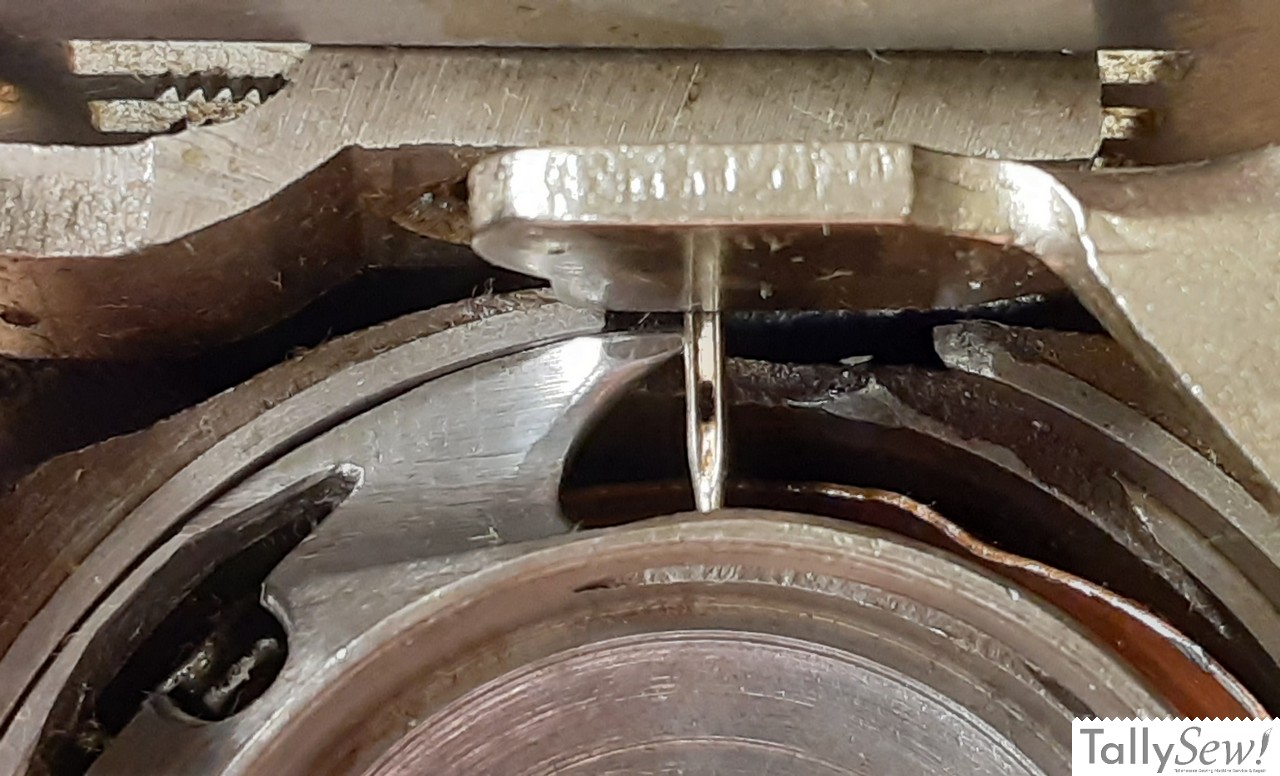
Now, from the front of the machine, watch to see if the needle is going to touch either the thread pull off arm or the hook as you slowly turn the handwheel.
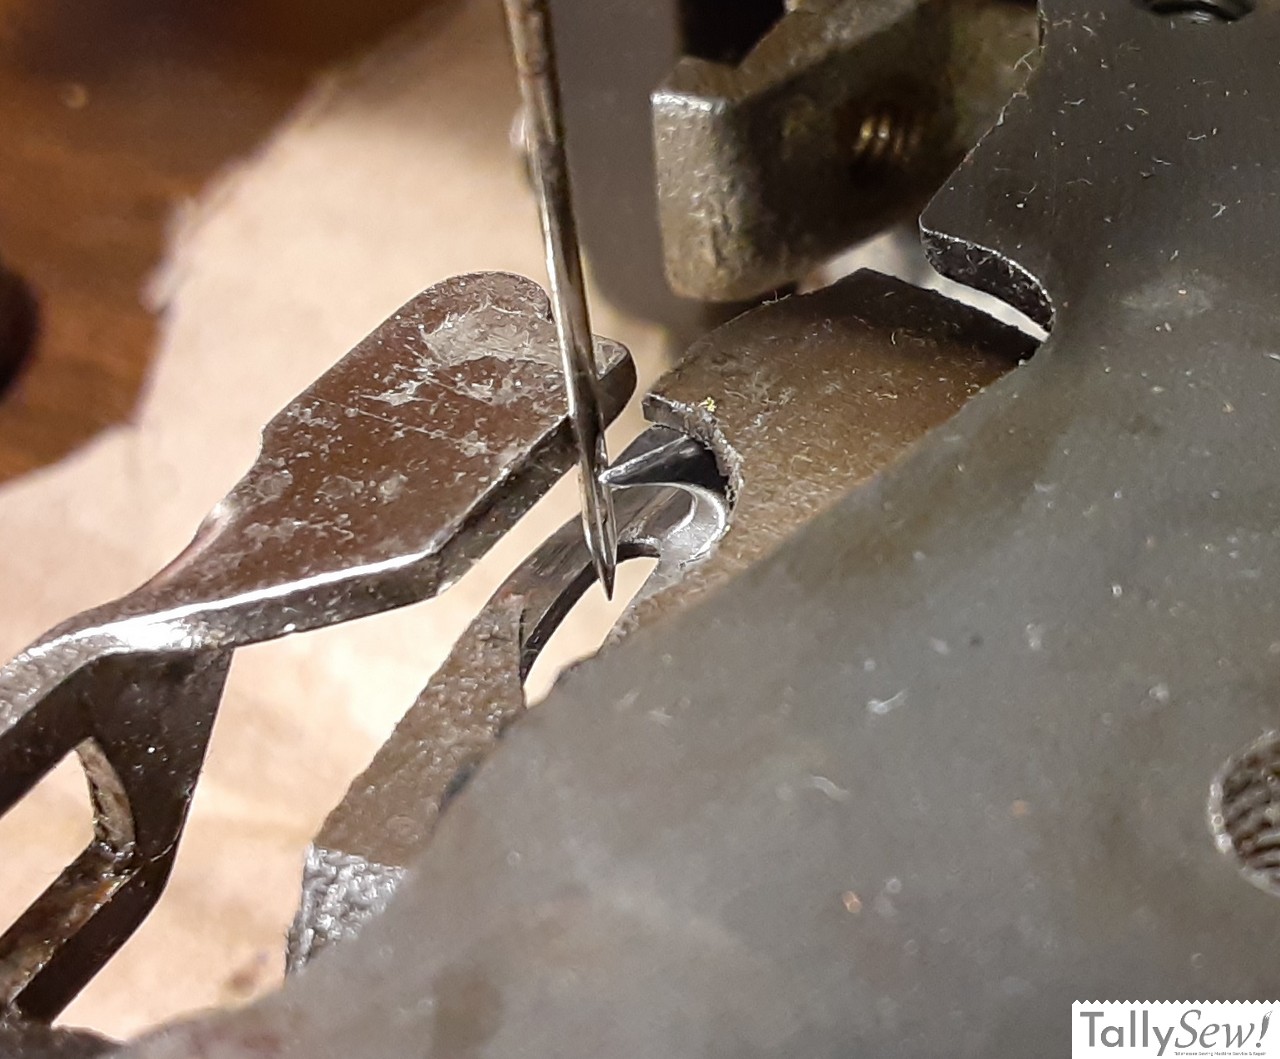
If the hook runs into, or deflects the needle as it passes then you’ll need to make adjustments to the grub screw below the tensioner. Loosen the lower needle bar box attachment screw a little, then, turning the grub screw clockwise will move the needle to the left when viewed from the front of the machine.
Make your adjustment, then retighten the lower needle bar box attachment screw, and recheck the needle to hook clearance.
You want the hook to pass through the scarf of the needle without deflecting the needle.
Test your changes
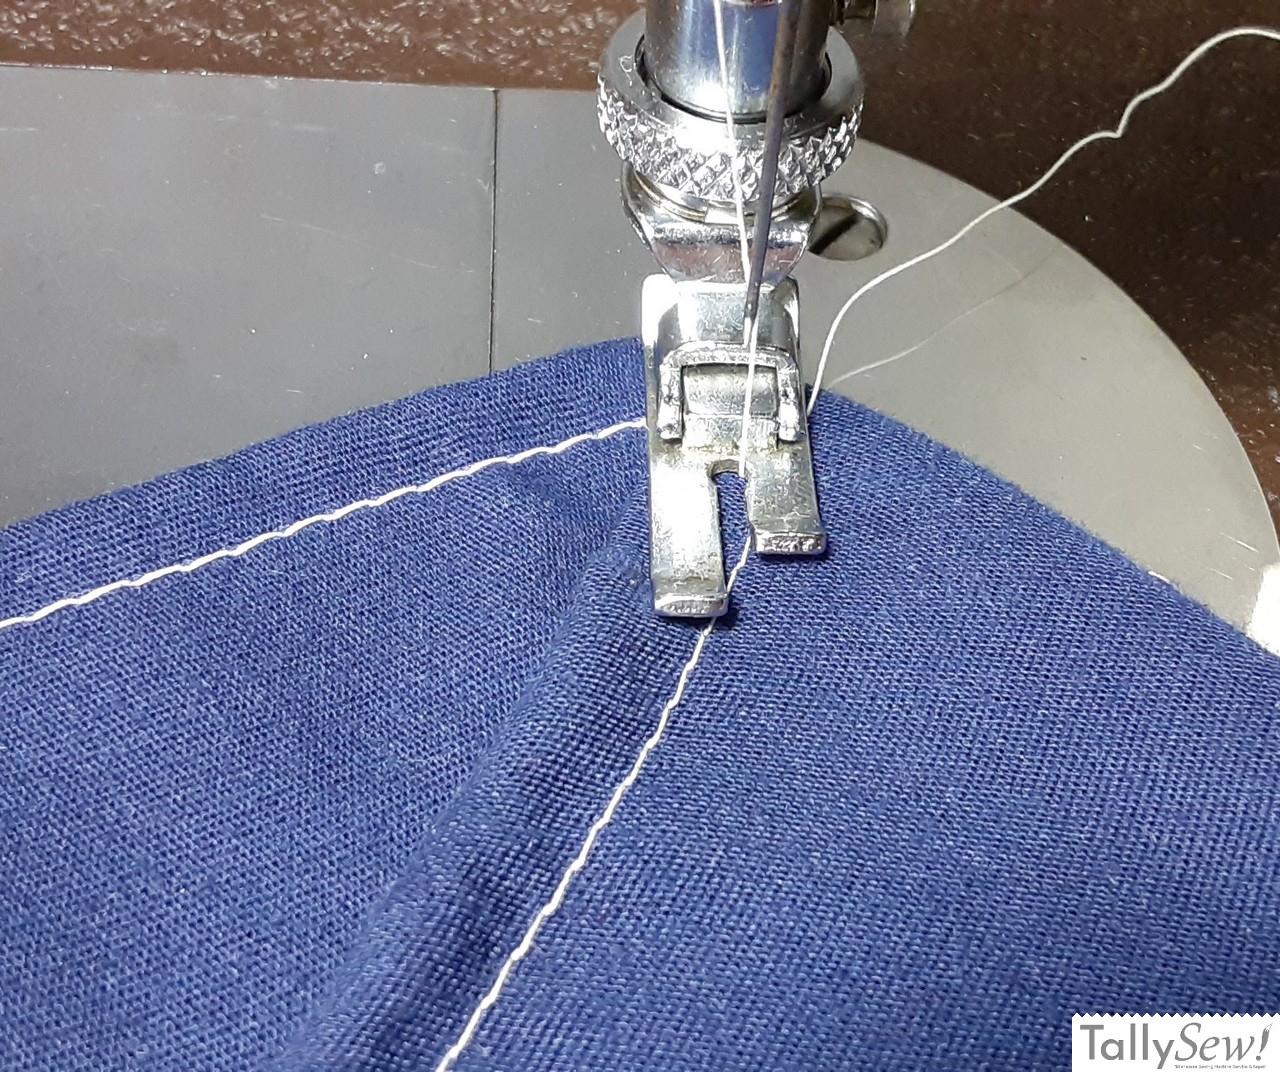
If everything looks good then attach the hook race cover and throat plate. Turn the handwheel checking for any needle deflection or unexpected noises. Then thread the machine and make a few stitches by turning the wheel by hand.
Slowly run some test stitches. If you hear noises, break the thread, or break a needle, then go back and check your work. Otherwise you should be in good shape.
Related Articles
Kenmore 117 Series Rotary Needle Bar Box
A how-to for removing and reattaching the needle bar box on a 117 series Kenmore rotary machine. This article can also be used as a guide when working on some rotaries labeled White or Domestic.

Kenmore 117 Series Tensioner Removal
A how-to for removing tensioner unit on a 117 series Kenmore rotary machine. Like the needle bar box article, this can also be used as a guide when working on some rotaries labeled White or Domestic.
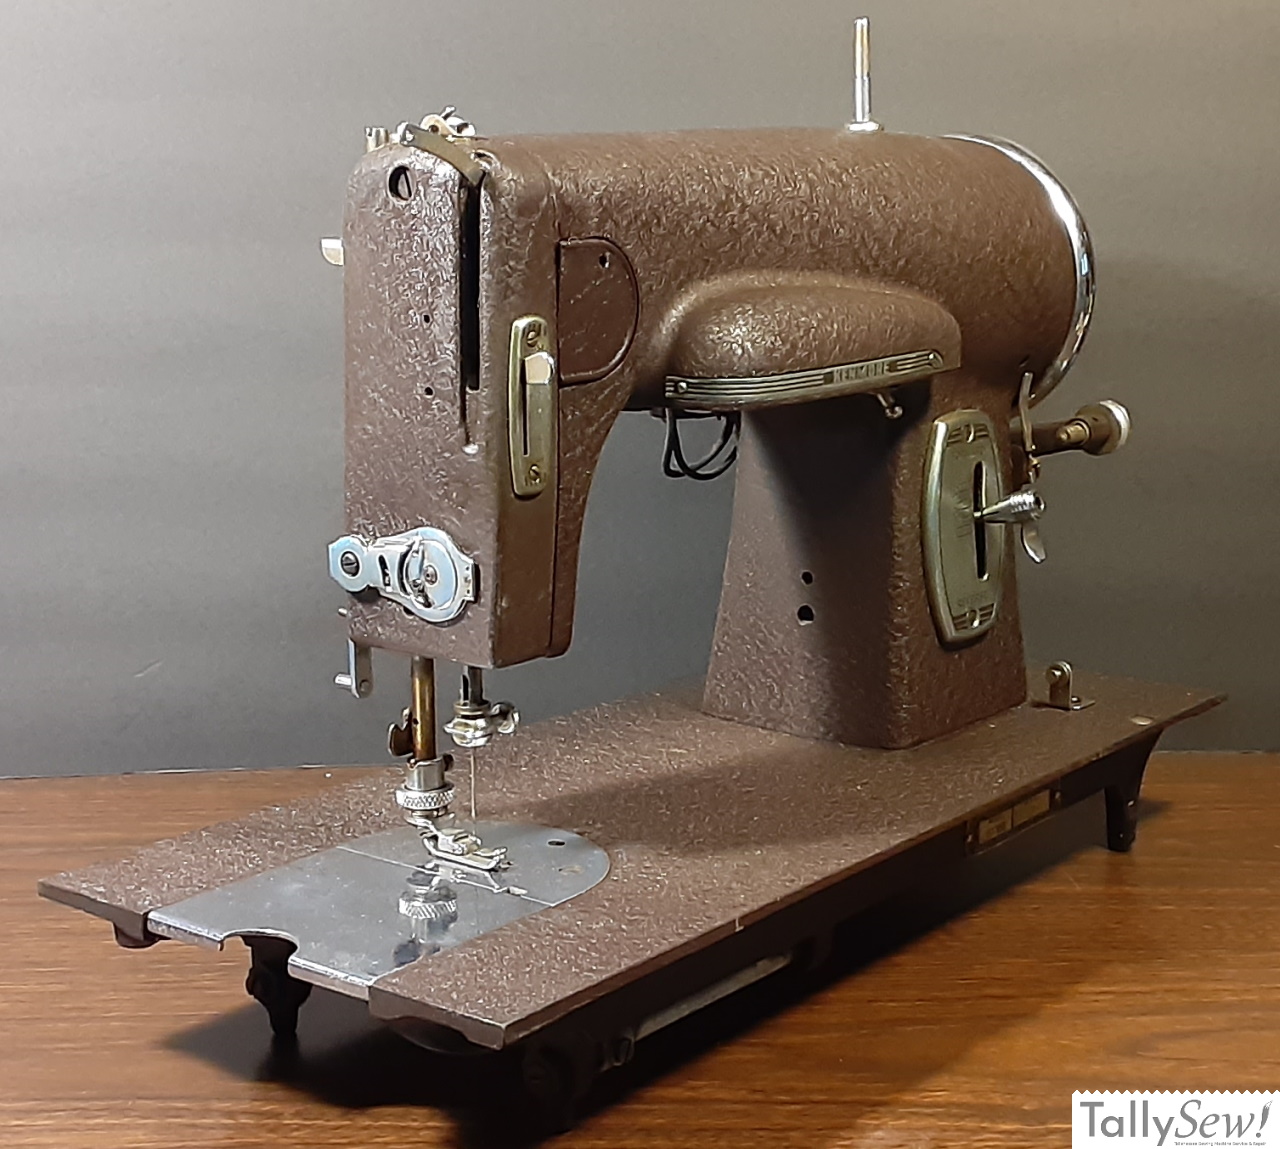
Kenmore Model 117.959 Rotary
The more common Kenmore model 117.959 Rotary looks much like it’s less common sibling at first glance. It’s most obvious difference is the color, but it also features a traditional top clamp presser foot and different hook race cover.