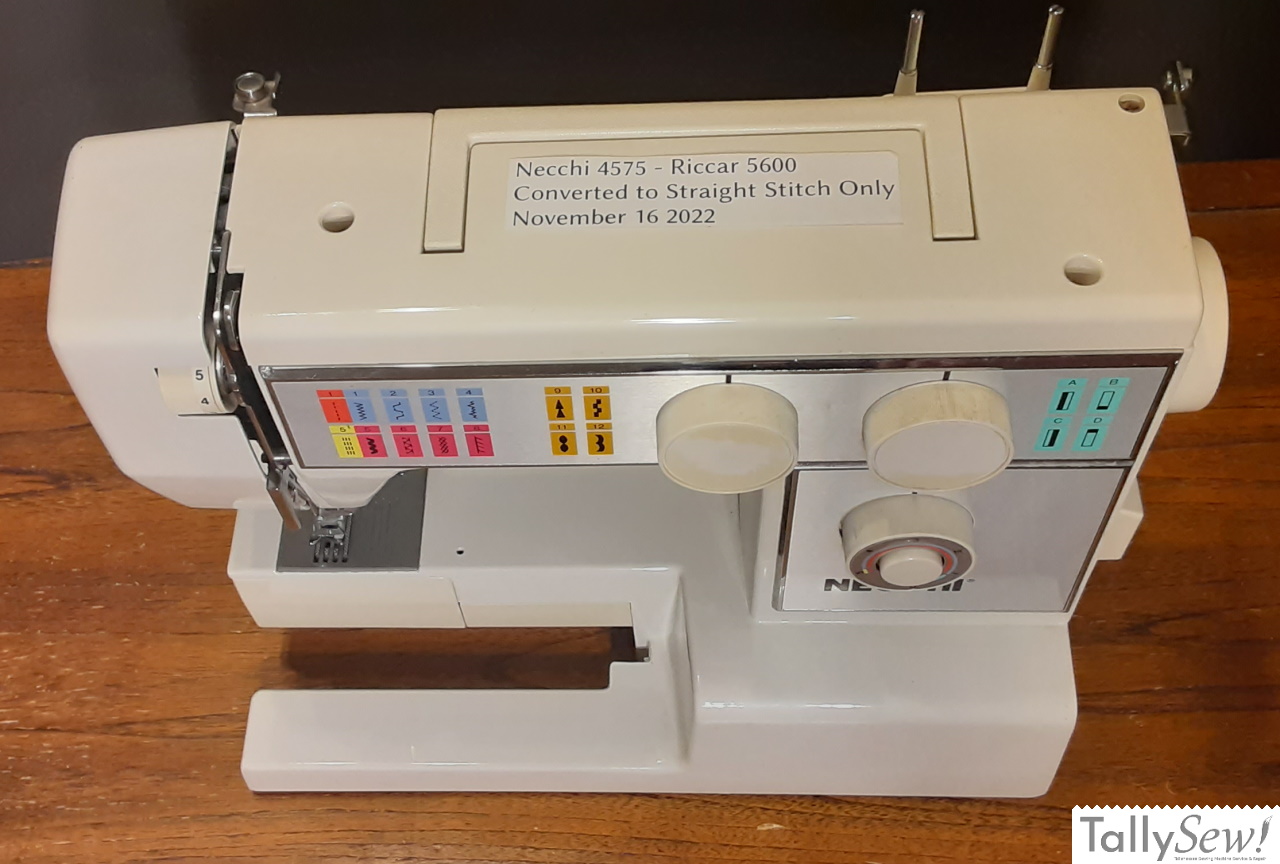
Necchi 4575
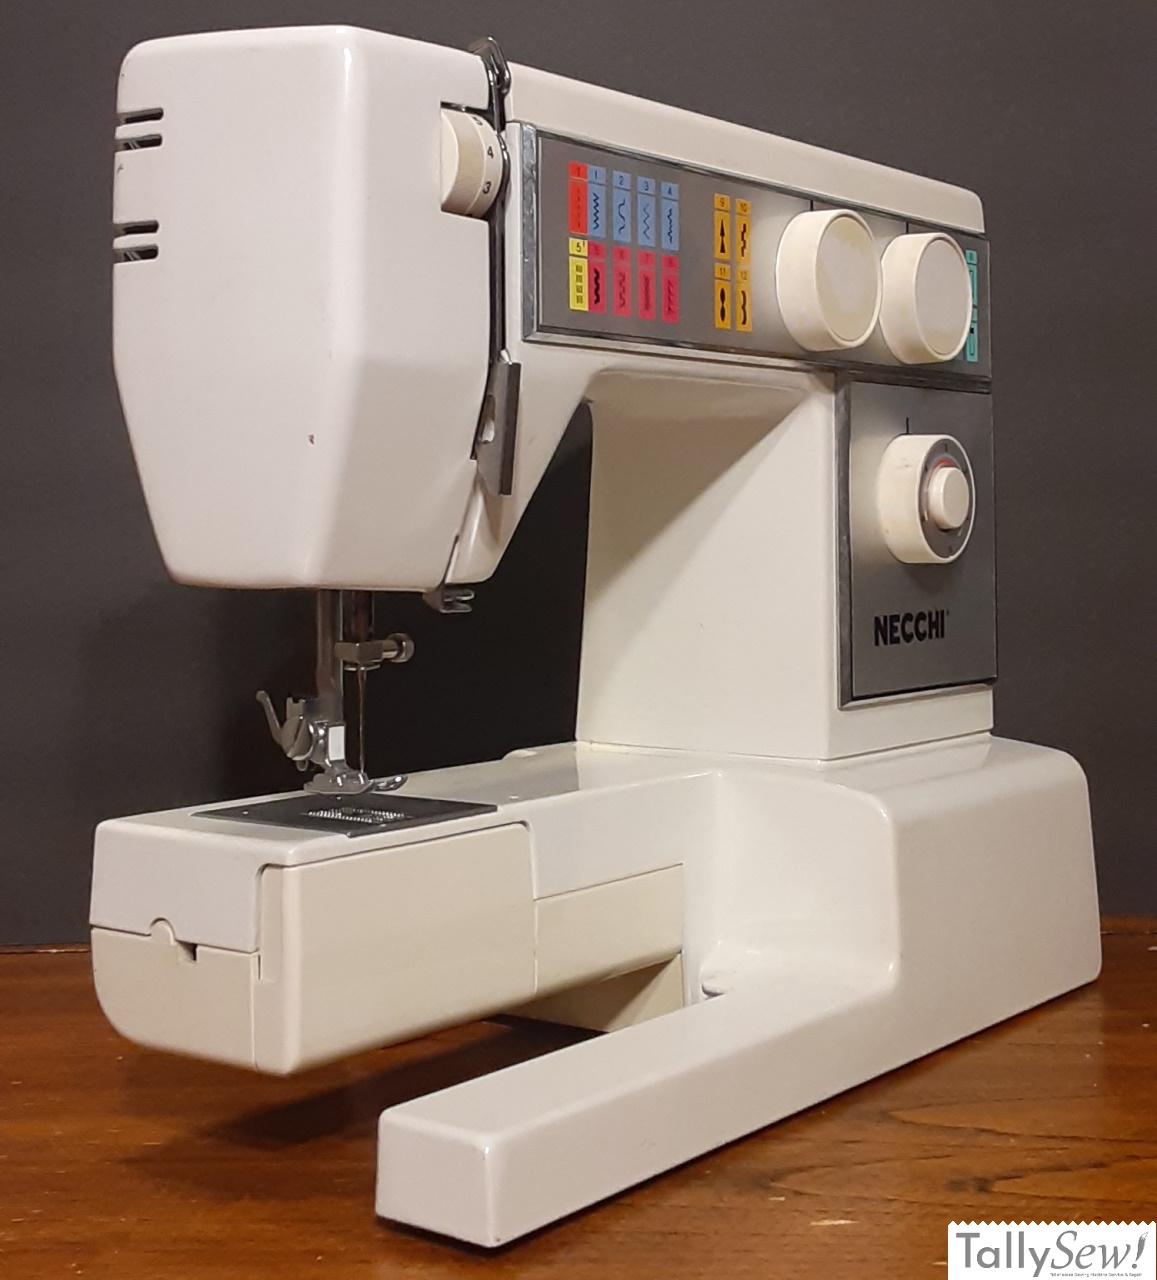

This Necchi was manufactured in Taiwan by the Riccar sewing machine company in the mid to late 80’s. Riccar also made a very similar machine called the “Riccar 5600”. Unfortunately I can’t be any more accurate about the production information than that (at least for now).
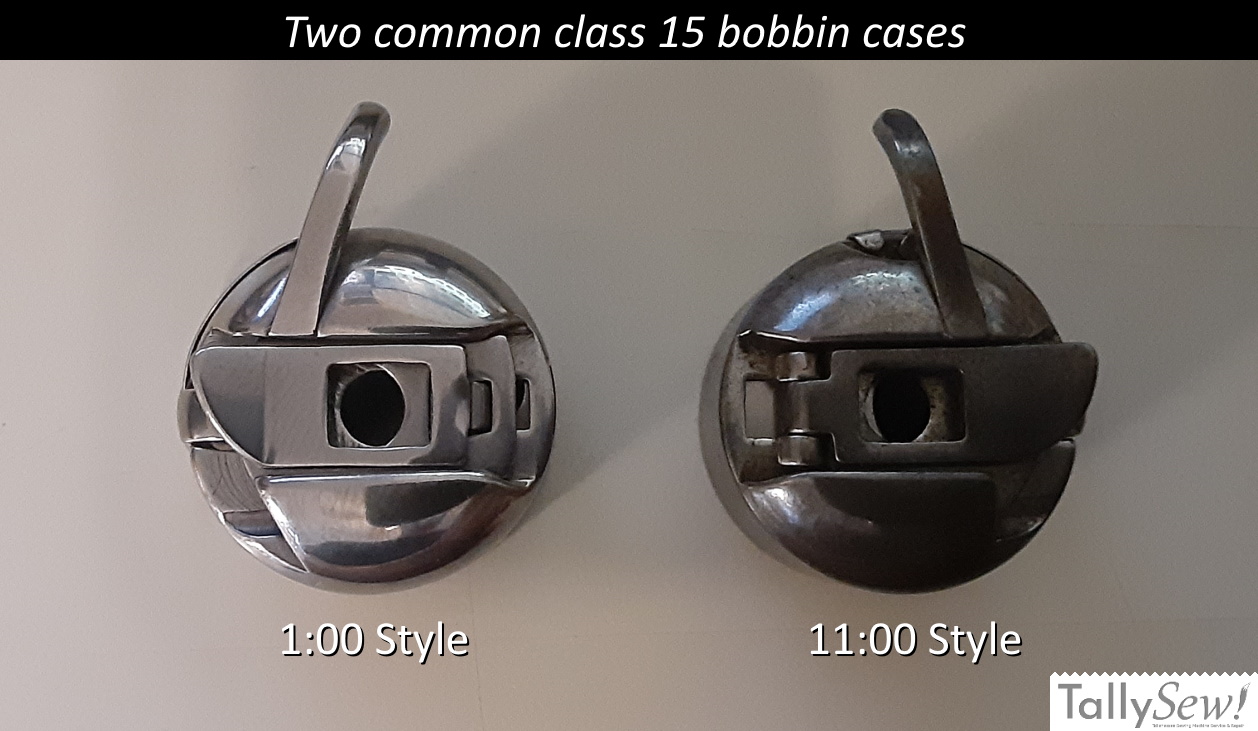
The 4575 uses a class 15 bobbin in the common “1 o’clock” style bobbin case.
This is a portable and convertible machine, meaning that it has a freearm bed with a bed extension, and that it’s fairly light and has a foldaway handle on top. The example that I purchased is missing the bed extension, and this is a pretty common issue with used convertible sewing machines.
The power/control pedal is common to many, many, other sewing machines spanning more than 15 different brands. If you have a few machines and you find a Necchi 4575 without a foot control for a reasonable price, check to see if you already have a power cord & foot control before you pass it by.
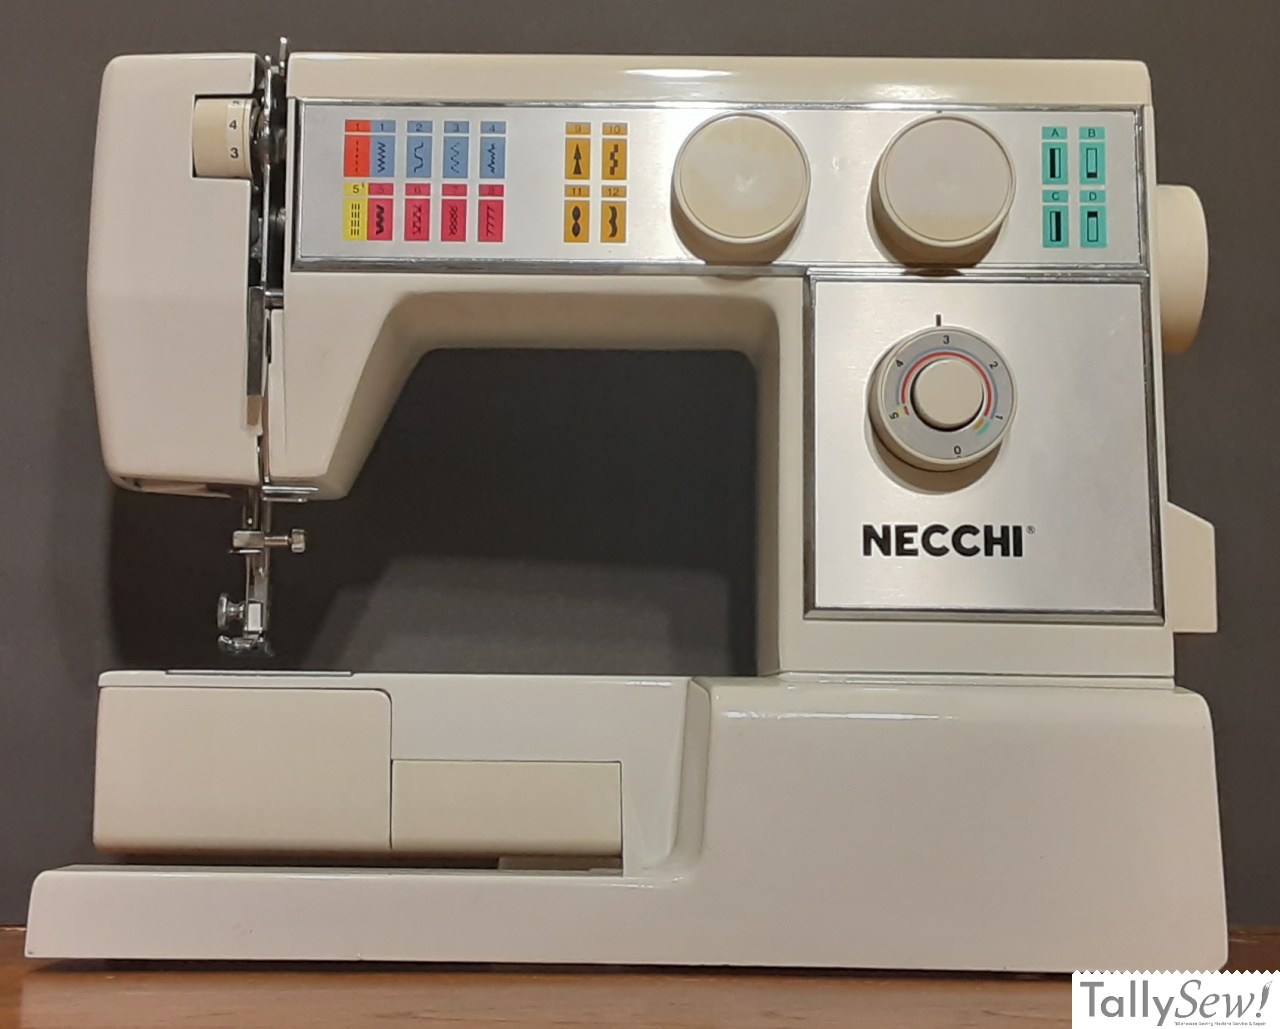
The machine has 12 stitch patterns and a buttonhole built in, and is well labeled and easy to read and understand.
The reverse button is located in the middle of the stitch length knob. This was a pretty common style in the mid 1980’s. The push button reverse is easy to understand, and makes the control less likely to get damaged when handling the machine, but I’m not a big fan. On light machines it’s easy to push the machine away from you when you push the button, so I find myself grabbing the right end of the machine with my fingers and pressing the button with my thumb so I can hold the machine in place.
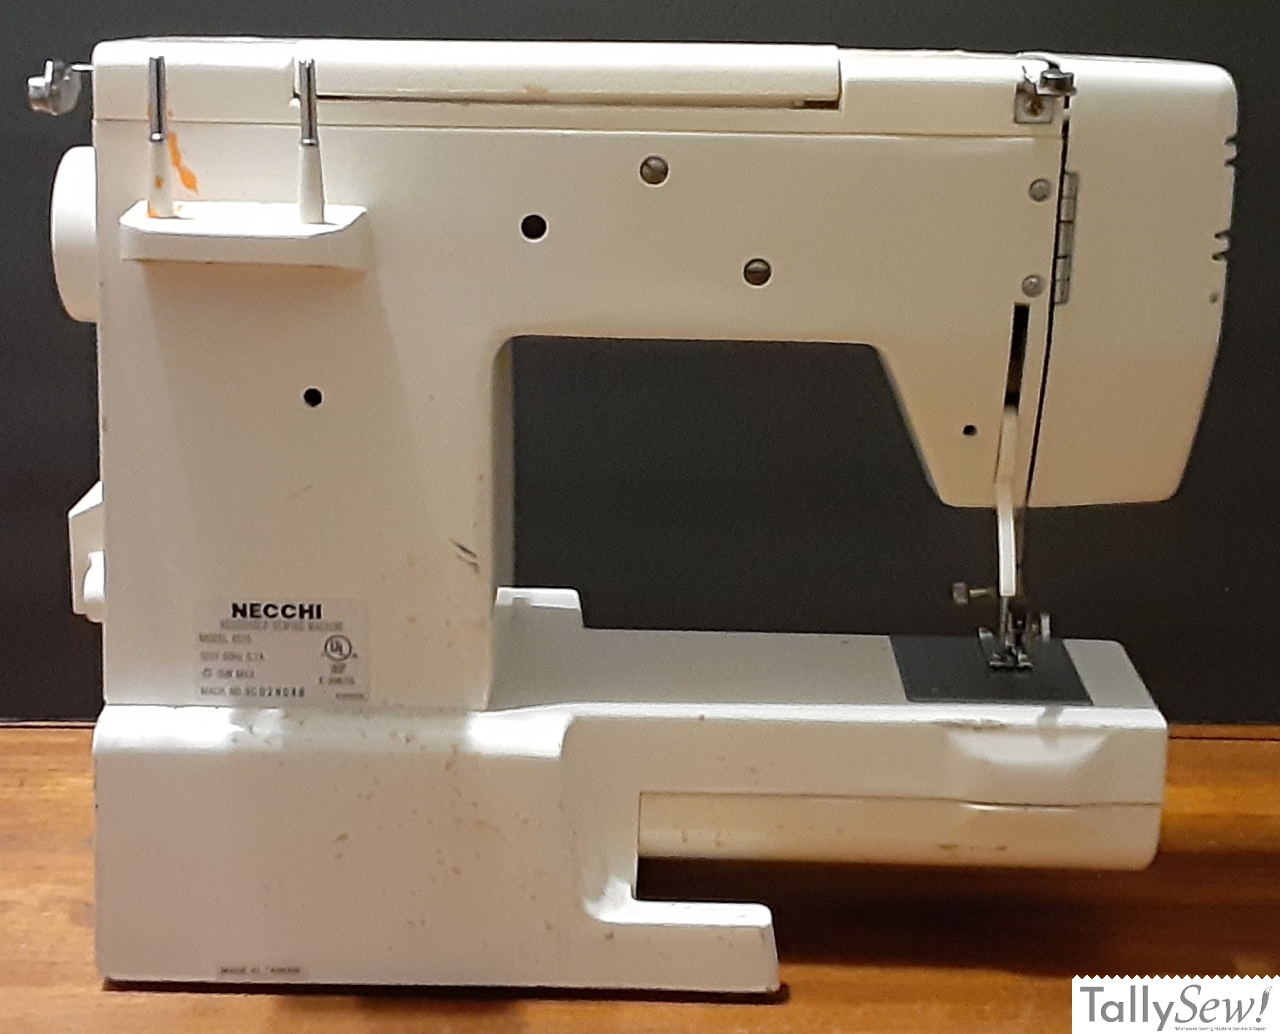
As you can see in the photos the machine looks like it may have been in a hobby room or workshop of some sort. It has orange and tan paint splatter all over it, and it’s filthy.
To it’s credit the machine wasn’t frozen when I got it, and aside from the grunge on it, it looked like it was in decent condition. I plugged it in and found that the bulb was dead, but the motor ran and all of the parts that where supposed to move, moved. I only ran it for few seconds since I knew that it really needed to be looked over before I tried to sew with it.
Plastic Parts…
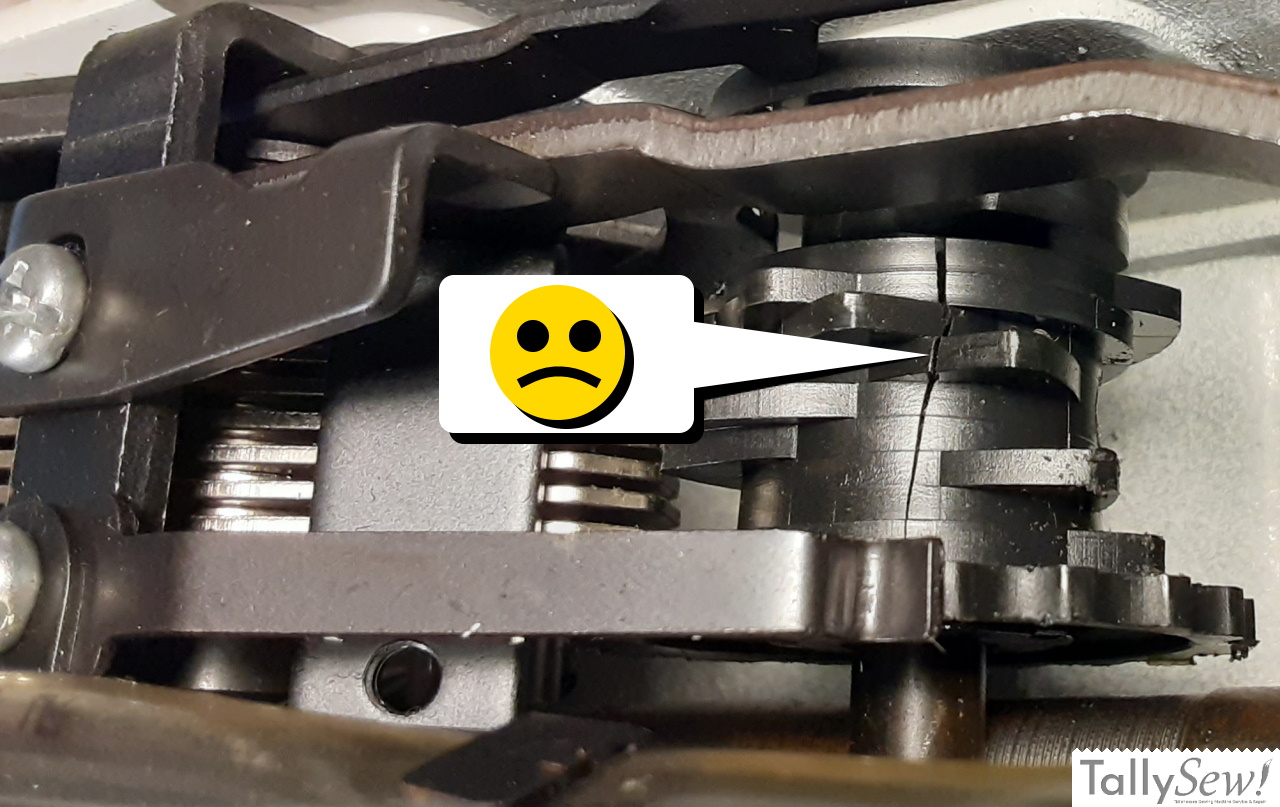
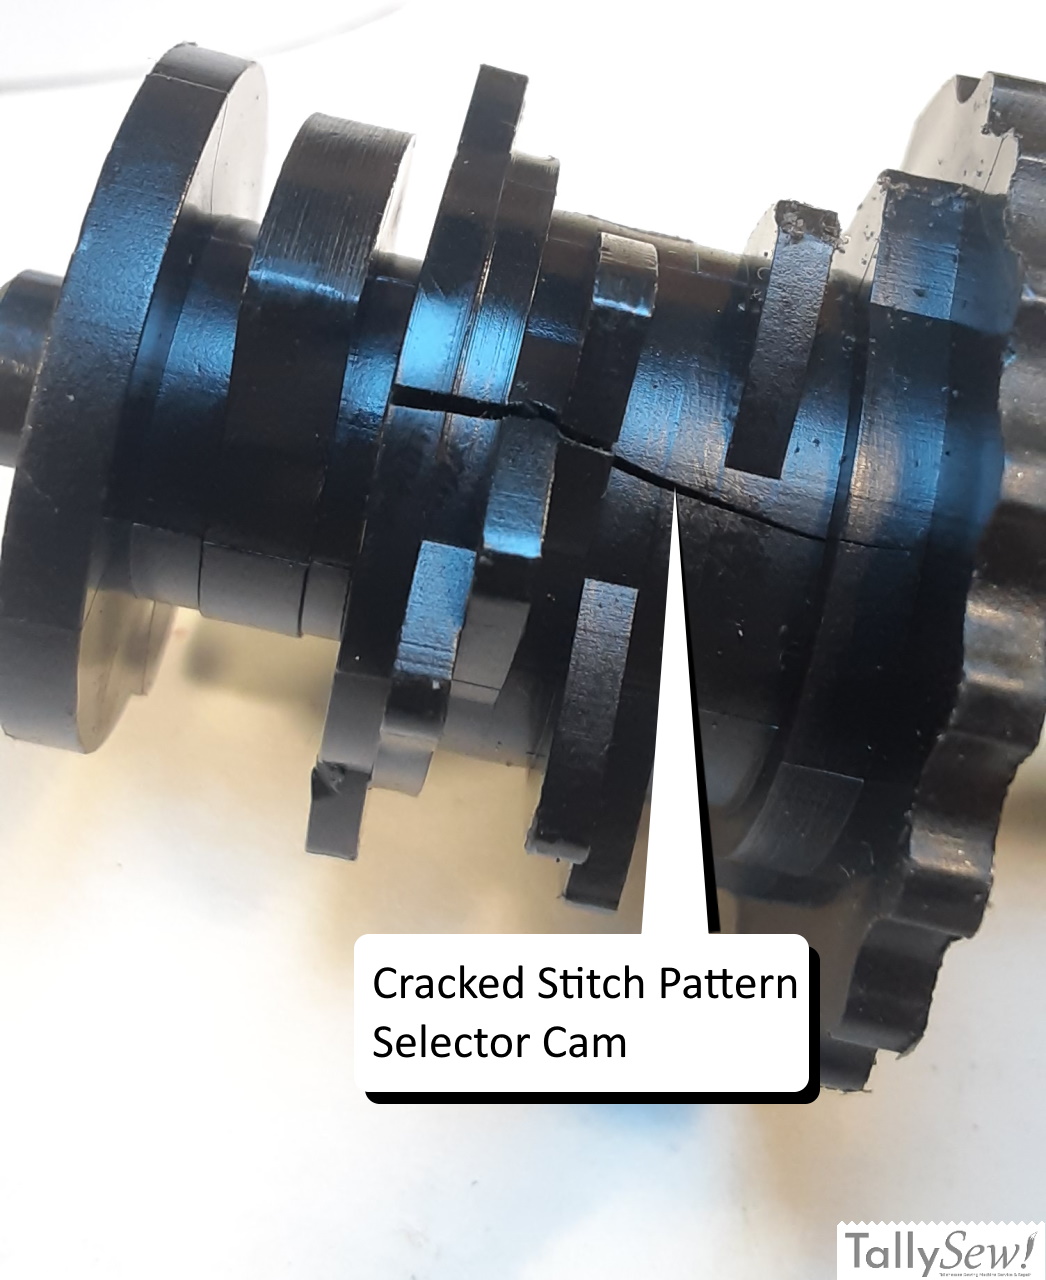
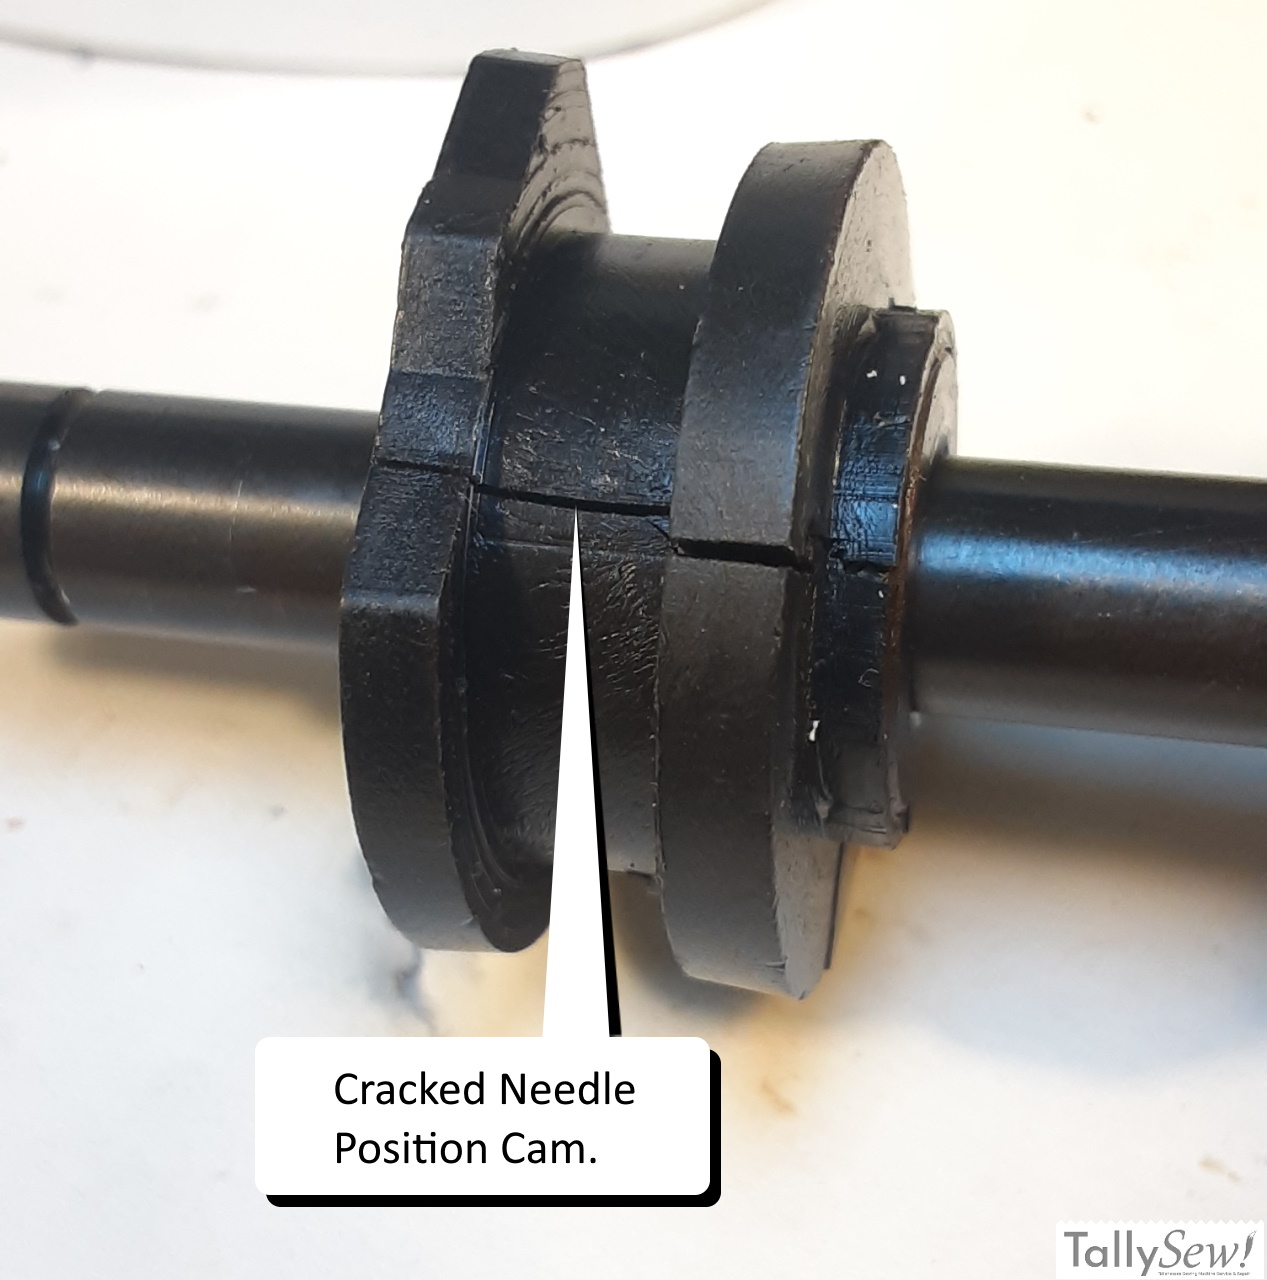

I opened the top cover of the machine and at first glance it was pretty clean, and looked ok. On further inspection I found several plastic components that had split lengthwise. The worst damage was found on the stitch selector (shown above) cam. Not to be confused with the cam stack which will be discussed later. The needle position selector cam was also cracked in several places. Both the stitch selector and needle position selector cams are located on the same rod, with the needle position selector cam closer to the front of the machine.
New selector cams for this machine aren’t available, and if they where, they are either new old stock (never used original parts), or used parts. Either way they wouldn’t last long if at all since plastic shrinkage seems to be the main issue causing these fractures.
I decided to take the selector cams and cam stack out the machine to have a look at them, and then I planned to reinstall them just for practice.
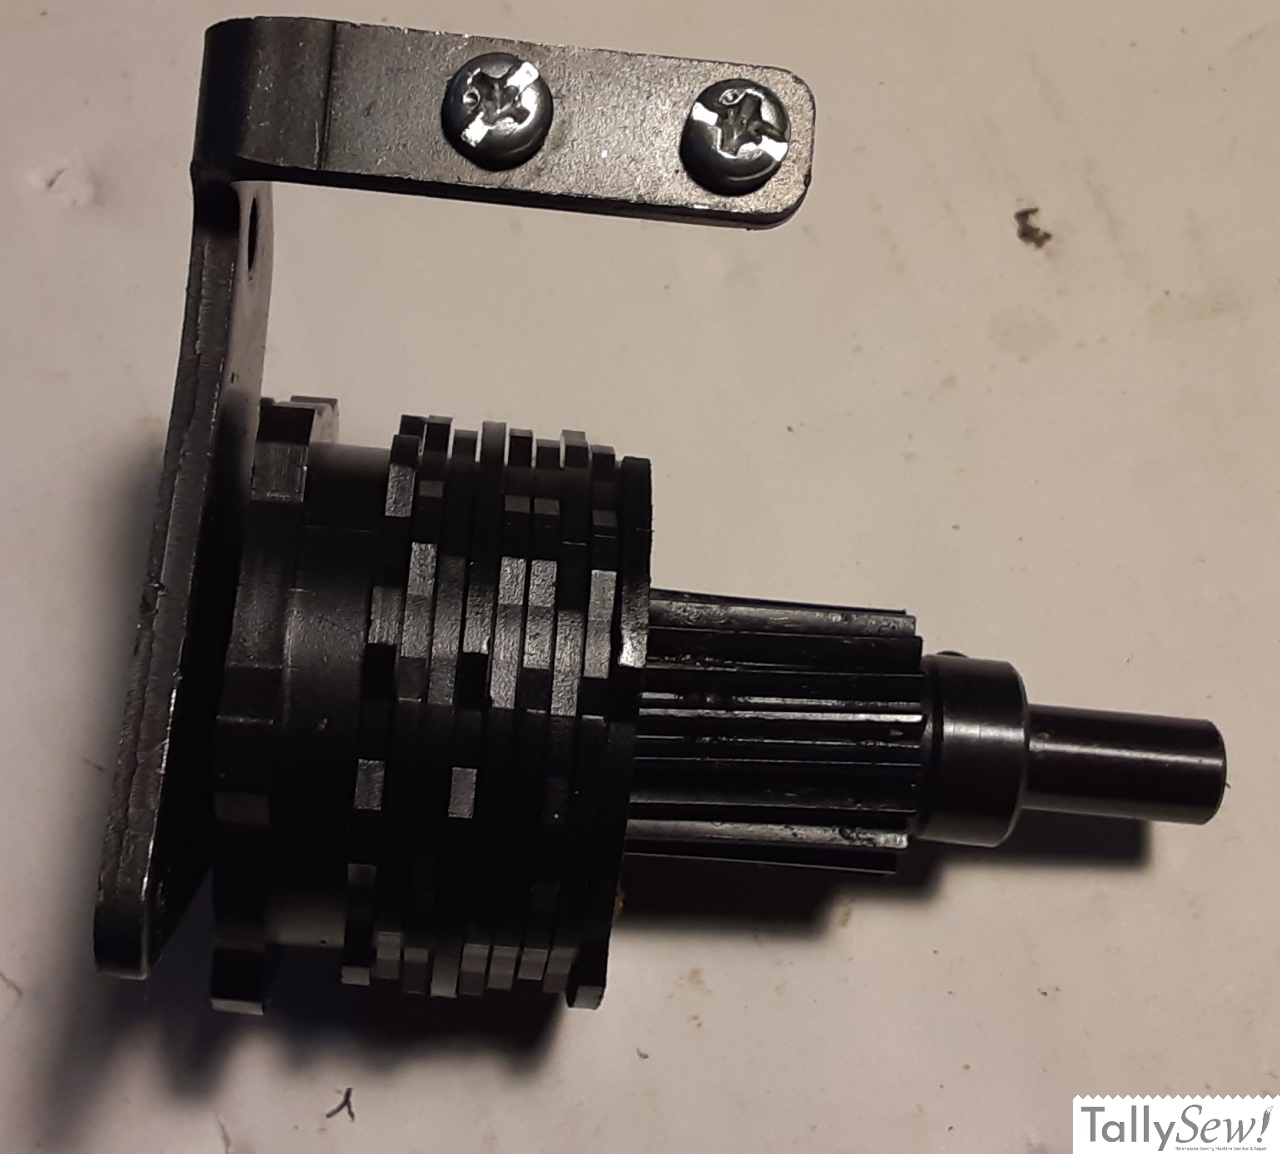
The cam stack surprised me and was in good shape. It rotates freely on a mandrill unlike the selector cams that are molded onto a metal sleeve. It’s possible that since the cam stack is not tightly bonded to the mandrill it’s been able to shrink without splitting, but that’s just a guess on my part.
While disassembling the Zig-Zag parts I realized I could simply remove them and turn the machine into straight stitch only without too much effort. Since putting it back together would mean that I was going to have to take it apart again I decided to only do the conversion instead.
What’s required to convert a multi stitch machine into a straight stitch machine, and why would you want to?
Technically any machine that is Zig-Zag capable could be made straight stitch only by simply setting the stitch width selector to zero and leavening it alone. So the “why” is probably the best place to start. If you have a sewing machine capable of multiple stitch patterns by way of an internal cam stack, and that cam stack, or some other part used to set or modify the pattern selection is damaged you have a few options available.
- Use, sell, or donate it as a parts machine
- Find new or used parts and repair it (or have it repaired)
- Use it as a decoration (some of these are great looking machines)
- Lock it into straight stitch and use it until it jams as the plastic parts come apart.
- Convert it to a straight stitch only machine.
Obviously I’ve decided to convert this machine to straight stitch only.
I converted the machine from multi-stitch to straight stitch only by removing all of the stitch pattern and zigzag components from the upper section of the machine. This included removing the stitch width, and stitch pattern components. This included the removal of the internal cam stack that’s used by the machine to create different pattern stitches.
All metal Drivetrain
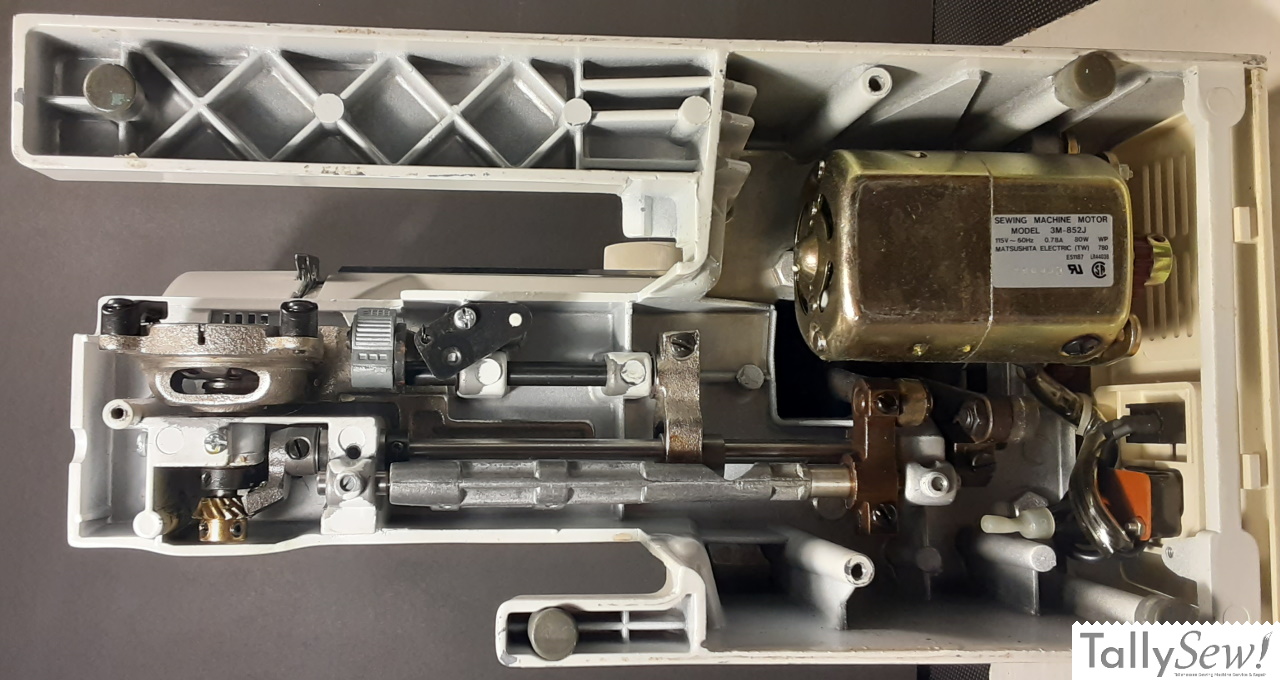
The good news is that the actual drivetrain of the Necchi 4575 is all metal. When this machine was made, most sewing machine companies had moved to plastic gears, or at least a hybrid of plastic and metal gears to cut down on the noise the machine made and also the cost of manufacture.
Specifications
| Brand | Necchi |
| Model | 4575 |
| Manufactured by | Riccar |
| Made in | Taiwan |
| Hook Type | Oscillating |
| Bobbin | Class 15 |
| Bobbin Case | Class 15, “1 o’clock” position finger |
| Needle System | 15×1 |
| Foot Type | Low Shank |
| Construction | Metal |
| Construction Drivetrain | Mixed |